by
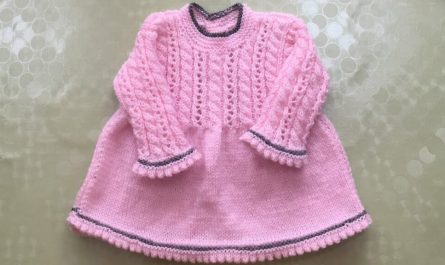
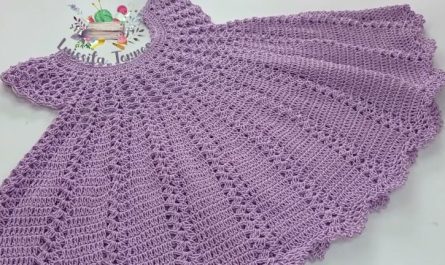
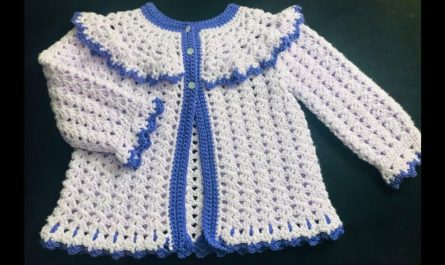
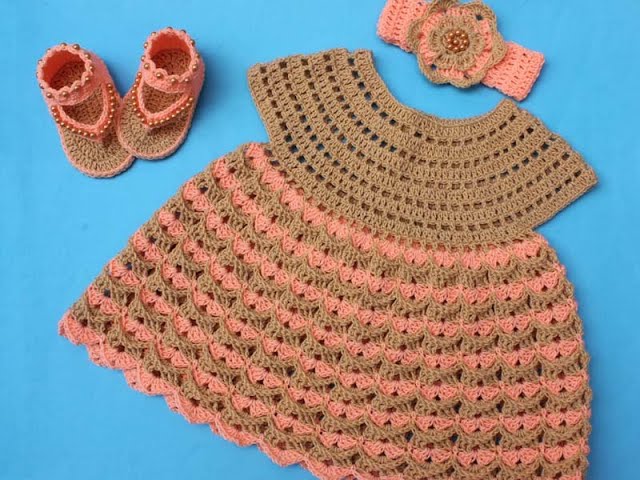
by A crochet baby frock is one of the sweetest garments you can make for a baby girl. Stylish yet soft, comfortable yet elegant—crocheted frocks make wonderful gifts, keepsakes, and statement pieces for any special occasion like birthdays, naming ceremonies, family gatherings, or casual wear.
This guide will walk you through how to make a beautiful and stylish crochet baby frock, ideal for babies aged 0–6 months. The pattern can be easily adjusted for larger sizes too.
Materials You’ll Need
Before you begin, gather the following supplies:
| Item | Description |
|---|---|
| Yarn | Soft baby yarn (DK weight / Category 3) – cotton or acrylic blend |
| Hook Size | 4.0 mm (G/6) |
| Yarn Needle | For weaving in ends |
| Buttons/Ribbon | For back closure or waist belt |
| Stitch Markers | Optional, for tracking increases |
| Scissors | Basic cutting tool |
| Measuring Tape | For checking size and fit |
Tip: Choose soft pastel colors (like baby pink, lilac, mint green, or white) for a classic frock look. Or go bold with modern colors like mustard, coral, or teal!
Size Guide: 0–6 Months
| Measurement | Approx. |
|---|---|
| Chest | 16–17 inches (41–43 cm) |
| Frock Length | 12–14 inches (30–35 cm) |
| Armhole | 3.5–4 inches (9–10 cm) |
| Neck Opening | 4–5 inches (10–12 cm) |
Stitches Used
The pattern uses beginner-to-easy crochet stitches:
-
ch – chain
-
sl st – slip stitch
-
sc – single crochet
-
hdc – half double crochet
-
dc – double crochet
-
Shell stitch – (5 dc in one stitch)
Optional decorative stitches:
-
V-stitch – (dc, ch 1, dc in same stitch)
-
Picot – (sc, ch 3, sl st into first ch)
Construction Overview
This frock is worked top-down:
-
Yoke (top part) – crocheted in rows or rounds
-
Separate sleeves from body
-
Skirt (worked in shell stitch or lace) – gives a flared frock effect
-
Edging, sleeves, neckline finishing
-
Back closure and embellishments
How to Make a Crochet Baby Frock – Step-by-Step Tutorial
Step 1: Make the Yoke
Foundation Chain:
-
Ch 54 (for 0–6 months)
-
Join with sl st to form a ring
-
Ch 2 (counts as first dc)
Round 1:
-
Dc in each stitch around (54 dc)
-
Sl st to join
Round 2–6 (Raglan Increases):
-
Place stitch markers at 4 points for increases (e.g. after 8, 13, 21, and 30 dc)
-
Work dc in each stitch, 2 dc in the marked stitch
-
By Round 6, you should have about 76–80 stitches
Adjust yoke width by adding or reducing rounds or stitches per increase.
Video Tutorial Part1:
Step 2: Separate Sleeves from Body
Round 7:
-
Dc across front panel
-
Skip sleeve stitches, ch 6–8 (creates armhole)
-
Dc across back
-
Skip second sleeve, ch 6–8
-
Dc to end
-
Join with sl st
You now have the neckline and armholes done and are ready to begin the skirt!
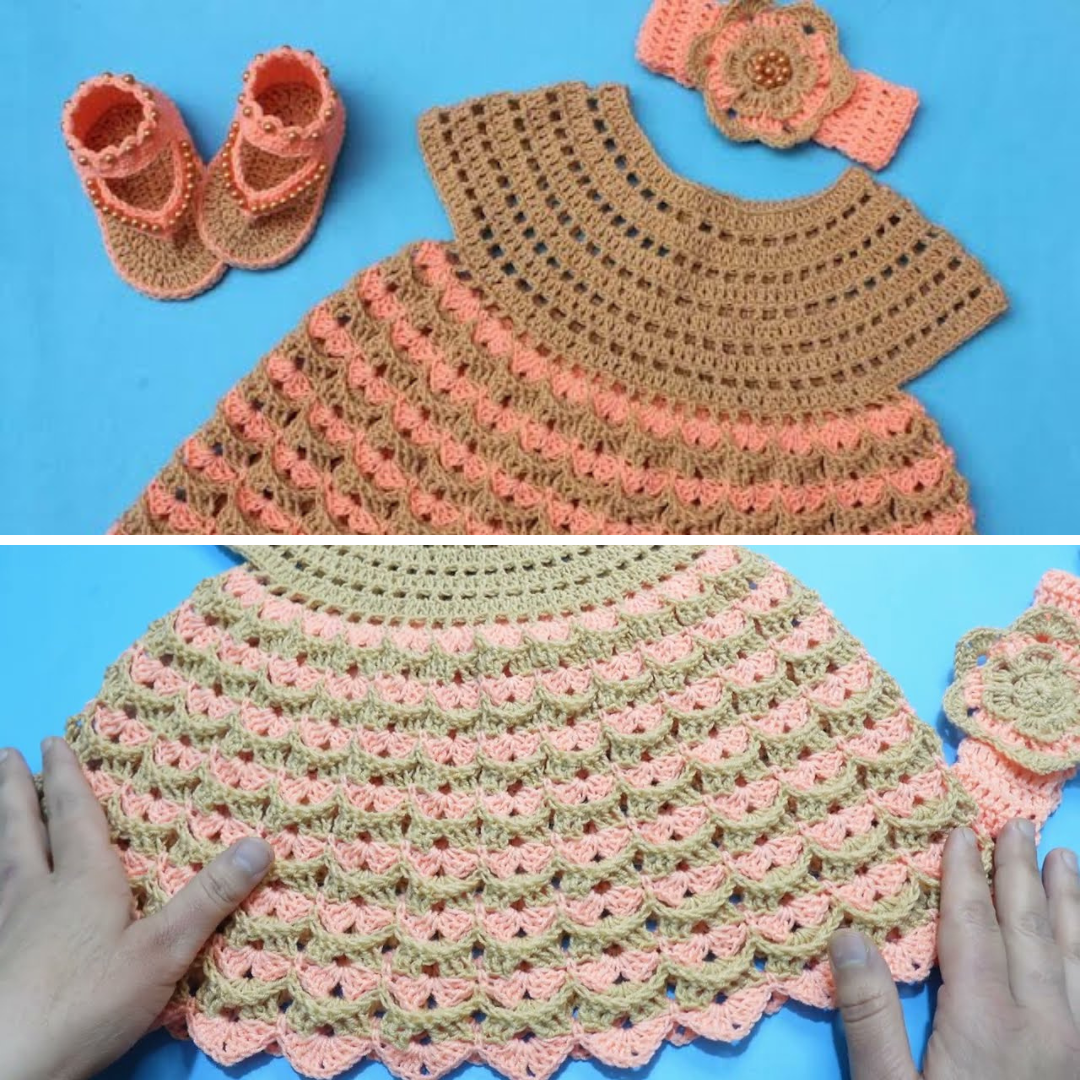
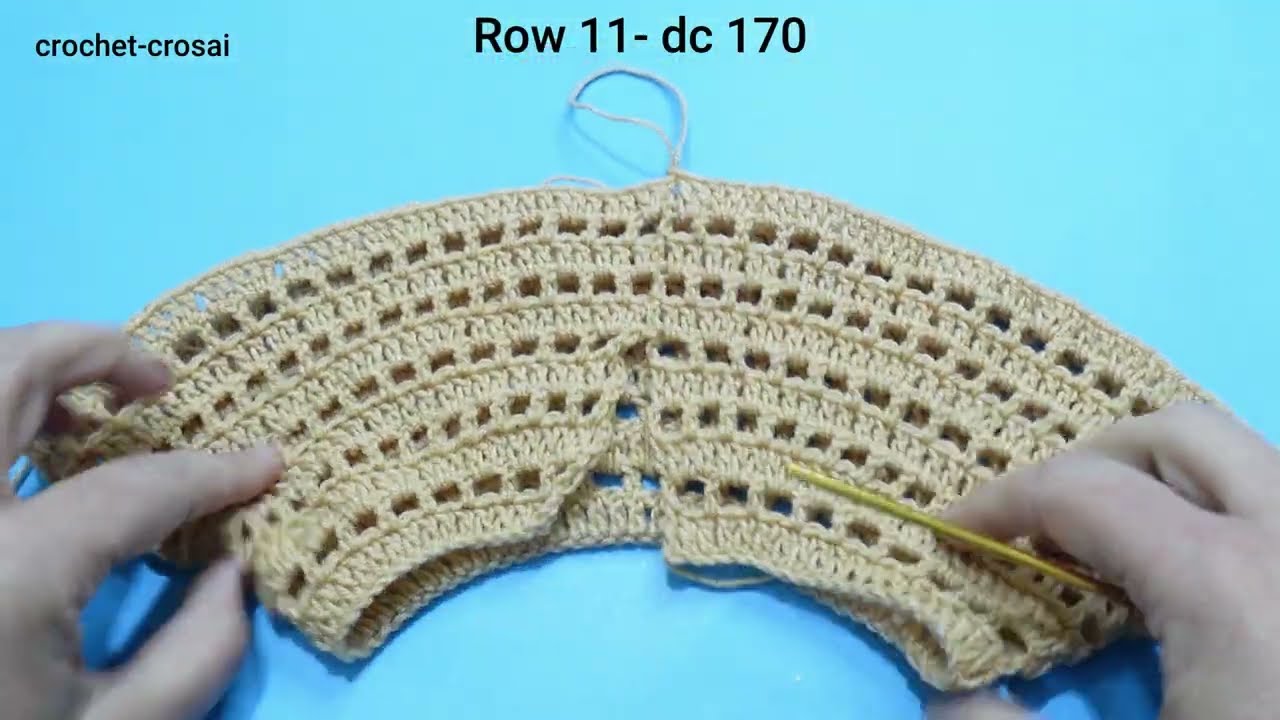
Step 3: Start the Skirt (Shell Stitch Design)
Round 8 (Shell Setup):
-
Ch 3 (counts as dc), skip 2 stitches, 5 dc in next st (shell), skip 2, sc in next
-
Continue pattern: (Shell, skip 2, sc) around
-
Sl st to join
Rounds 9–20:
-
Continue the shell pattern:
-
Sl st into middle of next shell
-
Ch 3, 4 dc (completes shell)
-
Sc into next sc
-
Repeat
-
Work more or fewer rounds depending on the desired length.
Step 4: Sleeves (Optional)
You can leave the frock sleeveless or add small cap sleeves:
Cap Sleeve (Repeat for both arms):
-
Join yarn at underarm
-
Work 2–3 rounds of dc or hdc around the armhole
-
Optional: Add a picot or shell edging
Step 5: Neckline & Edging
-
Work 1 round of sc around the neckline for neat finishing
-
Add picot or shell border for decorative touch
Skirt Hem:
-
Add 1–2 rows of shell or picot stitches for a ruffled hem
Step 6: Back Opening & Buttons
For easier dressing, leave a small back opening at the neckline.
-
Work sc around the opening
-
Add button loops (ch 6, sl st) and sew buttons
-
You can also use a ribbon tie as closure
Embellishment Ideas
| Decoration | How to Add |
|---|---|
| Ribbon Belt | Weave through a row near the waist and tie a bow |
| Crochet Flowers | Stitch a flower onto the yoke or skirt |
| Pearl Buttons | Use for closure or decorative accents |
| Color Blocking | Use two-tone yarns (e.g., white top, pink skirt) |
| Matching Headband | Crochet a small band with a flower to complete the set |
Beginner Tips
-
Choose soft, washable yarn suitable for baby skin
-
Always check your gauge before starting
-
Use stitch markers to track shell sections and armholes
-
Keep your tension even but not tight to avoid stiffness
-
Block your frock lightly to shape and soften the fabric
Styling Ideas
| Style | Description |
|---|---|
| Classic White | Elegant for christenings or formal events |
| Pastel Rainbow | Use variegated yarn for a colorful touch |
| Princess Pink | Soft pink with a flower and ribbon bow |
| Summer Yellow | Light and breathable with cap sleeves |
| Layered Lace | Add a second layer to the skirt for volume |
Final Thoughts
Creating a beautiful crochet baby frock is not just about crafting clothing—it’s about pouring love into every stitch. Whether you’re making it for your daughter, a niece, a granddaughter, or a gift, this project is sure to become a treasured piece.
With just some soft yarn, a hook, and a few hours, you can create a new & stylish baby frock that will have everyone asking where you bought it!
Video Tutorial Part2: