by
by Crochet baby bonnets are classic, adorable, and surprisingly simple to make. But what if you need one fast—for a baby shower, newborn photo shoot, or just because you’re short on time?
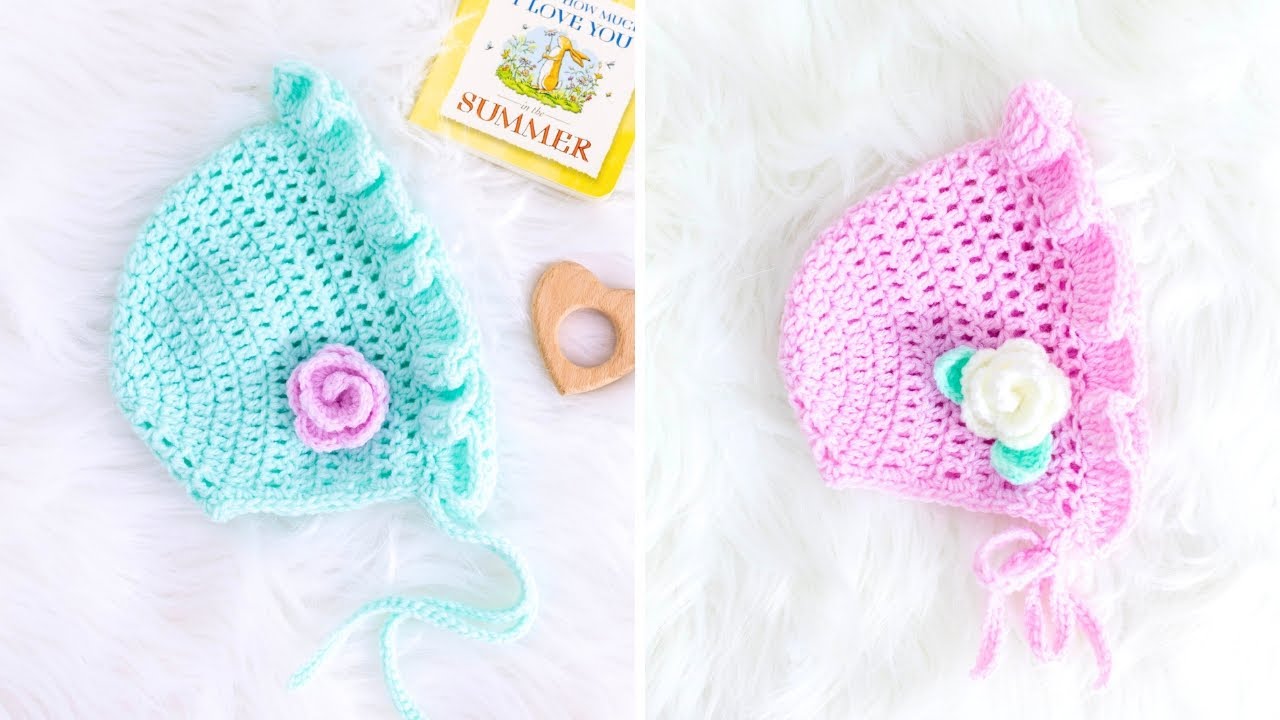
This tutorial will walk you through how to make a Quick and Easy Crochet Baby Bonnet that looks beautiful and only takes about 1 to 2 hours to complete. Minimal sewing, no shaping, and easy-to-follow stitches make this the perfect project for beginners or seasoned crocheters looking for a quick win.
What Makes This Bonnet Quick & Easy?
✅ Made with basic stitches only
✅ Worked flat in a rectangle
✅ No shaping or increasing
✅ Takes just 1–2 hours
✅ Easy to size up or down
✅ Minimal seaming
Materials You’ll Need
| Item | Details |
|---|---|
| Yarn | Worsted weight (4) yarn or DK (3), soft and baby-safe |
| Hook size | 4.0 mm (G) or appropriate for yarn |
| Yarn needle | For seaming and weaving ends |
| Scissors | To cut yarn |
| Stitch marker (optional) | To mark the first stitch of each row |
| Ribbon or yarn (optional) | For chin ties or embellishment |
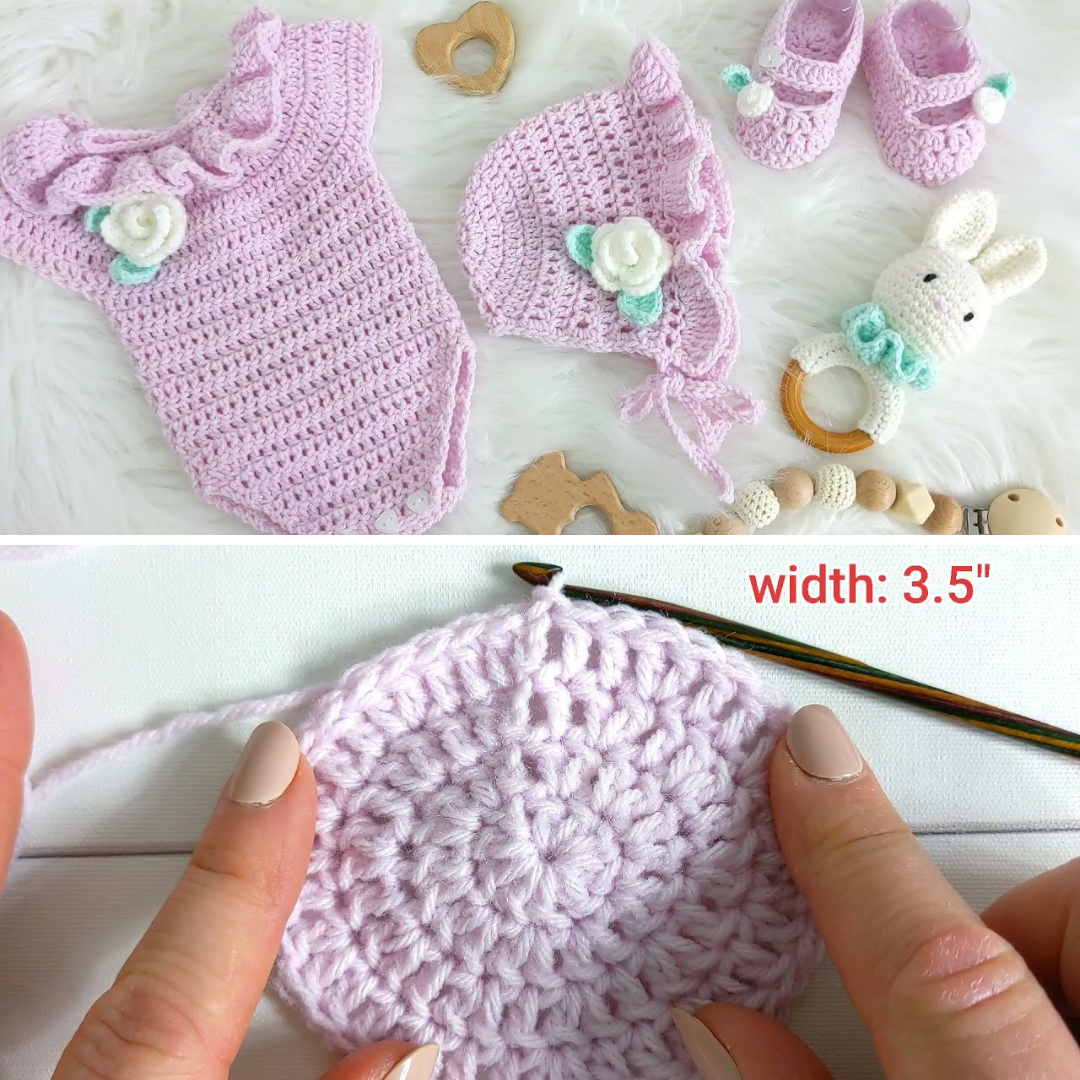
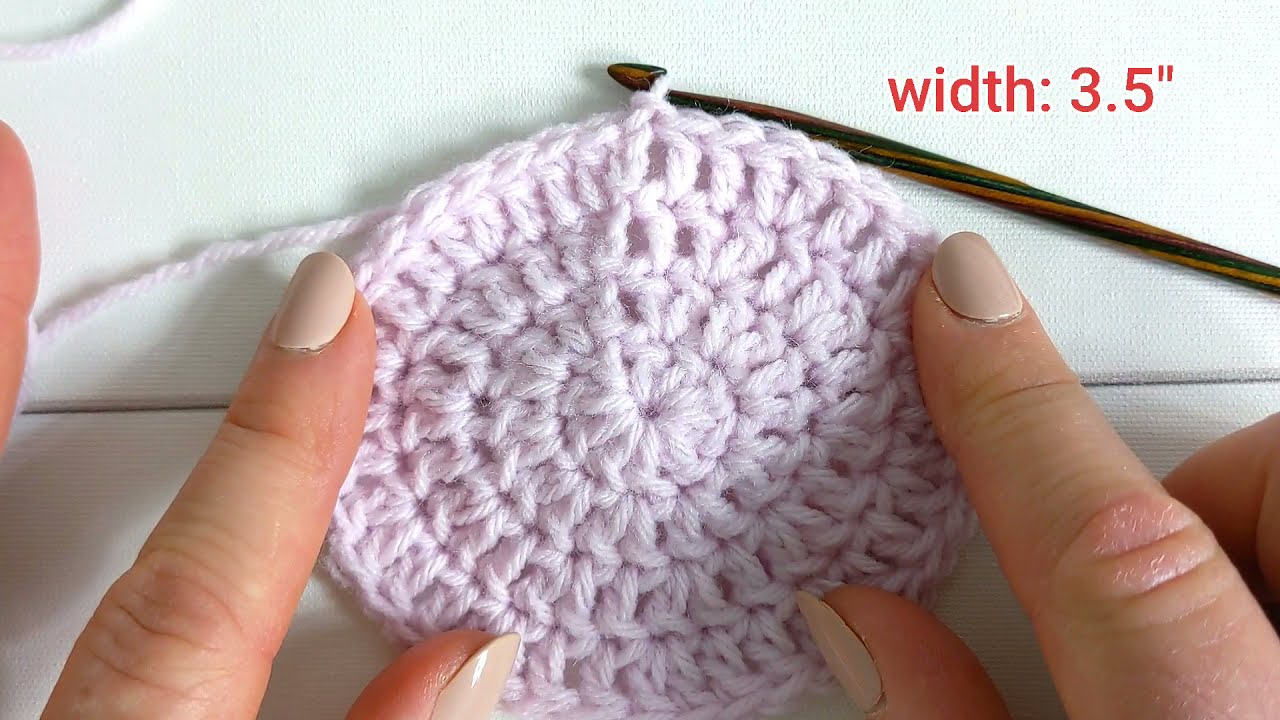
Finished Size (0–6 Months)
-
Width: 5″ (12.5 cm)
-
Height: 5.5″ (14 cm)
-
Fits head circumference: ~13–15″ (33–38 cm)
To size up, add more starting chains (for width) and more rows (for height).
Stitches & Abbreviations
-
ch – chain
-
sc – single crochet
-
hdc – half double crochet
-
sl st – slip stitch
-
BLO – back loop only
Pattern Construction Overview
-
Create a flat ribbed rectangle (back loop only for stretch).
-
Fold in half and seam the back.
-
Add a simple face edging.
-
Attach chin ties (optional but adorable).
Step-by-Step Pattern
Step 1: Make the Rectangle
With your yarn and 4.0 mm hook:
Row 1:
-
Ch 31 (adjust for width).
-
Hdc in 2nd ch from hook and across. (30 hdc)
Row 2–20:
-
Ch 1, turn.
-
Hdc in back loops only (BLO) across. (30 hdc)
✅ Tip: The BLO stitch gives the bonnet natural stretch and a ribbed, classic look.
-
Adjust rows depending on the height needed (add more rows for larger sizes).
Step 2: Fold and Seam the Back
-
Fold the rectangle in half width-wise.
-
Using your yarn needle or crochet hook, seam the short end using:
-
Whip stitch (needle), or
-
Slip stitch (hook)
-
This closes the back of the bonnet, leaving the front and bottom edges open.
Step 3: Add Edging Around the Face
Optional but adds a polished look:
-
Join yarn to one corner of the open face edge.
-
Work 1 round of single crochet (sc) evenly around.
-
Sl st to join, fasten off, and weave in ends.
✨ Optional Fancy Edge: For a scallop border, use this repeat:
(sc, skip 1 st, 3 dc in next st, skip 1 st)around the edge.
Step 4: Add Chin Ties (Optional)
Option 1: Crochet Chains
-
Attach yarn to one bottom corner.
-
Ch 40–50, sl st back down the chain.
-
Repeat on the other side.
Option 2: Ribbon Ties
-
Cut two 10–12” pieces of ribbon.
-
Hand-stitch to the inside corners of the bonnet base.
Optional Embellishments
-
Add a crochet flower, bow, or button to one side.
-
Use a contrasting color for edging or chin ties.
-
Sew on tiny bear ears or bunny ears for added cuteness .
Care Instructions
-
Use machine-washable yarn suitable for babies.
-
Wash on gentle or cold cycle.
-
Lay flat to dry to retain shape.
Time-Saving Tips
-
Work with lighter-colored yarns—easier to see stitches.
-
Use a row counter or stitch marker if you tend to lose track.
-
Make multiple bonnets in one sitting—perfect for baby shower bundles!
Gift Idea: Make a Matching Set
Why stop at just the bonnet?
Pair it with:
-
Baby booties
-
Baby mittens
-
Baby blanket
Wrap in tissue and place in a gift box or basket for a beautiful handmade baby gift!
Final Thoughts
The Quick and Easy Crochet Baby Bonnet is proof that beautiful doesn’t have to mean complicated. With just a few stitches and simple construction, you can create a timeless and cozy baby accessory in under two hours.
It’s a perfect project whether you’re:
-
A beginner wanting success fast
-
A seasoned crocheter stocking your shop ️
-
A gift-giver with a baby shower in two days