by
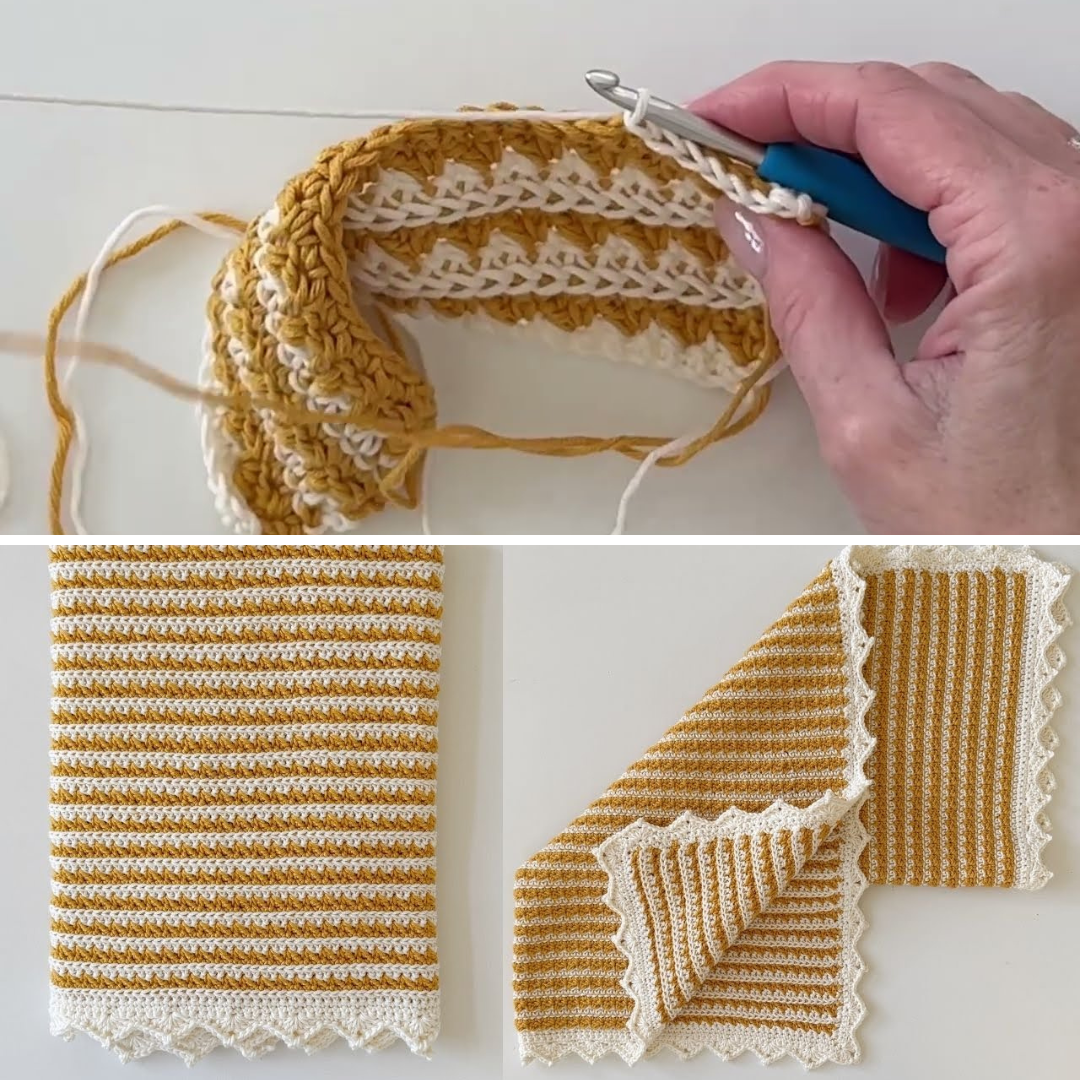
by The Cottage Lace Blanket (also referred to as the Cottage Lace Baby Blanket) is a vintage-inspired project designed by Tiffany from Daisy Farm Crafts. It features a stunning, intricate lace look created by alternating textured color rows with delicate “braided” slip stitch rows. This guide will walk you through making the car seat cover size (27″ x 27″) or customizing it to any size you desire.
1. Materials and Specifications
-
Yarn: Bernat Softy Cotton (a soft cotton blend).
-
Main Color (Gold): 2 full skeins.
-
Contrasting Color (Cream): 3 skeins (extra is used for the border) .
-
-
Hook: Size H (5.0 mm) .
-
Finished Size: 27″ x 27″ (for a baby blanket/car seat cover).
-
Pattern Repeat: Any even number. For the 27″ blanket, chain 110.
2. The Main Body: A Four-Row Repeat
The beauty of this blanket lies in its unique four-row sequence. You will carry the yarn up the side of the work rather than cutting it at every color change.
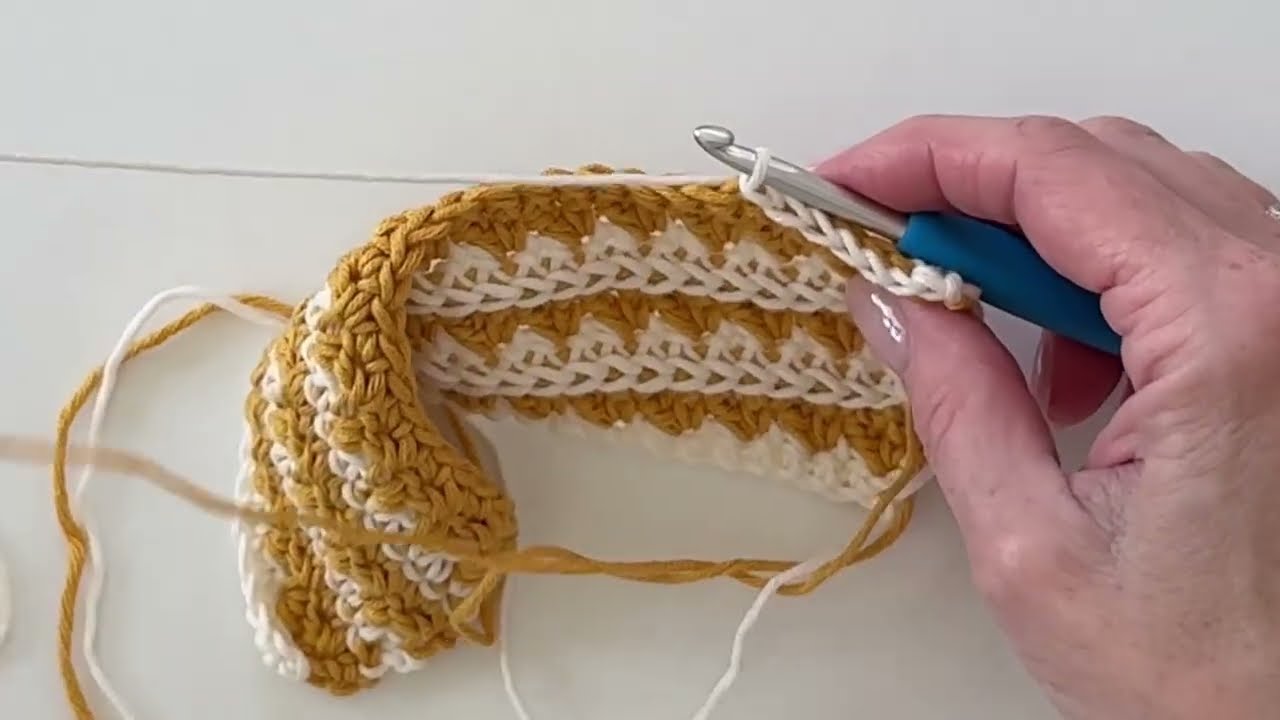
Row 1: The Base Row (Cream)
-
Chain an even number. In the second chain from the hook, work a single crochet (SC).
-
Work 1 SC in each chain across.
-
On the last stitch, pull through with the Gold yarn. Do not cut the cream .
Row 2: Textured Gold Row
-
In the first stitch, work (1 SC, 1 Double Crochet).
-
Skip the next stitch.
-
Repeat (1 SC, 1 DC) in the next stitch, skip one, across the row.
-
End by skipping the second-to-last stitch and placing 1 SC in the final stitch.
Row 3: Solid Gold Row
-
Chain 1 and turn. Work 1 SC into the top of every stitch across.
-
On the final stitch, drop the gold and pull the Cream yarn up the side of the work .
Row 4: The “Braided” Slip Stitch (Cream)
-
First stitch: 1 SC (this helps with the border edge) .
-
Middle stitches: Slip stitch into every stitch across. Keep your tension even—not too tight, not too loose—to create a beautiful braid across the work .
-
Final stitch: 1 SC. Chain 1 and turn.
Row 5: Single Crochet Recovery (Cream)
-
Work 1 SC into the tops of the gold SC row (Row 3), working behind/underneath the slip stitch braid.
-
On the final stitch, pull the Gold yarn back up the side.
3. Creating the Pointed Scallop Border
Finish your blanket with a cream row of SC before starting the border. Cut the gold yarn .
The Foundation (3 Rounds of SC)
-
Round 1: Work SC around the entire blanket. Place 3 SC in each corner .
-
Side placement: Work 2 SC per gold row and 1 SC per cream row .
-
-
Rounds 2 & 3: Work 1 SC in each stitch, with 3 SC in the center stitch of each corner .
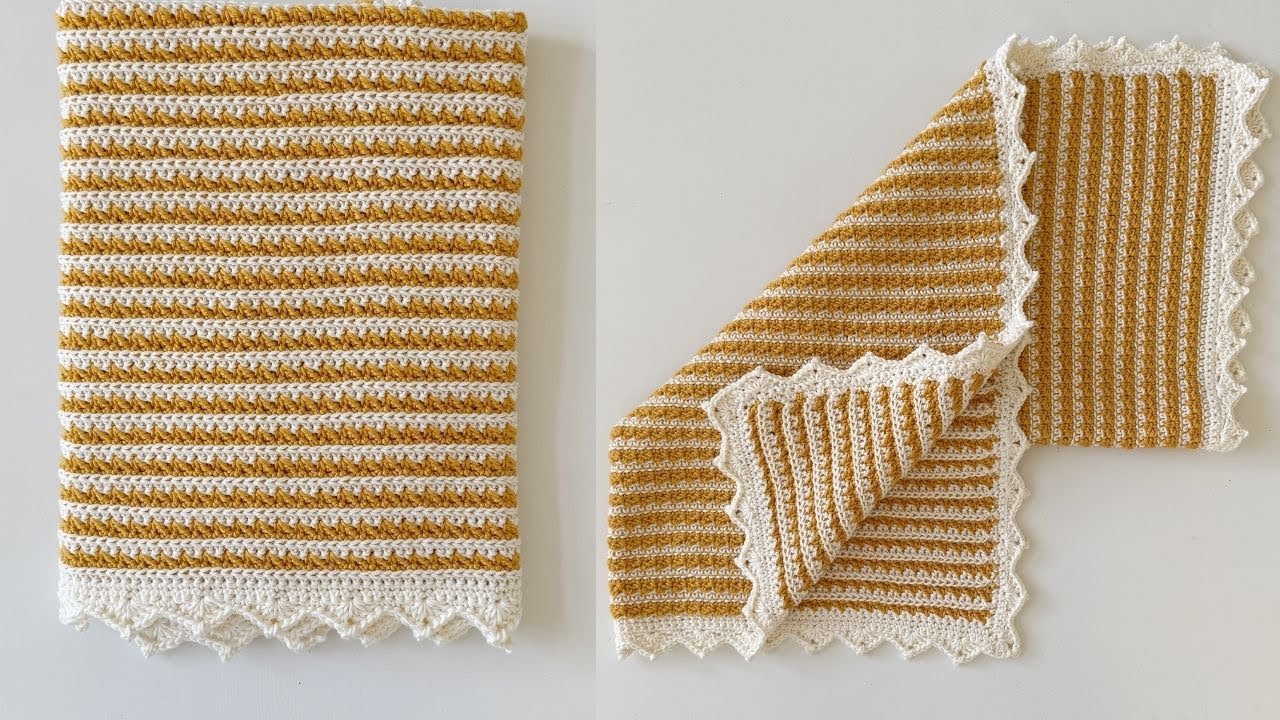
The Fan Round
-
Skip 2 stitches, then work a “fan” in the next: (3 DC, Chain 2, 3 DC) .
-
Skip 2 stitches, work 1 SC in each of the next 2 stitches.
-
Repeat this pattern (Fan, Skip 2, 2 SC, Skip 2) around the perimeter.
The Final “Picot” Round
-
Slip stitch into each DC of the fan.
-
When you reach the Chain 2 space at the peak: Slip stitch, Chain 2, Slip stitch into the first chain (this creates the tiny “Picot” point), then slip stitch into the space again
-
Continue slip stitching across the rest of the fan and the SCs below .
4. Finishing Touches
-
Weaving Ends: Since you carried the yarn up the side, the border will naturally hide those carries . Use a tapestry needle to weave in your starting and ending tails.
-
Blocking: Cotton blends benefit greatly from light blocking to open up the “lace” sections and even out the scalloped edges.
Video Tutorial: