by
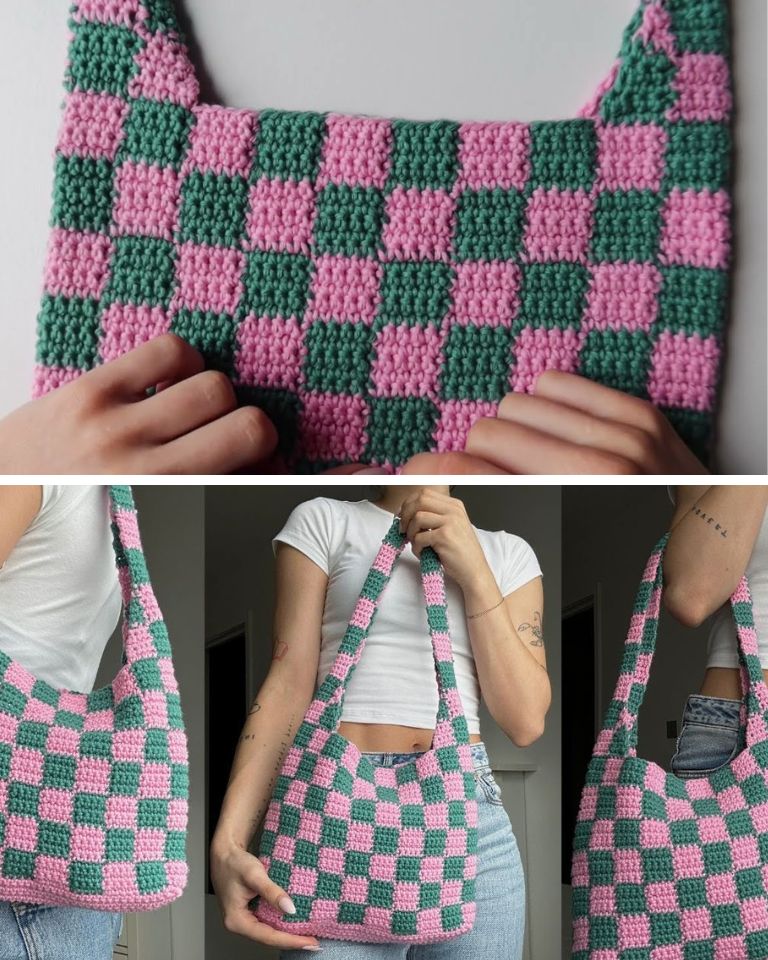
by Crochet bags have surged in popularity in recent years, and among the most stylish designs is the checkered tote bag. Combining timeless charm with contemporary aesthetics, this project is both fun and practical. Whether you’re looking to improve your crochet skills or create a personalized gift, this tutorial will guide you through every step of crafting a beautiful checkered tote bag from start to finish.
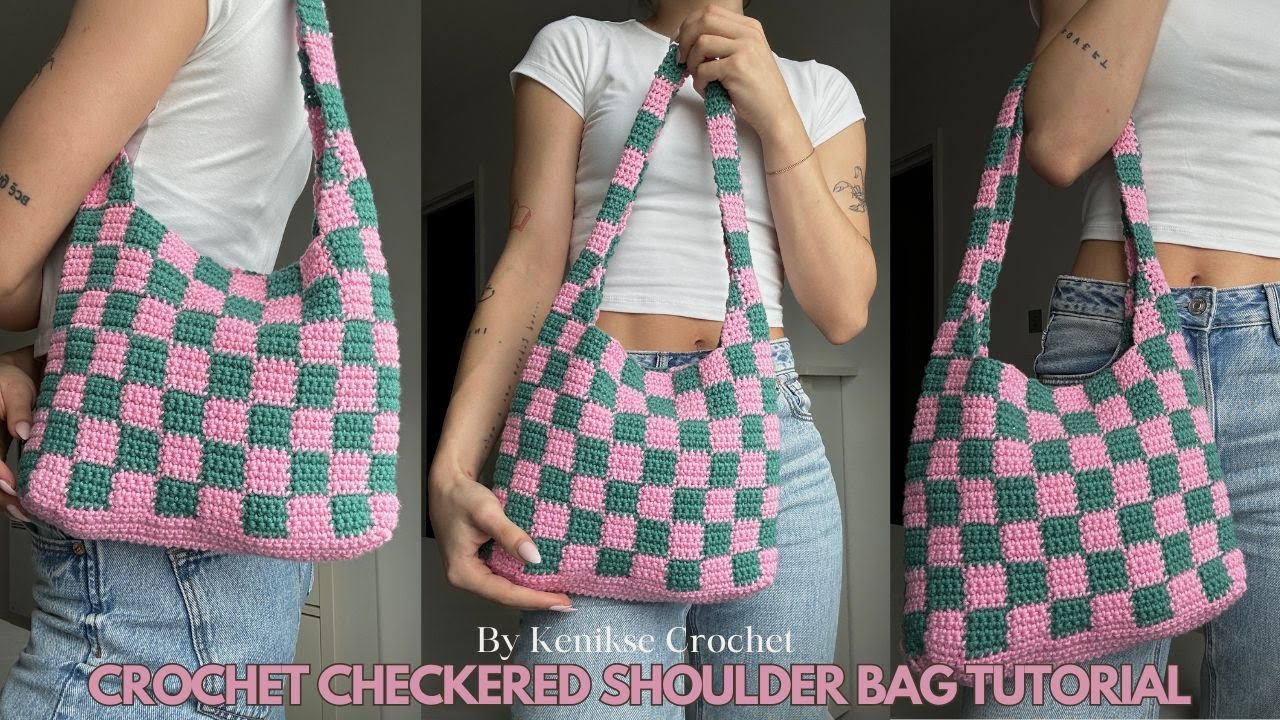
Table of Contents
-
Introduction to the Checkered Tote Bag
-
Materials & Tools Needed
-
Understanding the Pattern
-
Choosing Colors and Yarn
-
Step-by-Step Instructions
-
Step 1: Creating the Individual Squares
-
Step 2: Assembling the Panels
-
Step 3: Constructing the Tote
-
Step 4: Adding Handles
-
Optional: Lining Your Tote Bag
-
-
Tips for Success
-
Care Instructions
-
Customization Ideas
-
Conclusion
1. Introduction to the Checkered Tote Bag
Checkered patterns never go out of style. In crochet, the checkered tote bag is made by alternating colored squares in a grid-like format. This bag is ideal for everyday use and offers a great opportunity to practice color changes, square motifs, and seaming techniques.
By the end of this tutorial, you’ll have a strong grasp of how to:
-
Crochet uniform squares.
-
Seam crochet pieces together seamlessly.
-
Add sturdy handles and finish the bag professionally.
2. Materials & Tools Needed
Before diving into the pattern, gather your materials. Here’s what you’ll need:
Yarn:
-
Worsted weight yarn (Category 4) – two contrasting colors (Color A and Color B). Cotton or acrylic yarns work well.
-
Color A (e.g., White or Cream): ~200–250 yards
-
Color B (e.g., Black or Navy): ~200–250 yards
-
Tools:
-
Crochet Hook: Size H/8 (5.0mm) or size needed to obtain gauge
-
Scissors
-
Tapestry Needle
-
Measuring Tape
-
Stitch Markers (optional)
-
Fabric for Lining (optional)
3. Understanding the Pattern
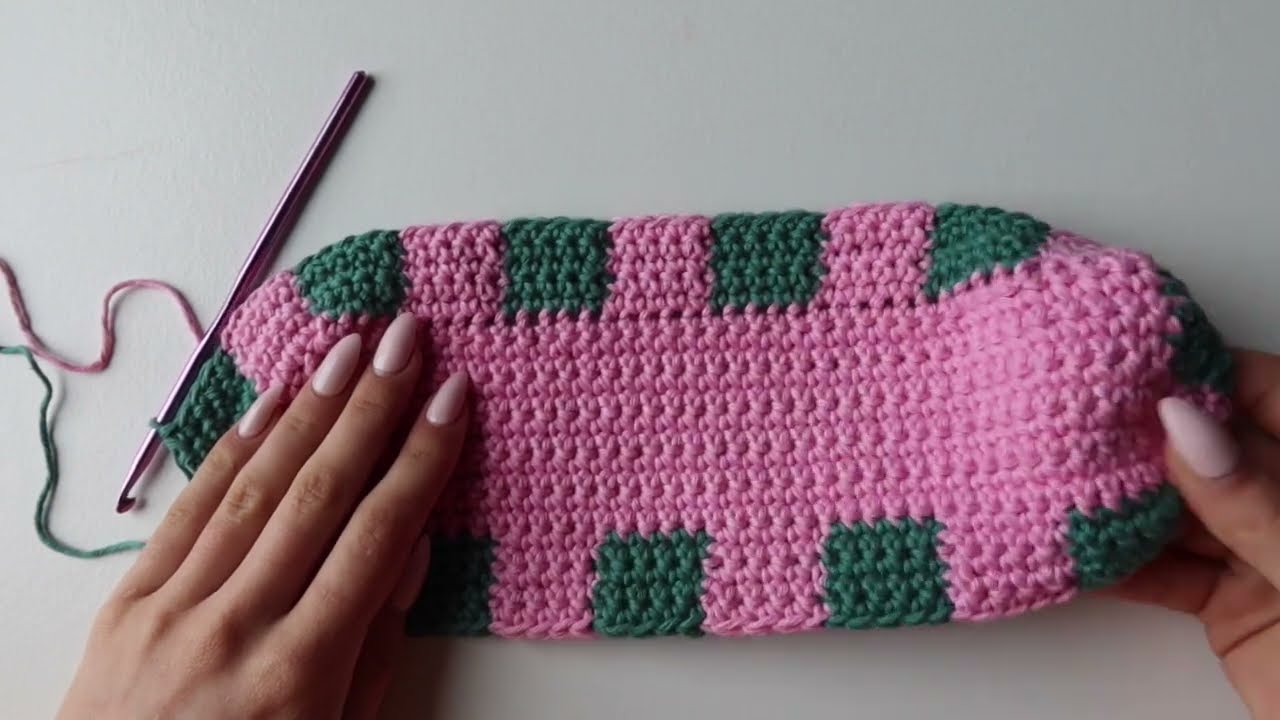
The checkered design is achieved by creating individual square motifs and joining them in an alternating color layout. You will make enough squares to form:
-
Two panels (front and back)
-
A base panel
-
Two side panels
-
Two straps
A standard tote bag might use a 4×4 square grid per side (16 squares per panel), resulting in 32 squares for both sides. Add additional squares for the sides and base depending on your desired size.
4. Choosing Colors and Yarn
The visual appeal of a checkered bag lies in high contrast. Classic combinations include:
-
Black & White
-
Navy & Cream
-
Forest Green & Beige
-
Red & Pink for a bold statement
Cotton yarn is preferred for durability, especially if the tote will carry heavy items. Acrylic can work too but may stretch over time.
5. Step-by-Step Instructions
Step 1: Creating the Individual Squares
Each square will be approximately 4” x 4” using worsted weight yarn and a 5.0mm hook.
Basic Square Pattern:
Repeat this pattern to create a total of 40–50 squares, depending on your bag size.
Alternate colors to make a balanced checkered design. For example:
-
20 squares in Color A
-
20 squares in Color B
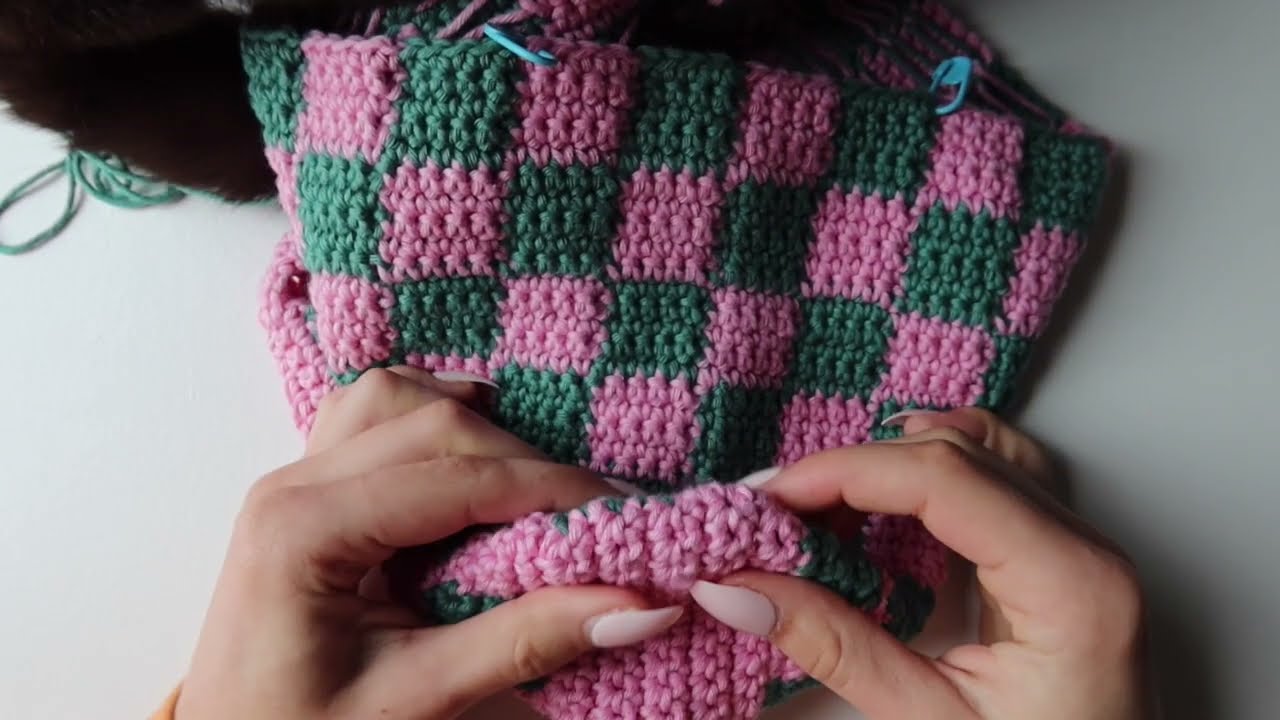
Step 2: Assembling the Panels
Arrange your squares in a checkerboard layout:
-
Lay out 4 squares across and 4 down for each panel.
-
Ensure that no two same-colored squares touch.
Seaming Techniques:
-
Use a whip stitch or slip stitch join to connect squares.
-
Work from the back of the squares for a cleaner front look.
-
Seam horizontally first, then vertically.
Repeat for front and back panels, plus additional strips for the sides and base (e.g., a row of 4 squares for the base, and 2 rows of 4 for each side).
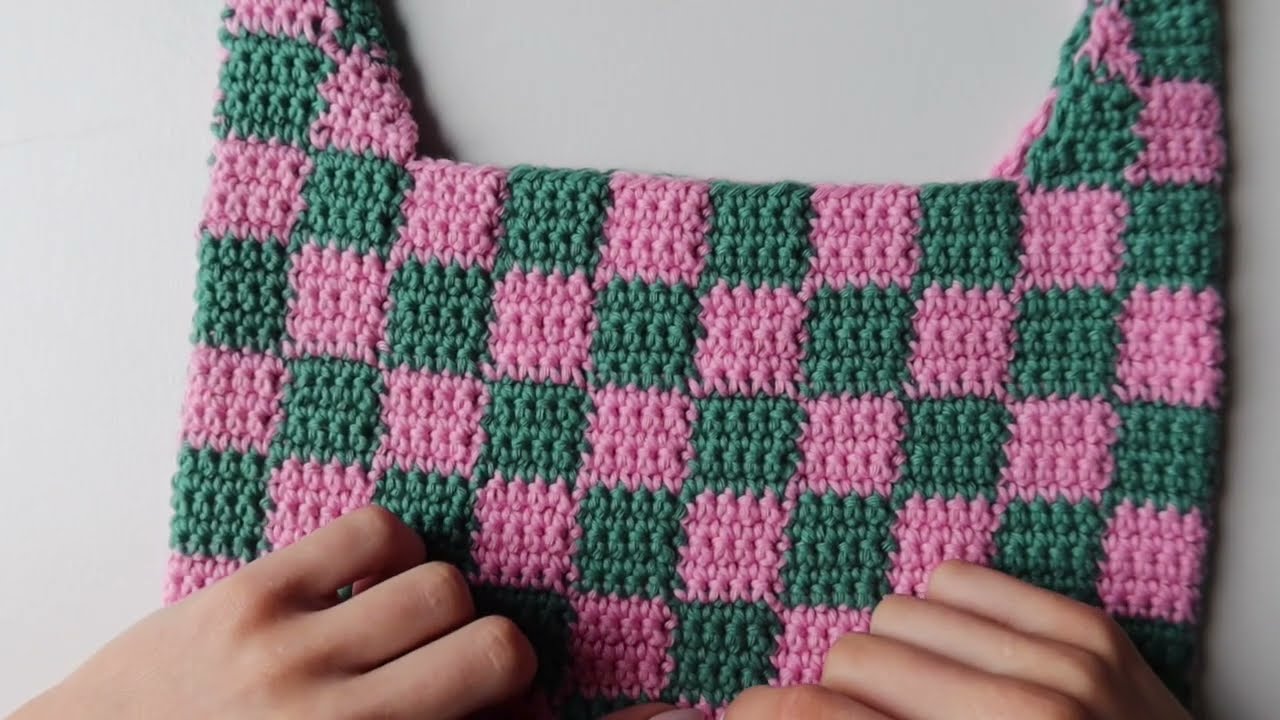
Step 3: Constructing the Tote
Once all panels are assembled:
-
Lay your back panel flat.
-
Attach the base panel along the bottom edge using a slip stitch join.
-
Attach the front panel to the other side of the base.
-
Seam the side panels in place, connecting the sides to both front and back.
-
Finish by slip stitching all the way around the top edge for a clean look.
Step 4: Adding Handles
Crochet Handles (two pieces):
Attach each handle to the inside top of the bag using a sturdy whip stitch or surface slip stitch. Reinforce by sewing an “X” shape at the base of each strap.
Optional: Lining Your Tote Bag
A fabric lining can make your tote bag more durable and give it a polished, professional finish.
Steps:
-
Cut fabric to match your bag’s dimensions, adding ½” seam allowance.
-
Sew sides and base of lining together.
-
Insert lining inside the bag and fold the top edge under.
-
Hand sew or machine stitch the lining to the inside top edge of the tote.
6. Tips for Success
-
Gauge Matters: Check that all your squares are uniform in size.
-
Weave As You Go: Weave in yarn tails after each square to save time.
-
Plan Layout: Lay out your squares before joining to avoid color repetition.
-
Block Your Squares: Wet-blocking helps your squares lie flat and match evenly.
7. Care Instructions
If using cotton yarn:
-
Machine washable (cold water, gentle cycle)
-
Air dry flat to prevent stretching
If lined with fabric, spot clean or hand wash when necessary.
8. Customization Ideas
Make the tote truly yours with these creative ideas:
-
Use gradient yarns for a fade effect.
-
Add appliqués or embroidered initials.
-
Use more colors for a multi-color checkerboard.
-
Vary square sizes for a modern twist.
-
Add a button or zipper closure at the top for extra security.
9. Conclusion
Crocheting a checkered tote bag is a rewarding project that merges form and function. With its bold, graphic appeal and practical design, this bag is sure to become a favorite accessory in your wardrobe—or a thoughtful handmade gift. Whether you keep it simple with two colors or add embellishments, the process teaches valuable skills like color changes, square motifs, and structural construction.
So grab your yarn and hook, and start stitching your way to a trendy, handcrafted tote bag today!
Video tutorial: