by
by Crocheted roses are timeless pieces of handmade art. Whether you’re creating a romantic gift, decorating a hat or bag, or designing a floral bouquet that will never wilt, crocheting a rose is a beautiful and rewarding project. In this step-by-step guide, you’ll learn how to crochet a classic spiral rose, one of the most popular and versatile types of crochet flowers.
Even if you’re a beginner, don’t worry—this tutorial breaks everything down into easy-to-follow steps, with tips to make your rose look as lifelike and elegant as possible.
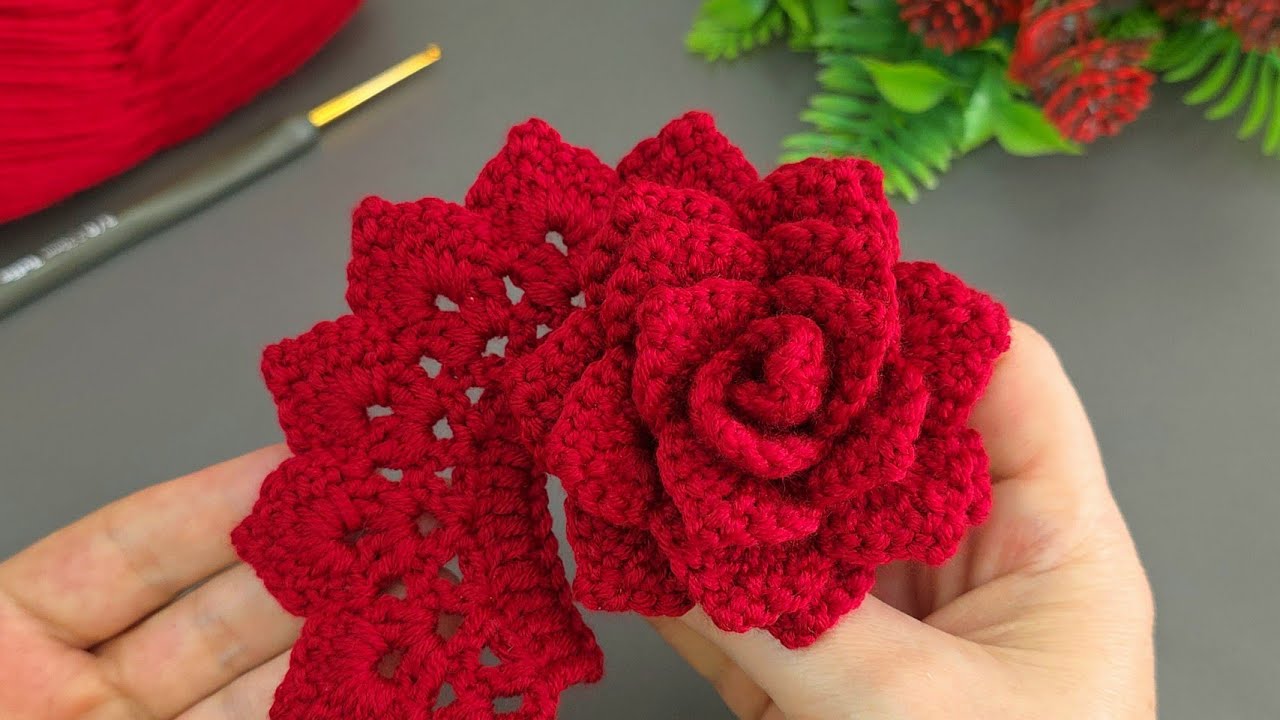
Table of Contents
-
Introduction to Crocheted Roses
-
Materials and Tools You’ll Need
-
Understanding the Crochet Rose Structure
-
Crochet Stitches You Need to Know
-
Step-by-Step Crochet Rose Pattern
-
Step 1: Foundation Chain
-
Step 2: First Row (Base for Petals)
-
Step 3: Second Row (Crocheting the Petals)
-
Step 4: Rolling and Shaping the Rose
-
-
Optional: Adding a Green Leaf and Stem
-
Tips for a Realistic Rose
-
Color & Yarn Suggestions
-
How to Use Your Crocheted Rose
-
Conclusion
1. Introduction to Crocheted Roses
Crocheted roses are small but impactful pieces that can elevate any project. Unlike real flowers, they never fade, and they offer the freedom to create in any color or size you desire. A spiral rose is made by crocheting a long strip with petal shapes, which is then rolled up to resemble a blooming flower.
2. Materials and Tools You’ll Need
To get started, here’s what you’ll need:
Yarn:
-
Weight: Worsted weight (Category 4) for a medium-sized rose
-
Type: Cotton or acrylic yarn
-
Color: Any color you’d like—red, pink, white, yellow, lavender, etc.
Tools:
-
Crochet Hook: Size G/6 (4.0 mm) or H/8 (5.0 mm)
-
Scissors
-
Tapestry Needle
-
Optional: Green yarn for leaves/stem, floral wire and tape for making stems
3. Understanding the Crochet Rose Structure
A basic crochet rose consists of:
-
A foundation chain, which acts as the base strip.
-
A first row of double crochets to build height and shape.
-
A second row of scalloped stitches to create petal shapes.
-
The strip is then rolled into a spiral and sewn into place to form the rose.
4. Crochet Stitches You Need to Know
You’ll need to know the following basic stitches:
-
Chain (ch)
-
Slip Stitch (sl st)
-
Single Crochet (sc)
-
Half Double Crochet (hdc)
-
Double Crochet (dc)
-
Treble Crochet (tr) – optional for more dramatic petals
5. Step-by-Step Crochet Rose Pattern
Let’s dive into the pattern!
✅ Step 1: Make the Foundation Chain
Start by chaining 51 (or any multiple of 3 + 1 for customization).
Tip: The longer the chain, the more petals your rose will have.
✅ Step 2: First Row – Build the Base
This row creates the base structure that will hold the petals.
Pattern:
-
Row 1:
Starting in the 4th chain from the hook, work 1 dc in each ch across.
You’ll end up with 48 dc.
Turn your work.
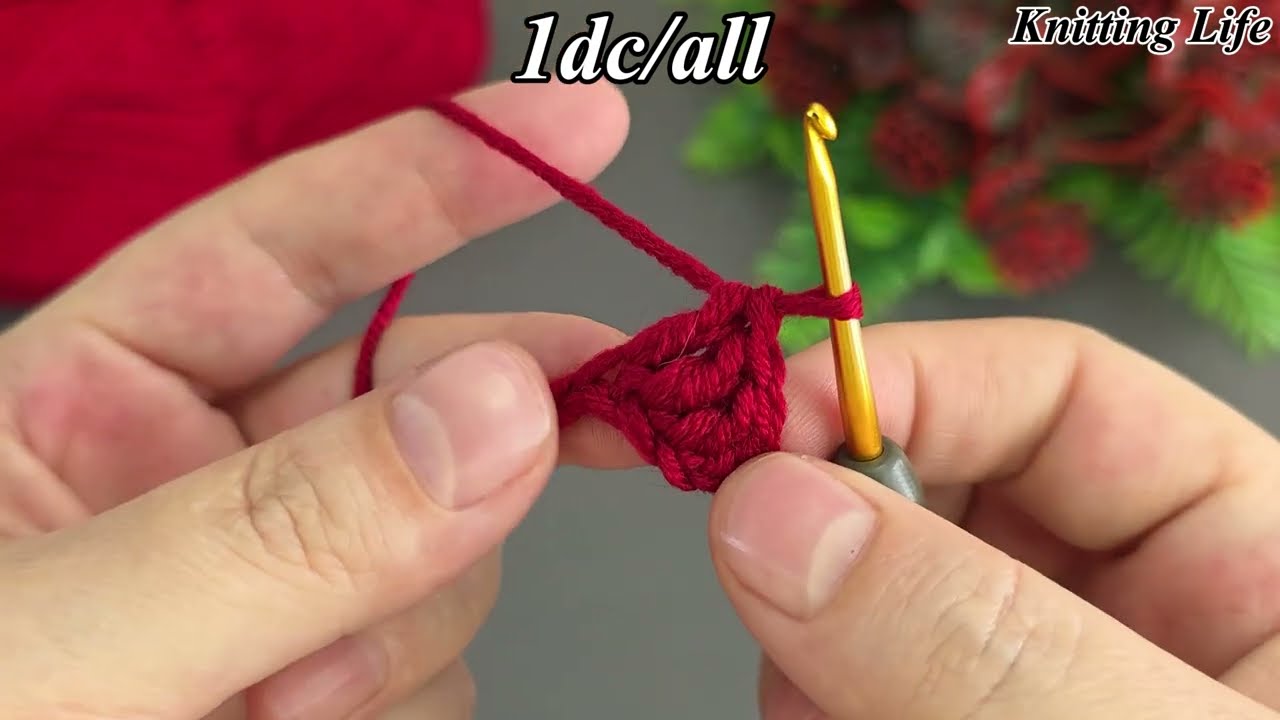
✅ Step 3: Second Row – Form the Petals
This is where the rose comes to life.
You’ll work 3 dc into one stitch, then slip stitch into the next stitch to create a petal. Repeat this across the row, alternating between large and small petals.
Pattern:
Repeat a pattern like this:
-
Small Petal
-
Small Petal
-
Large Petal
-
Repeat
Continue until you reach the end of the row. Fasten off and leave a long tail for sewing.
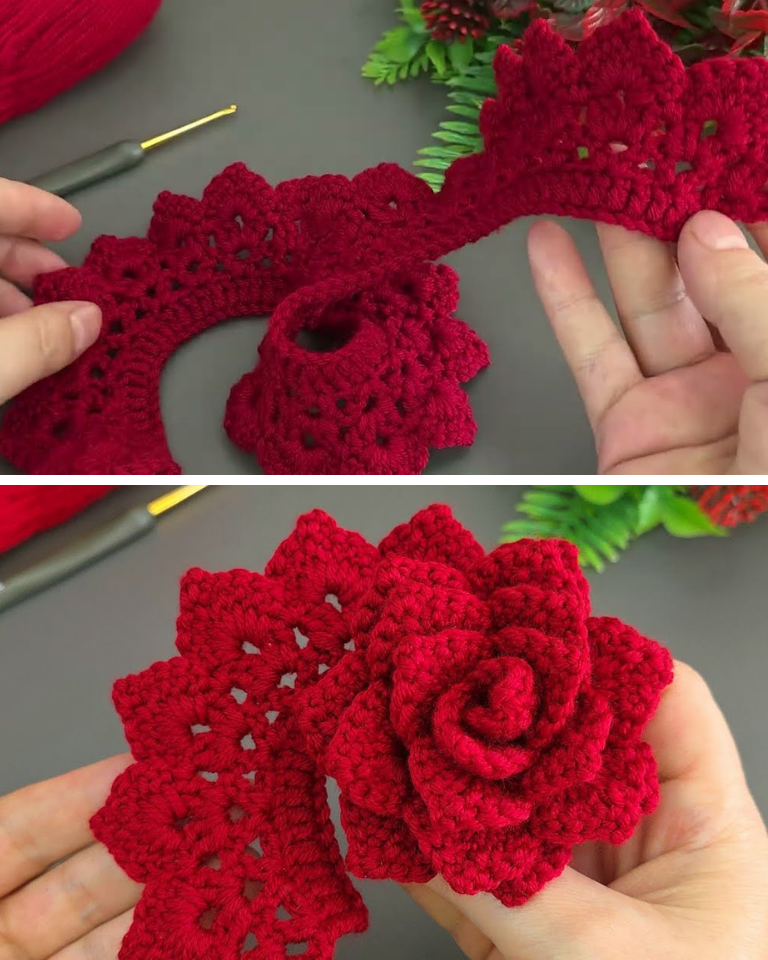
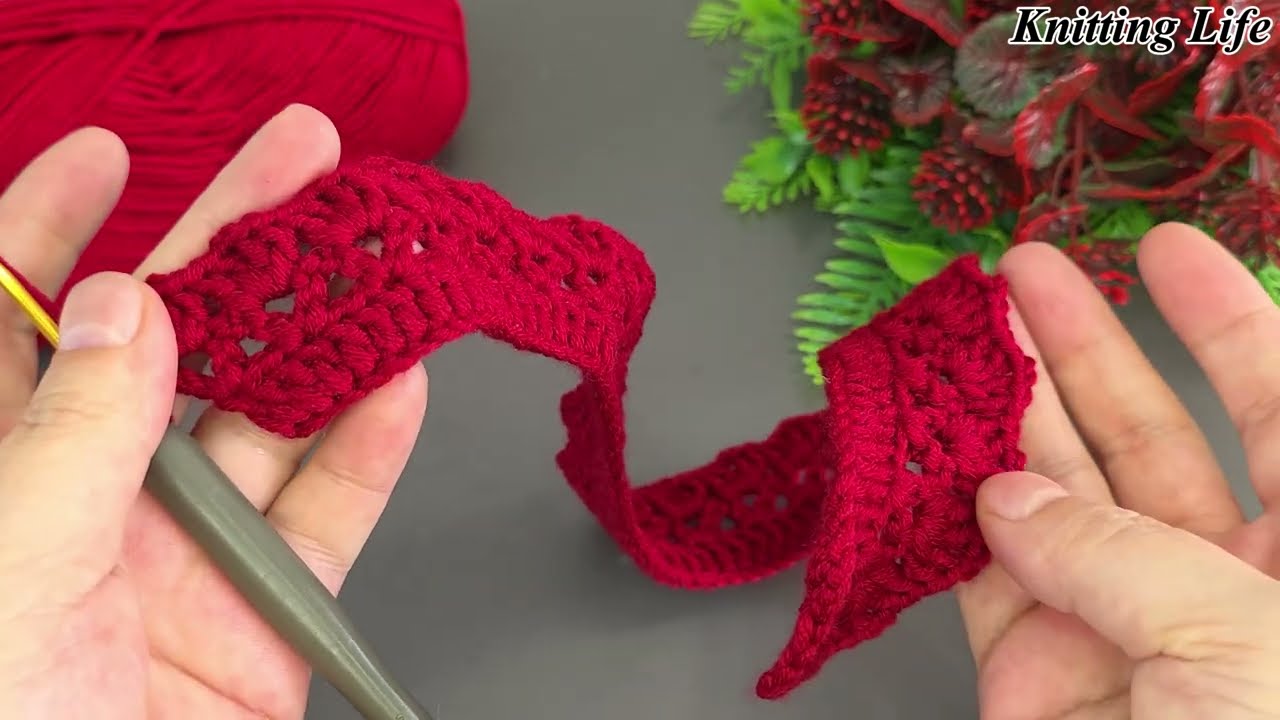
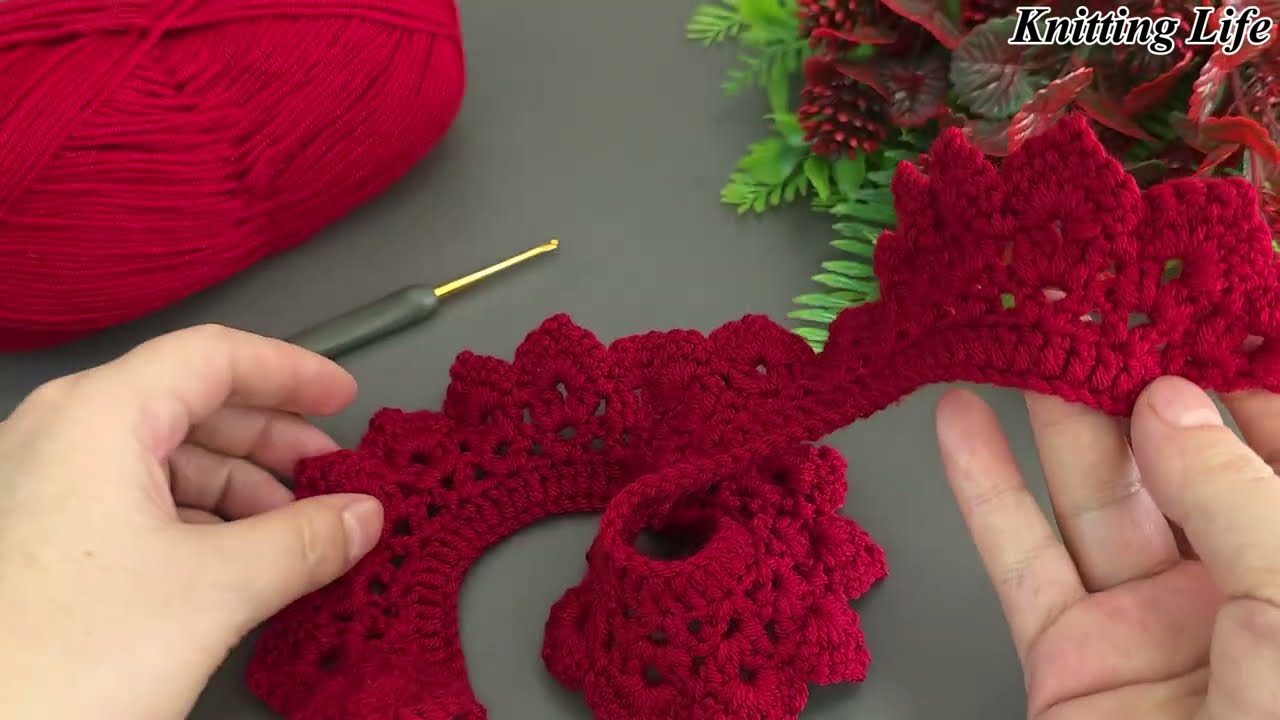
✅ Step 4: Rolling and Shaping the Rose
Now that your strip has petals:
-
Start at the short end of the strip.
-
Begin rolling it into a spiral, keeping the base aligned.
-
As you roll, you’ll see the petals naturally form a rose.
-
Sew the base together using your tapestry needle and yarn tail.
-
Stitch through the base layers to secure the rose tightly.
-
Pull the petals outward slightly for a natural blooming look.
6. Optional: Adding a Green Leaf and Stem
To enhance realism, add a leaf or a stem.
Simple Leaf Pattern:
Sew the leaf to the base of the rose.
To Add a Stem:
-
Use floral wire, insert into the rose base.
-
Wrap the wire in green floral tape.
-
Optionally, crochet a green chain and wrap it around the wire.
7. Tips for a Realistic Rose
-
Use slightly thinner yarn and a smaller hook for delicate petals.
-
Vary the size of petals for more dimension.
-
Gently block your petals if they curl too much.
-
Use two tones of yarn for a shaded effect (e.g., red and pink).
8. Color & Yarn Suggestions
Classic Colors:
-
Red = Love
-
Pink = Admiration
-
Yellow = Friendship
-
White = Purity
-
Lavender = Enchantment
Yarn Types:
-
Cotton: Crisp edges and defined petals
-
Acrylic: Softer, fluffier look
-
Blended yarns: Offer interesting textures and colors
9. How to Use Your Crocheted Rose
Your rose can be used in dozens of creative ways:
-
Bouquets or centerpieces
-
Hair clips or headbands
-
Gift toppers
-
Brooches or pins
-
Sewn onto bags, scarves, or garments
-
Bridal décor or corsages
Group several roses together to create stunning arrangements.
✅ 10. Conclusion
Crocheting a rose is a simple yet highly rewarding project. With just a few stitches and a bit of creative flair, you can create an everlasting bloom that adds charm to any project. Whether you’re making one as a heartfelt gift or dozens for a bouquet, this timeless flower will showcase your skills and creativity.
So grab your hook and yarn, and start crocheting your first rose today—one petal at a time!
Video tutorial: