by
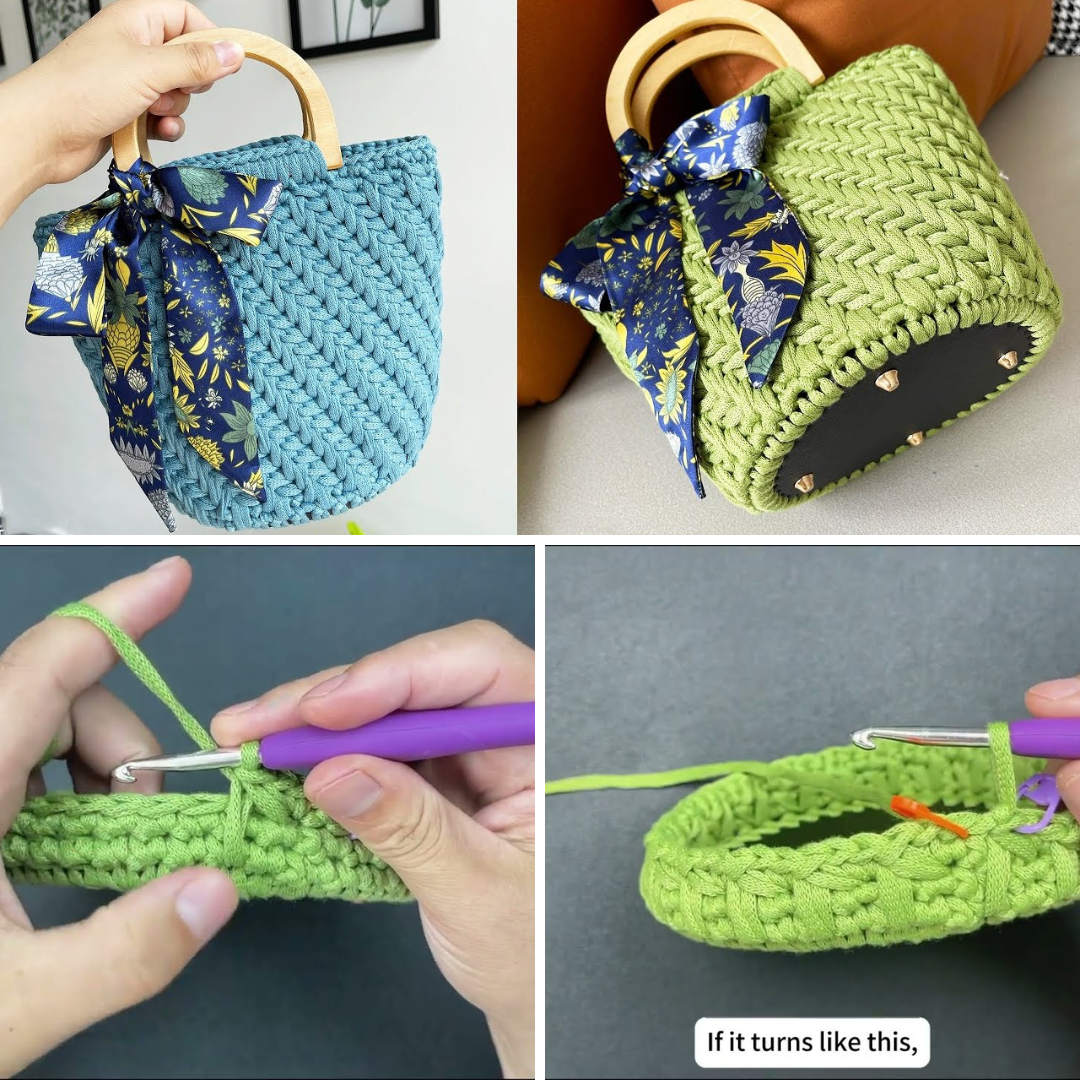
by Crochet handbags are not only trendy and versatile, but they’re also super fun to make! Whether you’re new to crochet or looking for a quick weekend project, this easy crochet handbag pattern is perfect for you. The best part? It uses simple stitches, a basic rectangle construction, and can be easily customized in color, size, and style.
Let’s get started on creating your very own crochet handbag!
What You’ll Make
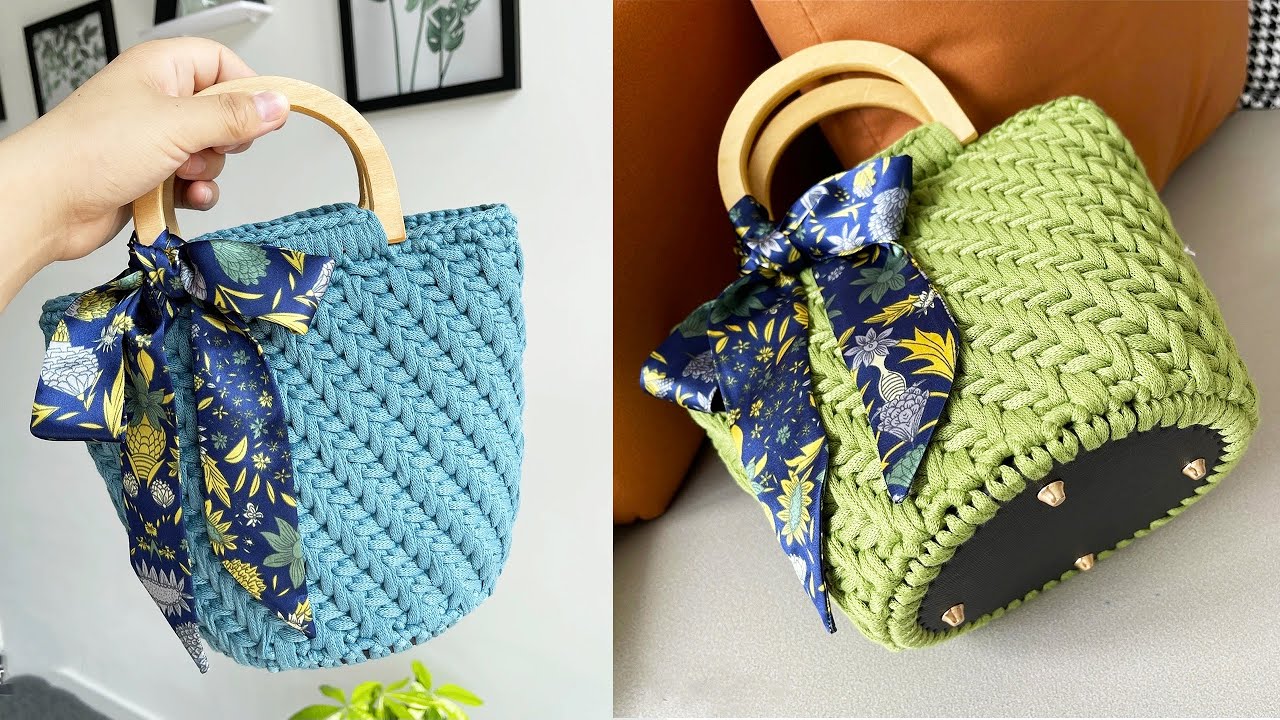
A structured and stylish crochet handbag using a flat rectangle, folded and seamed, with attached handles. This design is perfect for casual outings, errands, or as a gift.
Materials Needed
| Item | Details |
|---|---|
| Yarn | Worsted weight cotton or acrylic yarn (Category 4) – approx. 200g |
| Crochet Hook | 4.0mm or 4.5mm (adjust based on yarn) |
| Yarn Needle | For weaving in ends and sewing |
| Scissors | For trimming yarn |
| Stitch Markers | Optional (for marking corners or handle placement) |
| Handles | Crochet your own or use ready-made wooden/leather handles |
| Button or Magnetic Snap | Optional, for closure |
| Fabric (optional) | For lining the bag interior |
Skill Level: Beginner-Friendly
Crochet Stitches You’ll Use:
-
Chain (ch)
-
Single Crochet (sc) – or use Half Double Crochet (hdc) for faster progress
-
Slip Stitch (sl st)
-
Sewing pieces together
Finished Size (Adjustable):
-
Width: Approx. 30–35 cm (12–14″)
-
Height: Approx. 25 cm (10″) before folding
You can easily adjust by increasing/decreasing the foundation chain or number of rows.
Step-by-Step Instructions
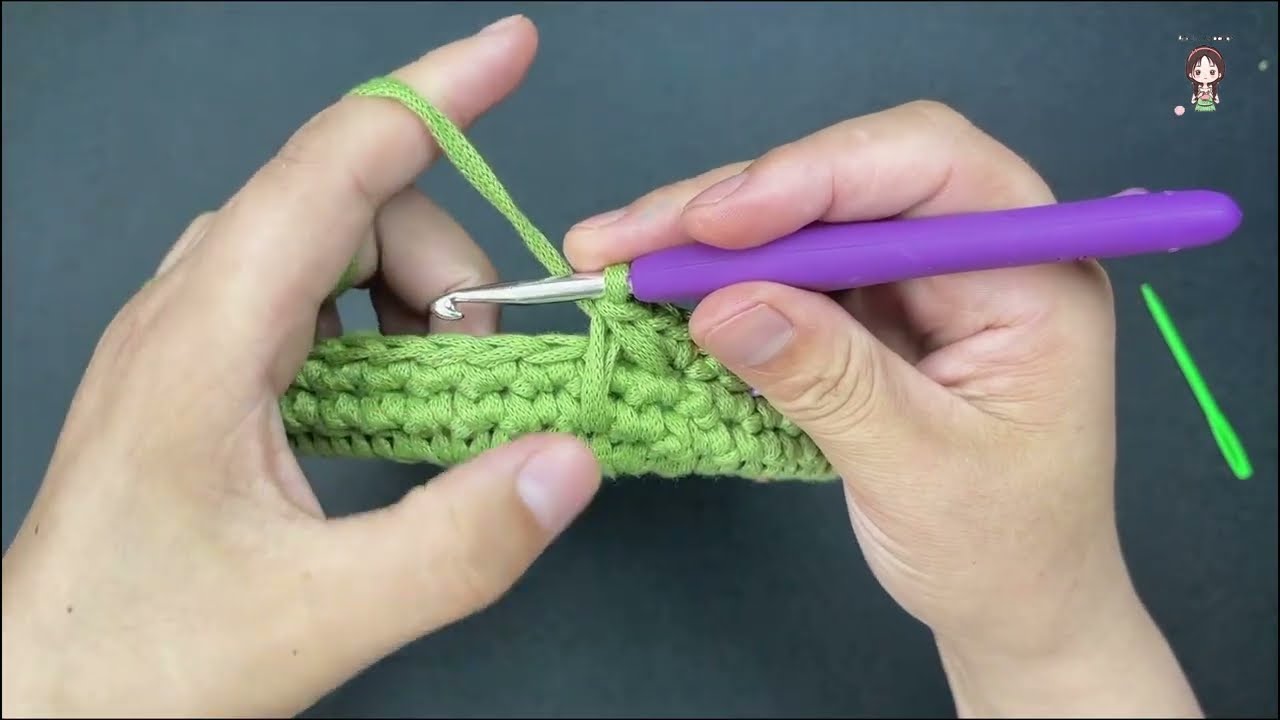
✅ Step 1: Make the Main Body of the Bag
We’ll start by crocheting a large rectangle that will be folded in half to form the body of the bag.
Instructions:
-
Foundation Chain:
-
Ch 51 (or any even number for desired width)
-
-
Row 1:
-
Sc in 2nd ch from hook and in each st across. (50 sc)
-
Ch 1, turn.
-
-
Rows 2–50 (or desired height):
-
Sc in each stitch across.
-
Ch 1, turn.
-
Tip: Use half double crochet (hdc) instead of sc for a taller stitch and faster progress.
-
Fasten off and weave in ends.
You now have a flat rectangular panel.
✅ Step 2: Fold and Seam the Sides
-
Fold the rectangle in half horizontally (like a taco) so the short sides meet at the top.
-
Use slip stitch, whip stitch, or single crochet to seam both sides.
-
Leave the top open.
-
Optional: Turn the bag inside out for hidden seams.
✅ Step 3: Add the Handles
Option A: Crocheted Handles
-
Attach yarn to top corner of the bag.
-
Chain 60–70 (for shoulder length) or 25–30 (for hand-held).
-
Attach the chain to the other side of the opening.
-
Sc back across the chain to reinforce the strap.
-
Fasten off and repeat for the second strap.
Option B: Pre-Made Handles
-
Use leather, wooden, or bamboo handles.
-
Sew or crochet around the base of the handle to attach it to the inside of the bag.
✅ Step 4: Optional Flap or Button Closure
Flap:
-
Reattach yarn at the back top center of the bag.
-
Sc across 10–15 stitches to form the flap base.
-
Work 5–6 rows in sc or hdc, decreasing at the sides to taper.
-
Add a buttonhole (ch 4, skip 4 sts) or just a simple rounded edge.
Button:
-
Sew a large wooden or plastic button onto the front of the bag to close the flap.
✅ Step 5: Optional Lining
Lining gives your bag extra durability and prevents stretching.
-
Cut a rectangle of fabric slightly larger than your bag.
-
Fold and sew the edges inward.
-
Hand-sew or use fabric glue to attach the lining inside.
✨ Customization Ideas
-
Color Blocking: Use two or more yarn colors in wide stripes.
-
Textured Stitches: Try using puff stitch, lemon peel stitch, or waffle stitch for texture.
-
Add Appliqués: Sew on flowers, hearts, or patches.
-
Add Tassels or Fringe: On the sides or from the handle ends.
-
Add a Pocket: Crochet a small square and sew it to the front or inside.
Care Instructions
-
Hand wash in cold water
-
Lay flat to dry
-
Avoid heavy items unless bag is lined
✅ Project Summary
| Step | Action |
|---|---|
| 1 | Crochet a large rectangle using sc or hdc |
| 2 | Fold in half and seam the sides |
| 3 | Add handles (crochet or pre-made) |
| 4 | Optional: Add flap, button, or lining |
| 5 | Customize as desired! |
Final Thoughts
This easy crochet handbag pattern is a great way to create a beautiful, functional accessory with just the basics. It’s beginner-friendly, works up fast, and gives you lots of room for creativity. Whether you’re making it for yourself, a friend, or as a handmade gift — this crochet handbag is sure to impress.
Video Tutorial;
Happy crocheting!