by
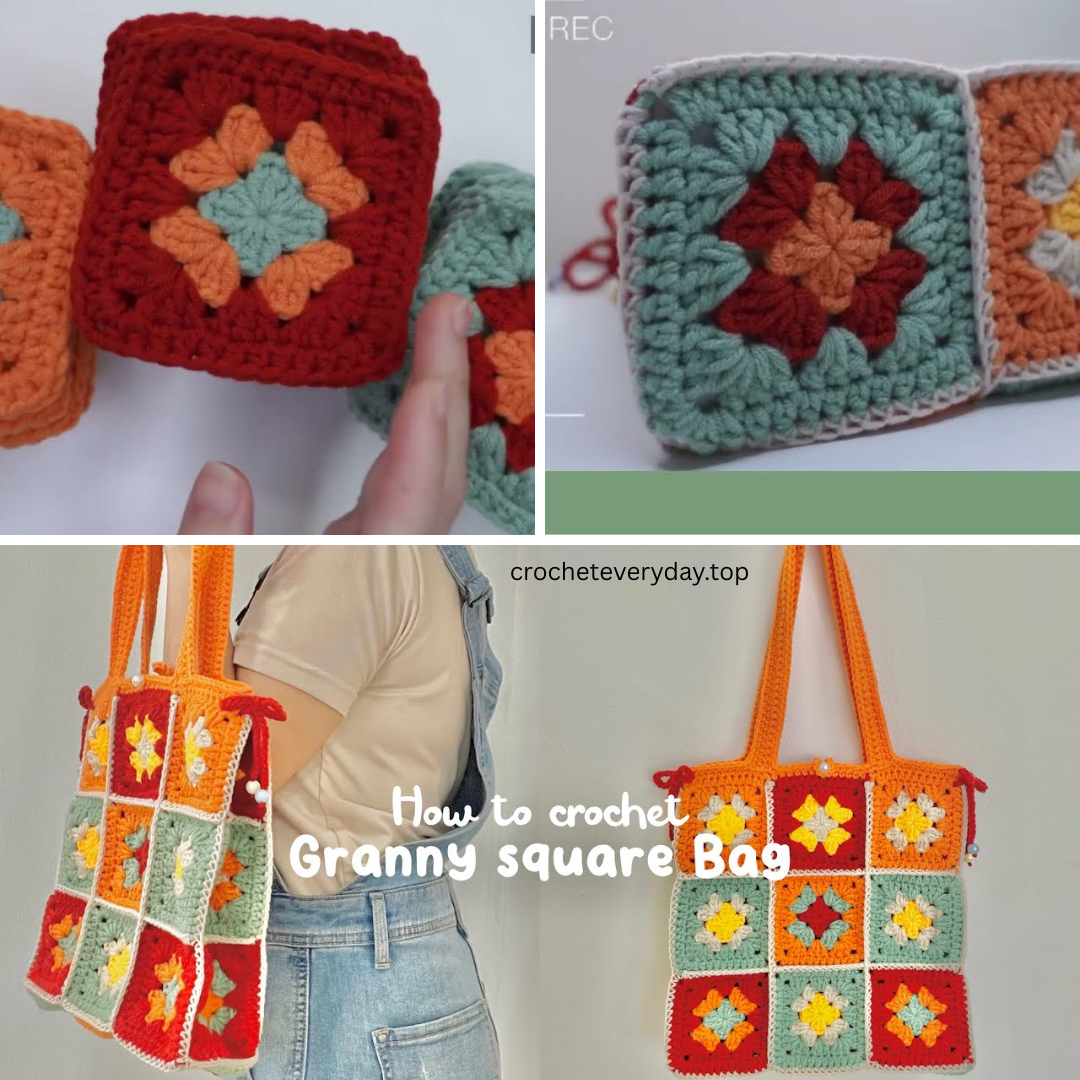
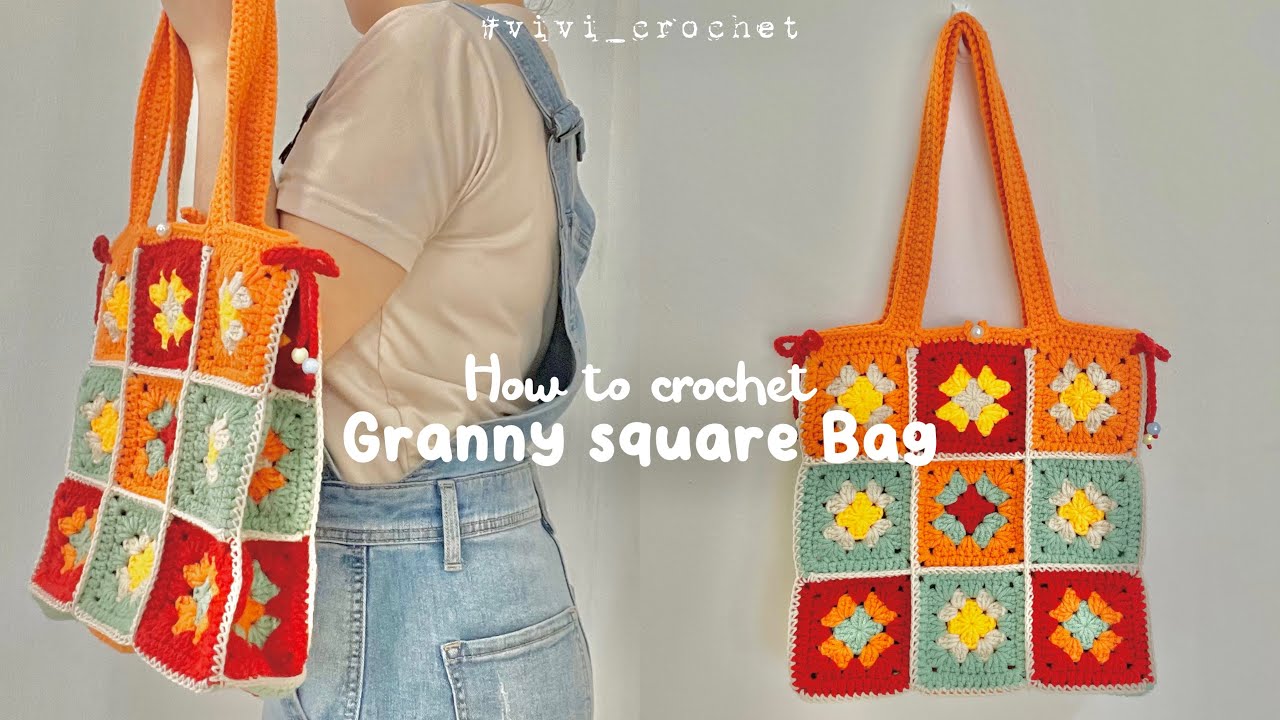
by Granny squares—those iconic little blocks of color and tradition—have made a huge comeback. These timeless motifs aren’t just for afghans anymore; they’re showing up in fashion, accessories, and home décor in fun, modern ways. One of the most stylish and practical ways to use them? The granny square tote bag.
Whether you’re heading to the farmers’ market, the beach, or just out for the day, a granny square tote bag is the perfect mix of vintage charm and functional style. This article will walk you through how to crochet a granny square tote bag from start to finish—perfect for confident beginners or intermediate crocheters ready to level up.
Why Make a Granny Square Tote Bag?
-
Eco-friendly & reusable: Say goodbye to plastic bags!
-
Stylish: Customize your colors to match any outfit.
-
Portable project: Work on squares one at a time.
-
Great stash buster: Use up leftover yarn.
-
Beginner-friendly: Granny squares use simple stitches.
-
Highly customizable: Make it any size, add lining, handles, or embellishments.
Materials Needed
Before you begin, gather your supplies:
Yarn:
-
Worsted weight cotton or acrylic yarn (#4 medium)
(Cotton is sturdy; acrylic is more stretchy but also works well.)
Tools:
-
4.0 mm to 5.0 mm crochet hook (depending on yarn and your tension)
-
Scissors
-
Yarn needle (for joining and weaving in ends)
-
Stitch markers (optional)
-
Measuring tape
Optional (for structure and finish):
-
Fabric for lining
-
Magnetic snap or zipper
-
Bag handles or strap hardware
✨ Stitches & Techniques Used
You don’t need a lot of advanced skills to make this tote:
-
Chain (ch)
-
Slip stitch (sl st)
-
Double crochet (dc)
-
Single crochet (sc)
-
Granny square construction
-
Whip stitch or slip stitch join
-
Crocheting in the round
-
Seaming and edging
Tote Bag Dimensions (Adjustable)
Let’s aim for a medium tote bag, approximately:
-
Width: 12–14 inches
-
Height: 12–14 inches
-
Straps: 20–25 inches long
This typically requires 13–17 granny squares depending on the size and layout.
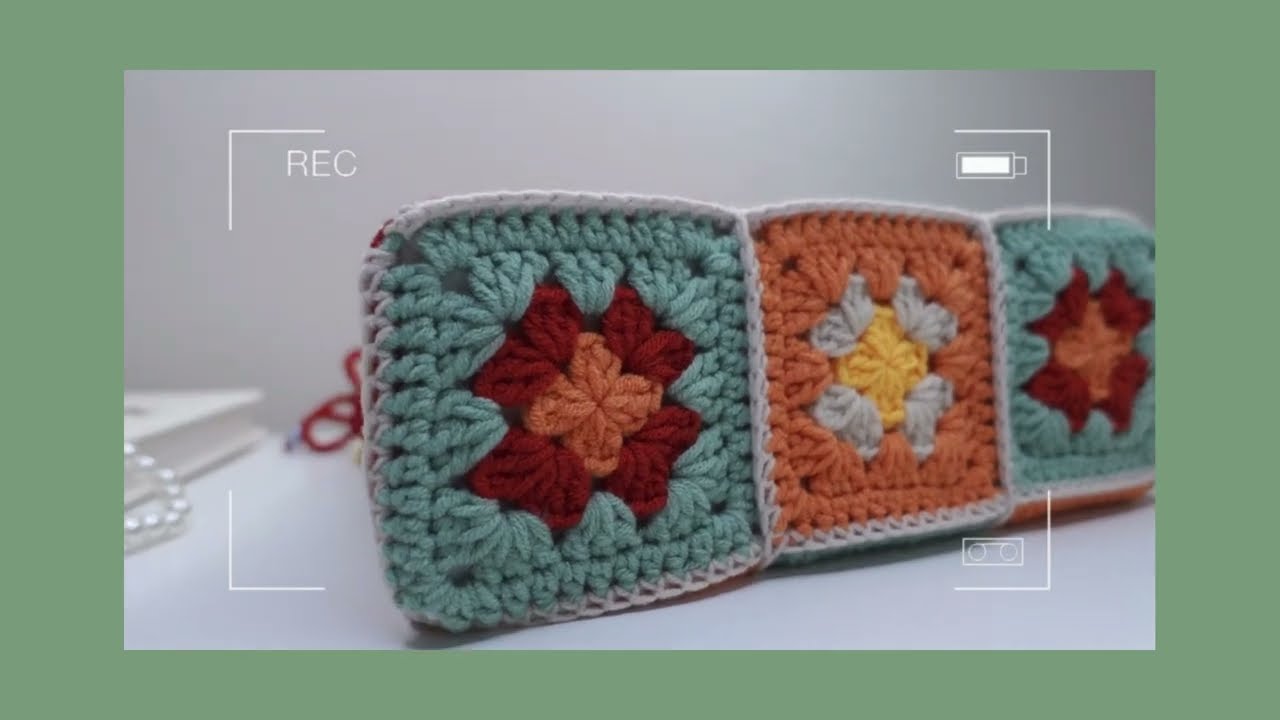
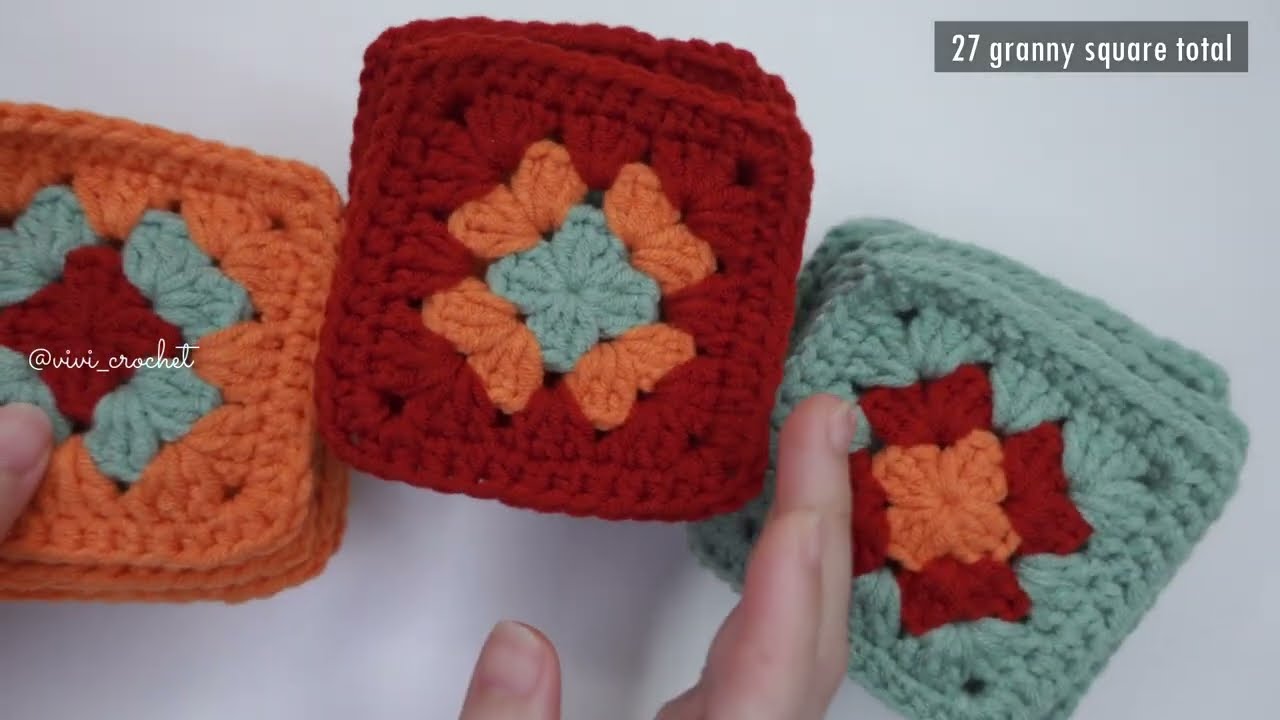
Step 1: Make Classic Granny Squares
We’ll start by making the classic 3-round granny square.
Basic Granny Square Pattern (3 Rounds)
-
Start with a magic ring (or ch 4, sl st to form ring).
-
Round 1: Ch 3 (counts as dc), 2 dc into ring, ch 2, 3 dc x3. Ch 2, sl st to top of beginning ch-3. (4 corner spaces)
-
Round 2: Sl st to next ch-2 space. Ch 3, 2 dc, ch 2, 3 dc (corner), in next ch-2 space: 3 dc, ch 2, 3 dc x3. Sl st to beginning ch-3.
-
Round 3: Repeat the same as above, placing 3 dc in each side space and (3 dc, ch 2, 3 dc) in corners.
Fasten off and weave in ends.
Tip: Make each square the same size. Block them lightly if they curl or are uneven.
How Many Squares?
-
Front and Back Panels: 4 squares each (2×2 layout) or 9 squares (3×3 layout)
-
Sides and Bottom: 1–3 squares, depending on size and depth
-
Straps: Made separately (optional squares or simple straps)
Step 2: Join the Squares
Option 1: Whip Stitch Join
-
Place two squares right sides facing.
-
Sew through the back loops only using your yarn needle.
-
Continue joining squares until you form two panels.
Option 2: Slip Stitch Join (Crochet Method)
-
Hold two squares wrong sides together.
-
Slip stitch through both loops of both squares, joining along the edge.
-
This creates a nice ridged seam on the front.
Step 3: Assemble the Bag
After creating two large panels (front and back), it’s time to form the tote.
Layout Options:
A. Flat Tote (no gusset):
-
Join two 2×2 panels along three sides (bottom and sides).
-
Leave the top open.
B. Structured Tote (with sides and bottom):
-
Use additional squares or rectangles to form a gusset panel.
-
Sew gusset to one panel first, then to the other, forming a 3D bag shape.
Step 4: Add the Handles
You can crochet straps or use pre-made leather/wooden handles.
Crochet Strap Option:
-
Ch 80–100 (adjust based on desired length).
-
Sc in 2nd ch from hook and across. Turn.
-
Continue in sc or hdc for 4–6 rows to make it sturdy.
-
Sew or sl st securely to the inside top edges of the tote.
Optional:
-
Reinforce the strap area with extra rows or small squares.
-
Add D-rings if attaching leather or rope handles.
Step 5: Edging and Finishing
Add a Border (Optional but Recommended):
-
Work a round of sc all around the top of the bag to give it a clean edge.
-
Optional: Do reverse single crochet (crab stitch) for a textured edge.
Add a Closure (Optional):
-
Sew on a magnetic snap, button + loop, or a zipper to secure the contents.
Optional Step: Add Lining (for Structure)
Lining gives your bag durability and a polished look.
To Add Fabric Lining:
-
Cut fabric slightly larger than the bag’s dimensions.
-
Fold and hem raw edges.
-
Sew to the inside of the bag using a needle and thread or sewing machine.
-
Sew around strap attachment points for extra strength.

Pro Tip: Use canvas, cotton, or interfacing fabric to stiffen the lining.
Design & Color Inspiration
Here are a few fun ideas to make your granny square tote bag one-of-a-kind:
-
Color Block: Use one color per square for a modern pop-art vibe.
-
Boho Vibes: Mix neutrals and earthy tones with fringe on the bottom.
-
Retro Rainbow: Make each square a different color for a 70s aesthetic.
-
Ombre Fade: Arrange colors from light to dark for a gradient effect.
-
Seasonal Themes: Use fall leaves , pastels for spring, or red and green for a Christmas-themed tote!
Care Instructions
Handmade crochet bags need proper care:
-
Hand wash in cold water with mild soap.
-
Do not wring—gently squeeze out water.
-
Lay flat to dry on a towel.
-
If lined, do not machine wash unless the fabric and yarn are both pre-shrunk.
Final Thoughts
Crocheting a granny square tote bag is more than just a craft—it’s a journey into color, shape, and tradition. You can make it simple or elaborate, practical or decorative. With just yarn, a hook, and a bit of creativity, you can carry your crochet wherever you go—literally!
This project is:
✅ Beginner-friendly
✅ Fully customizable
✅ A perfect gift idea
✅ Great for practicing color combinations and stitching techniques
So grab your favorite yarn colors, find a cozy chair, and start creating your own stylish tote—one granny square at a time! ✨
Video Tutorial :