by
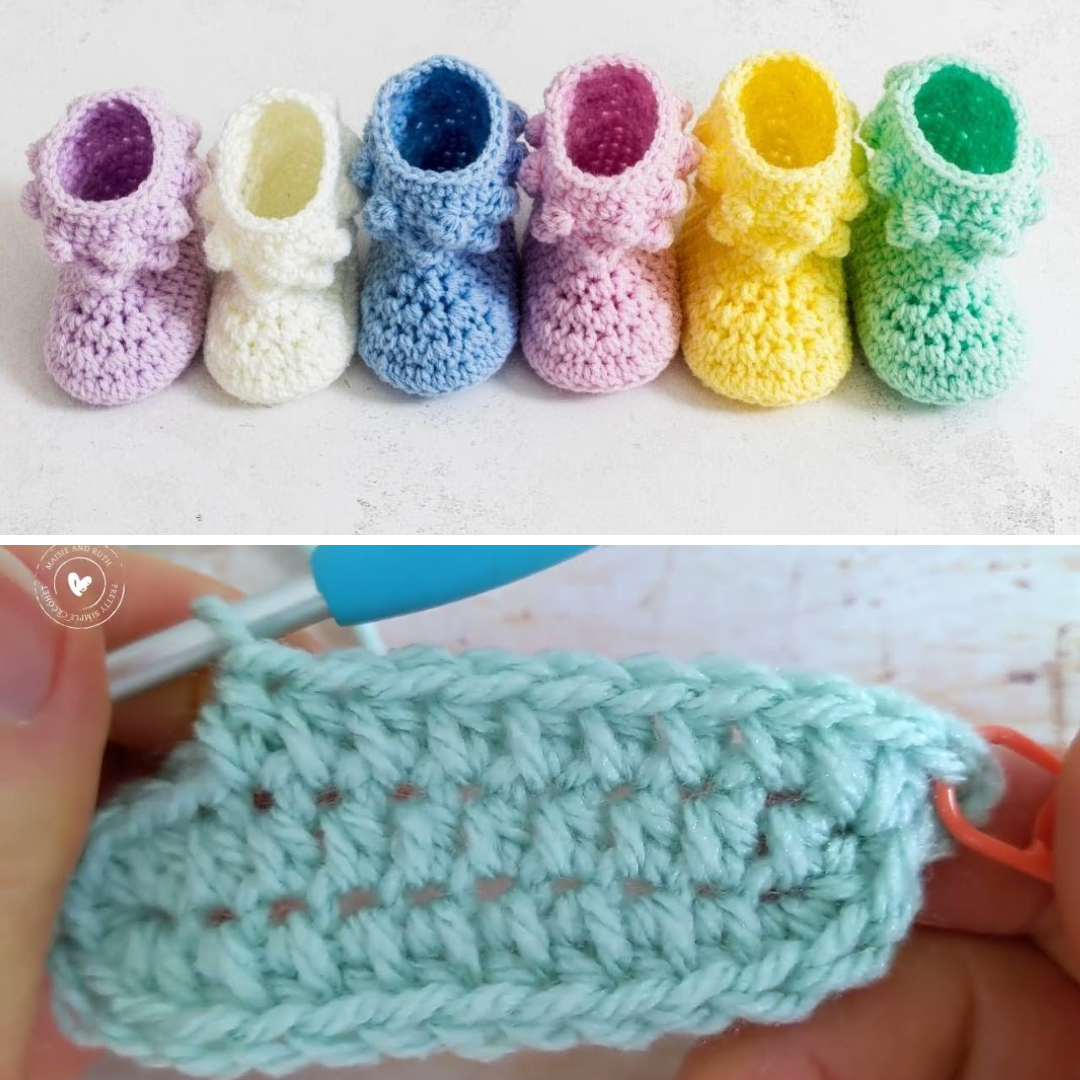
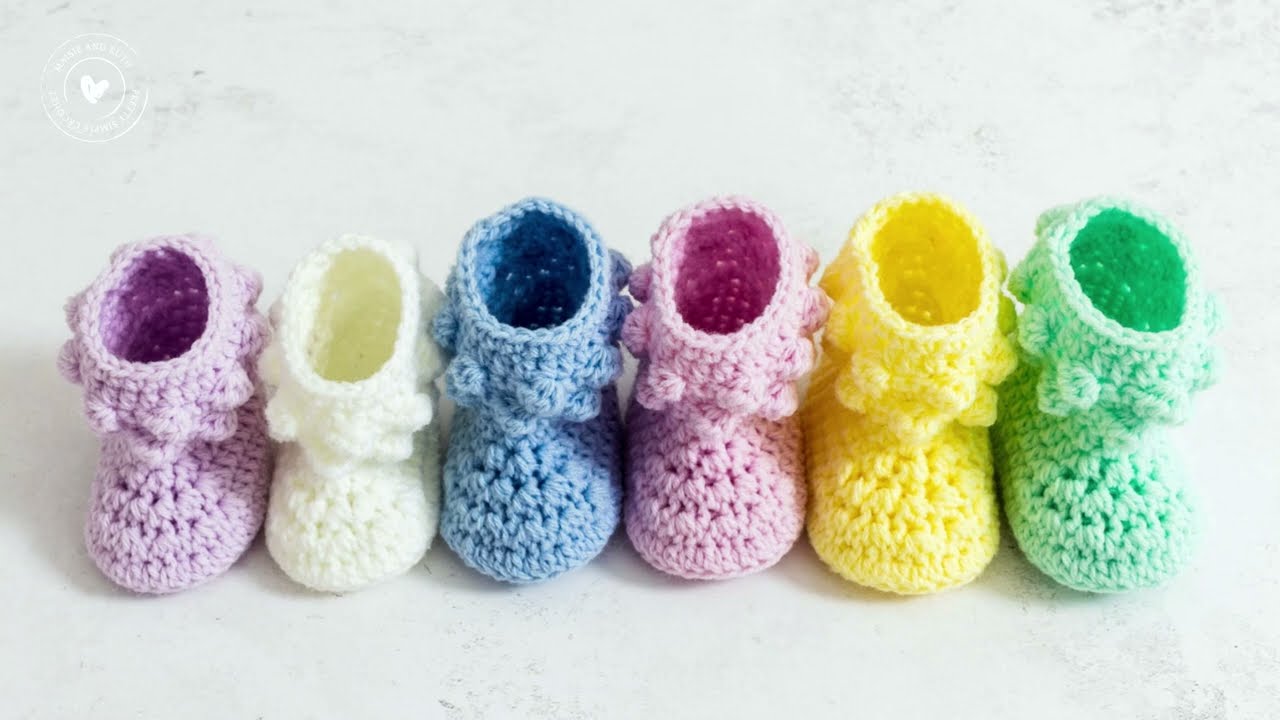
by There’s nothing quite as adorable — or as satisfying to make — as a pair of soft, tiny crochet baby booties. Whether you’re crafting for your own little one, creating a heartfelt baby shower gift, or simply enjoying a cozy project, these baby booties are the perfect quick and cute crochet item.
This tutorial will guide you step-by-step on how to make cute and easy crochet baby booties, using basic stitches and minimal shaping. It’s beginner-friendly and includes tips for customization, sizing, and finishing.
What You’ll Need
Before you get started, gather these materials:
Yarn:
-
Type: Soft, baby-safe yarn
-
Recommended: Light worsted (Category 3) or DK weight yarn
-
Fiber: Cotton, acrylic, or a soft blend that is machine-washable
-
Amount: Approx. 50–100 yards
Tools:
-
Crochet Hook: 4.0 mm (G/6) or size appropriate for your yarn
-
Tapestry Needle: For sewing and weaving in ends
-
Scissors
-
Stitch Markers (optional, but helpful)
Sizing Reference
This pattern is written for 0–3 months. You can size up by using thicker yarn or a larger hook.
| Age Range | Foot Length |
|---|---|
| 0–3 months | 3.25 in (8.25 cm) |
| 3–6 months | 3.5 in (9 cm) |
| 6–12 months | 4 in (10 cm) |
Crochet Stitches Used
This easy pattern uses basic stitches:
-
ch – chain
-
sc – single crochet
-
hdc – half double crochet
-
dc – double crochet
-
sl st – slip stitch
-
inc – increase (2 stitches in the same stitch)
-
dec – decrease (crochet 2 stitches together)
Crochet Baby Booties Pattern (0–3 Months)
We’ll work these booties in 3 parts:
-
Sole (bottom of the bootie)
-
Sides (body of the bootie)
-
Top (toe area)
✅ Step 1: Crochet the Sole
-
Ch 10
-
Round 1
-
In 2nd ch from hook: 2 sc
-
Sc in next 7 ch
-
In last ch: 5 sc (to turn around to other side)
-
Sc in next 7 ch (on the other side of the chain)
-
2 sc in the last ch
-
Sl st to first sc to join (Total: 24 stitches)
-
-
Round 2
-
Ch 1, 2 sc in first st
-
Sc in next 7 st
-
2 sc in each of next 5 st (heel curve)
-
Sc in next 7 st
-
2 sc in each of last 3 st
-
Sl st to join (Total: 32 stitches)
-
-
Round 3
-
Ch 1, sc in each st around
-
Sl st to join
-
(This gives the sole structure)
-
✅ Step 2: Create the Bootie Body
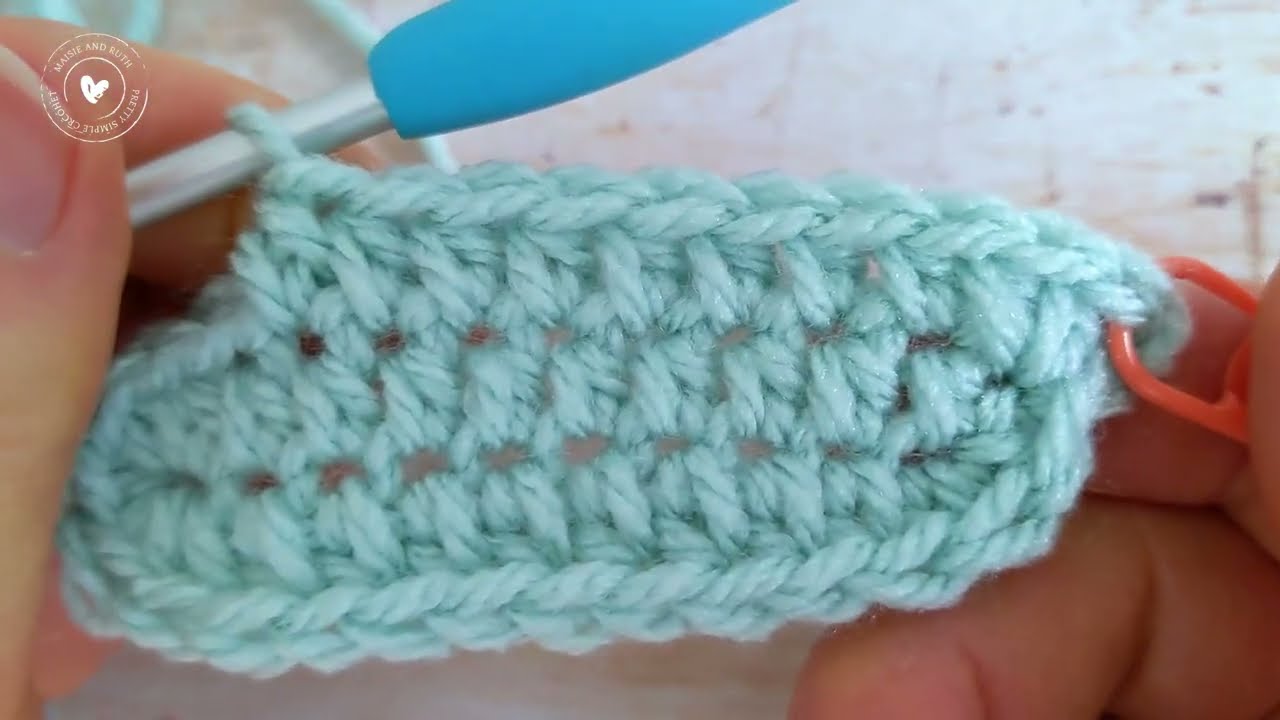
Now that you’ve completed the sole, you’ll start working into the back loops only (BLO) to shape the body.
-
Round 4 (BLO)
-
Ch 1, sc in each stitch around in back loops only
-
Sl st to join
-
-
Rounds 5–6
-
Ch 1, sc in each st (both loops)
-
Sl st to join
-
At this point, your bootie should look like a little bowl — this is the base of the shoe!
✅ Step 3: Shape the Toe (Top of Bootie)
-
Round 7 (Decrease round)
-
Ch 1
-
Sc in next 9 st
-
Sc2tog (decrease) 7 times (to shape the toe)
-
Sc in remaining stitches to end
-
Sl st to join
-
-
Round 8
-
Ch 1
-
Sc in each stitch around
-
Sl st to join
-
-
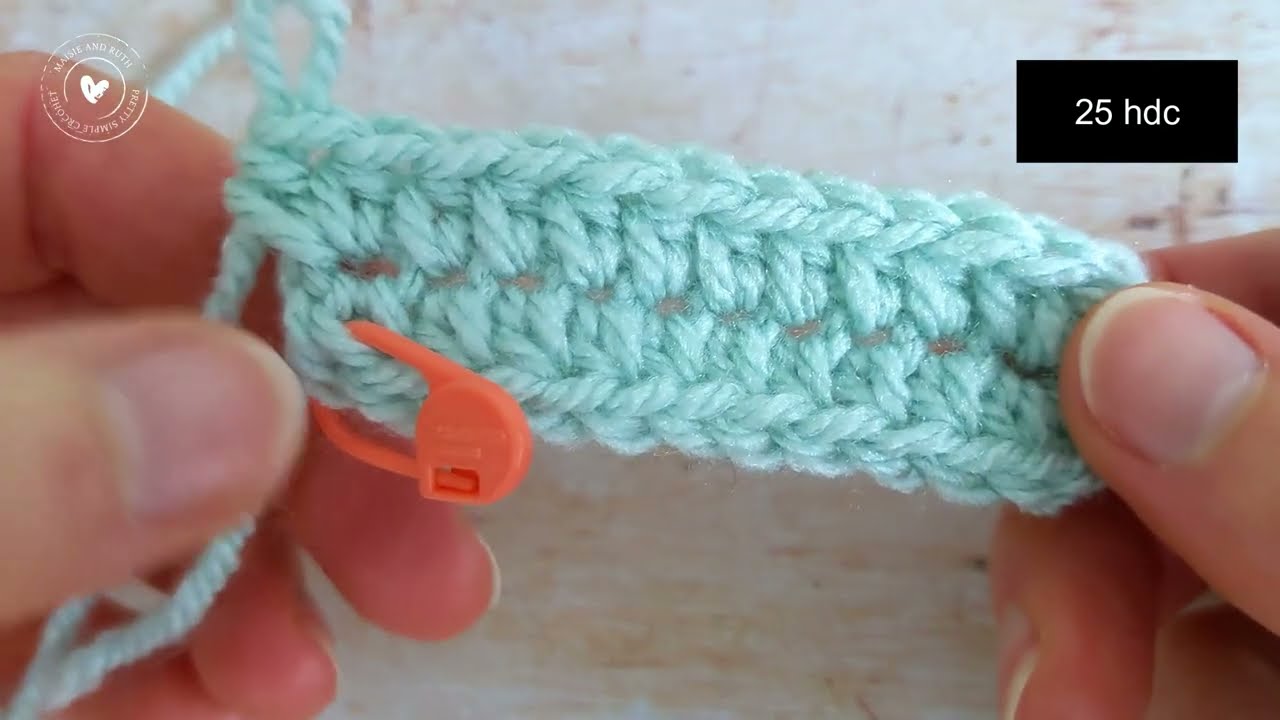
Round 9 (Cuff)
-
Ch 2, hdc in each stitch around
-
Sl st to join
-
Optional: Repeat Round 9 for a taller cuff, or switch to a contrasting color for decoration.
✅ Step 4: Finishing
-
Fasten off and weave in all ends with a tapestry needle
-
Make the second bootie following the same steps
Customization Ideas
Make your booties even cuter and more unique with these ideas:
Design Add-Ons:
-
Crochet a small flower, heart, or bow and stitch it onto the top
-
Add buttons or wooden beads (for decoration only — avoid for newborns if not securely attached)
-
Use ribbon ties around the ankle
Color Play:
-
Make the sole and body in different colors
-
Use self-striping yarn for a variegated look
-
Add a stripe or border row around the top cuff
Care Instructions
-
Use machine-washable yarn for easy care
-
Wash on a gentle cycle with mild detergent
-
Lay flat to dry or tumble dry on low (check yarn label)
Bonus Tips
-
Use a non-slip fabric paint or sew on suede soles if the booties are for walking-age babies
-
Keep stitch count accurate — use stitch markers for your round beginnings
-
Measure baby’s foot or consult sizing chart to adjust length if needed
Share Your Adorable Work!
Don’t forget to snap a photo of your adorable handmade baby booties and share them with your crafting community!
Use hashtags like:
-
#CrochetBabyBooties
-
#HandmadeBaby
-
#BabyShowerGift
-
#CrochetForBeginners
Final Thoughts
Crochet baby booties are one of the most satisfying and heartwarming projects you can make. They’re quick, portable, and packed with personality — perfect for gifting or selling at craft fairs.
Whether you keep it simple or get creative with colors and embellishments, your finished booties will be a cozy handmade treasure.
VIDEO TUTORIAL: