by
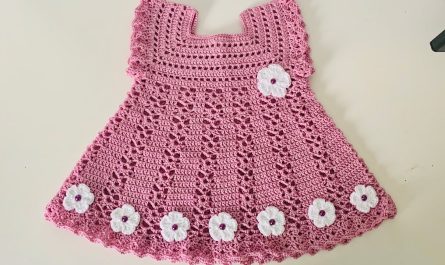
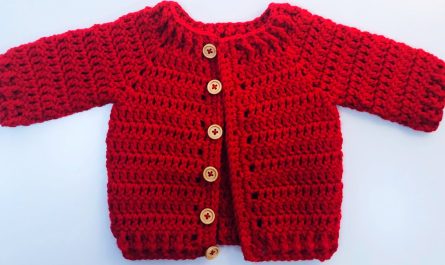
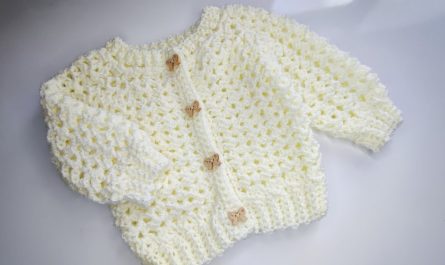
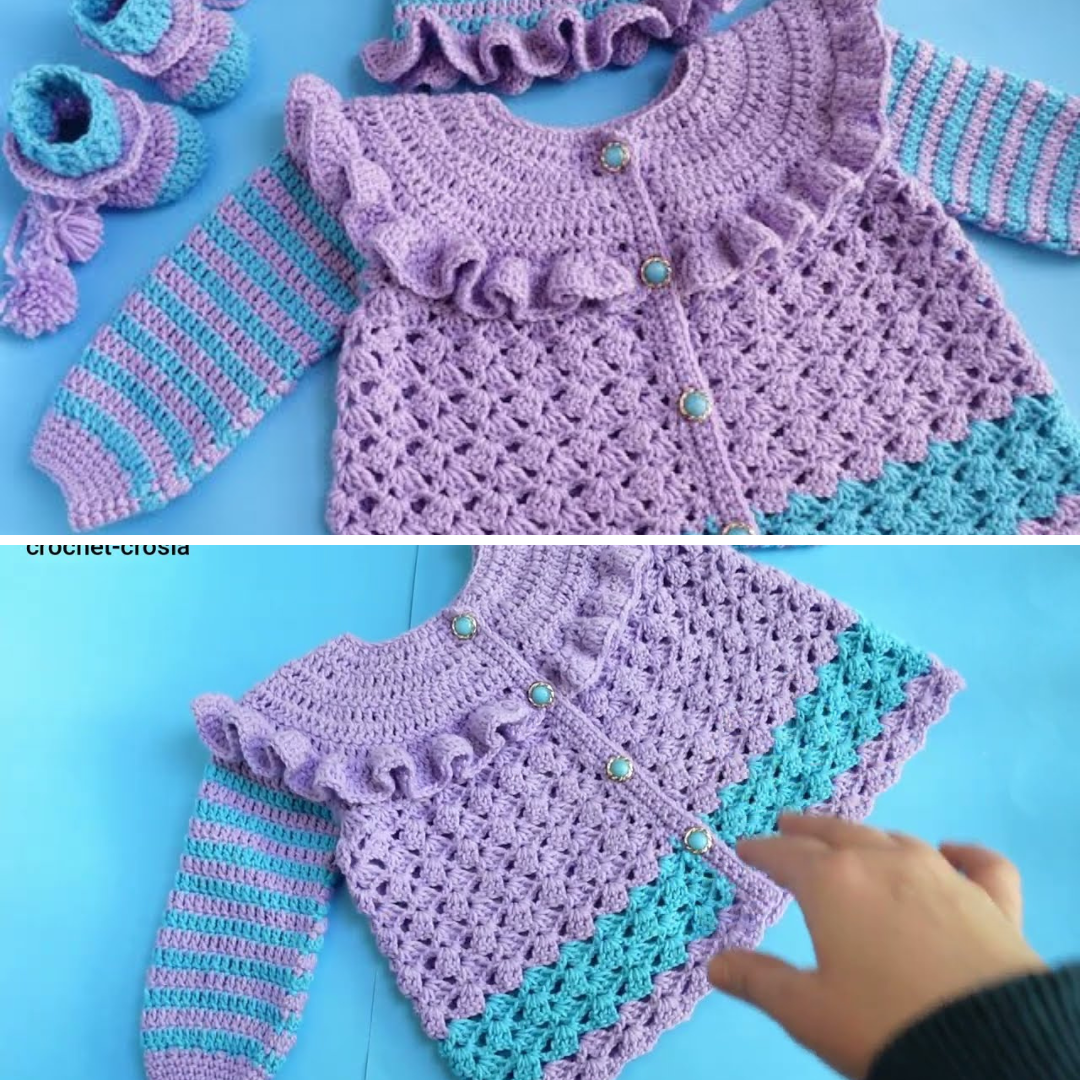
by A crochet baby sweater or cardigan jacket is a perfect handmade piece to keep your baby girl cozy and cute. Lightweight, soft, and easy to wear, this type of project is also incredibly beginner-friendly—especially when made in one piece with minimal sewing!
In this guide, you’ll learn how to crochet a simple baby sweater with clear, easy-to-follow steps.
Supplies You’ll Need
| Material | Recommended Type |
|---|---|
| Yarn | Soft baby yarn, DK or Light Worsted (Category 3) |
| Hook | 4.0 mm (G-6) crochet hook |
| Yarn Needle | For weaving in ends and seaming |
| Buttons | 3–5 small buttons |
| Scissors | For trimming yarn |
| Stitch Markers | Optional, but helpful for armholes |
Finished Size: 0–6 Months
| Measurement | Approximate |
|---|---|
| Chest Width | 17 in (43 cm) |
| Sweater Length | 9–10 in (23–25 cm) |
| Sleeve Length | 5–6 in (13–15 cm) |
You can adjust the number of stitches/rows for bigger sizes.
Crochet Stitches Used
This project uses basic stitches only, ideal for beginners:
-
ch – chain
-
sc – single crochet
-
hdc – half double crochet
-
dc – double crochet
-
sl st – slip stitch
-
inc – increase (2 stitches in 1 stitch)
Pattern Construction Overview
This baby cardigan is worked top-down in one piece, then split for sleeves and body. Sleeves are added later in the round.
Pattern Structure:
-
Yoke (neck to underarm)
-
Separate for body and sleeves
-
Work body (bottom of jacket)
-
Add sleeves
-
Add edging and buttons
Easy Crochet Baby Sweater Pattern
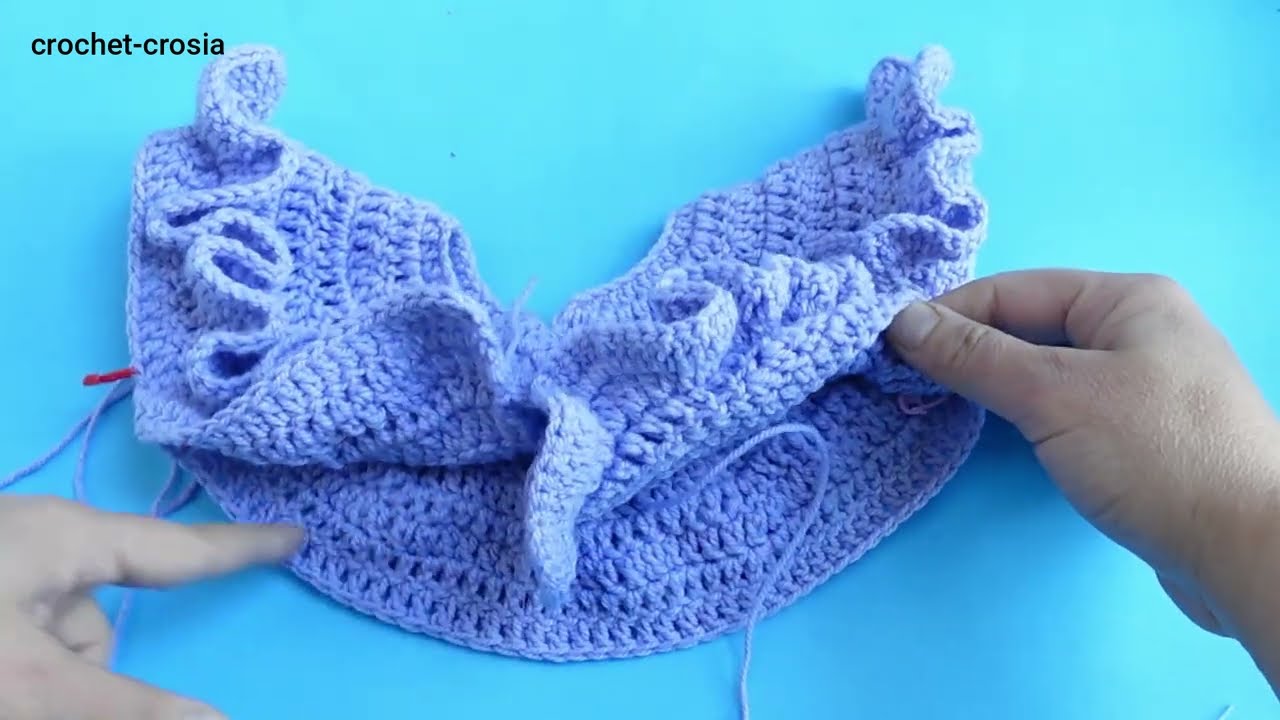
Step 1: Make the Yoke (Neck to Underarm)
Foundation Chain:
-
Ch 52 (adjust in multiples of 8 for different sizes)
Row 1 (Set Up):
-
Dc in 4th ch from hook and each across
-
(Total 50 dc + 1 turning ch = 51 stitches)
Row 2–6 (Yoke Increases):
-
Increase at 4 raglan points: front-left, sleeve-left, back, sleeve-right
Sample Increase Layout:
-
Dc in next 7, 2 dc in next (increase)
-
Dc 6, 2 dc (increase)
-
Dc 16, 2 dc (increase)
-
Dc 6, 2 dc (increase)
-
Dc to end
➡️ Repeat increase rows for a total of 5–6 rows or until the yoke measures around 3.5–4 inches deep.
Video Tutorial Part1:
Step 2: Divide for Body and Sleeves
Row 7:
-
Dc across first front section
-
Skip stitches for sleeve (use stitch marker to note start/end)
-
Ch 4–6 for armhole
-
Dc across back
-
Skip second sleeve section
-
Ch 4–6
-
Dc across second front section
➡️ You now have the body of the sweater formed!
Step 3: Work the Body
Rows 8–18 (or until desired length):
-
Dc in each stitch and chain space across
-
Ch 2, turn at the end of each row
➡️ Optional: Work alternating rows of hdc or include shell stitches for design.
Row 19 (Final Edge Row):
-
Work 1 row of sc for a clean bottom edge
Step 4: Add Sleeves (In the Round)
Sleeve (Repeat for both):
-
Join yarn to underarm
-
Work dc evenly around the armhole (approx. 24–26 stitches)
-
Join with sl st, ch 2
Rounds 1–6 (or desired length):
-
Dc in each stitch around
-
Optional: Slightly decrease (dc2tog) every other round for tapered sleeve
Final Round:
-
Sc around cuff or add shell/picot edging
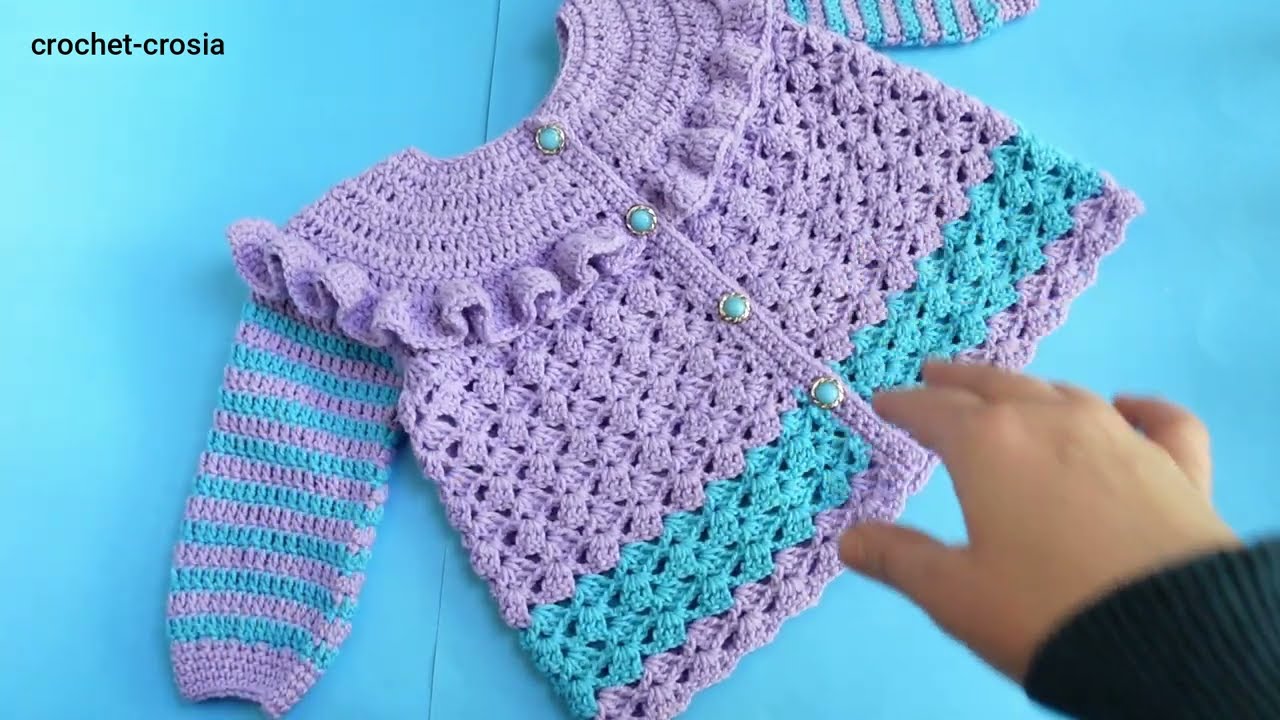
Step 5: Add Front Edging and Buttonholes
Button Band (Left Side):
-
Join yarn at bottom front
-
Sc evenly up to the neckline
Buttonhole Band (Right Side):
-
Repeat sc row, but add buttonholes:
-
(Sc 3, ch 2, skip 2) – repeat 2–3 times evenly
-
Neckline:
-
Sc or hdc around collar for a neat finish
Step 6: Finishing Touches
-
Sew buttons opposite buttonholes
-
Weave in all loose ends with a yarn needle
-
Lightly block if needed
Optional Design Variations
| Idea | Description |
|---|---|
| Color Blocking | Use one color for the yoke and another for the body/sleeves |
| Shell Stitch Hem | Add feminine touch with shell edging at bottom and cuffs |
| Ribbon Tie | Add satin ribbon at the waist or neckline |
| Appliqué | Sew on a crocheted flower or heart |
Tips for Beginners
-
Keep your tension loose for flexibility and comfort
-
Use stitch markers at increase points to avoid confusion
-
Check size by measuring as you go
-
Choose washable yarn—babies can be messy!
-
If using buttons, make sure they are secure and baby-safe
Perfect For:
-
Newborn gifts
-
Baby showers
-
Holidays or birthdays
-
Everyday layering for chilly days
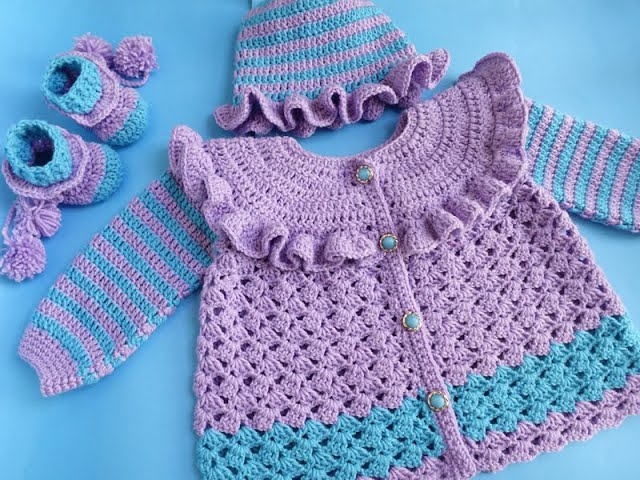
Matching Accessories (Optional)
-
Crochet baby hat or beanie
-
Baby booties
-
Headband with bow or flower
-
Blanket in matching yarn
Let me know if you’d like tutorials for any of those too!
Final Thoughts
Making an easy crochet baby sweater or cardigan jacket for a little girl is a beautiful, beginner-friendly project that delivers big results. With soft yarn, basic stitches, and a little time, you’ll create a handmade piece full of love and warmth.
Whether you keep it simple or add embellishments, your creation is sure to become a treasured item—perhaps even a keepsake passed down through generations.
Video Tutorial Part2: