 by
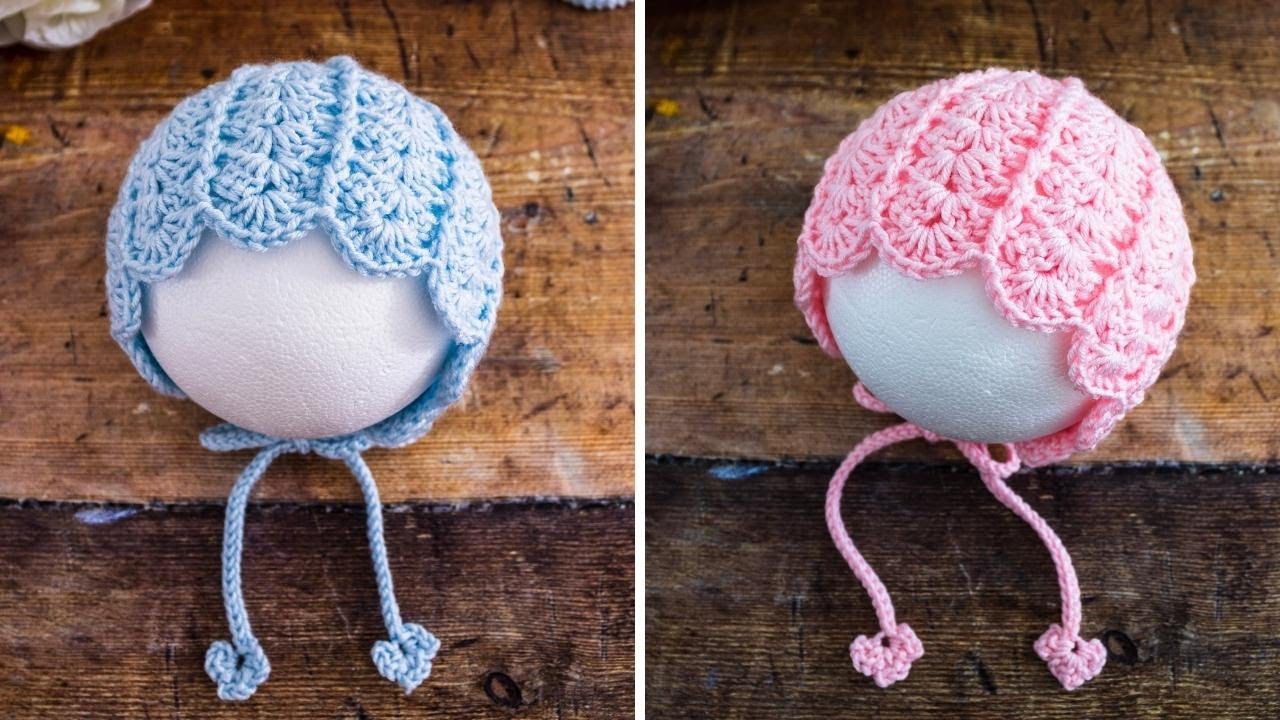
by A crochet baby bonnet is the perfect mix of vintage charm and cozy comfort. Whether you’re preparing for a newborn photo shoot, crafting a handmade baby shower gift, or just want to make something adorable and practical, this easy crochet baby bonnet will warm hearts (and heads!).
This step-by-step guide is great for beginners and can be completed in just a couple of hours using basic stitches and soft baby-friendly yarn.
Materials You’ll Need
| Item | Description |
|---|---|
| Yarn | Worsted weight (4) or DK (3) baby-friendly yarn (cotton or soft acrylic) |
| Crochet hook | 4.0 mm (G) or size needed for your yarn |
| Yarn needle | For sewing and weaving in ends |
| Scissors | For trimming yarn |
| Stitch marker | Optional, to mark rows |
| Ribbon or yarn ties (optional) | For tying under the chin |
✨ Basic Skills Used
-
Chain (ch)
-
Single crochet (sc)
-
Half double crochet (hdc)
-
Double crochet (dc)
-
Slip stitch (sl st)
-
Working in rows and in back loops
-
Seaming with whip stitch or slip stitch
✅ No shaping required! This bonnet is worked flat in a rectangle and then seamed into shape—perfect for beginners.
Sizing (0–6 Months)
This pattern is for a 0–6 month baby size. To adjust, you can add rows (for more depth) or stitches (for more width). Measurements for newborn bonnet:
-
Width: 13–14 cm (5–5.5 in)
-
Height: 11–12 cm (4.5 in)
Step-by-Step: Easy Crochet Baby Bonnet
Step 1: Crochet the Bonnet Body (Flat Rectangle)
With your yarn and 4.0 mm hook:
Row 1:
-
Ch 31 (or desired width of bonnet).
-
Hdc in 2nd ch from hook and in each across. (30 hdc)
Row 2–20:
-
Ch 1, turn.
-
Hdc in back loops only (BLO) across each row. (30 hdc)
✅ The back loop-only gives a stretchy, ribbed texture.
-
Repeat until the piece measures around 5″ wide by 4.5″ tall, or as needed for your desired size.
-
Do not fasten off—you’ll now fold and seam.
Step 2: Fold and Seam the Back
-
Fold the rectangle in half width-wise, so the short sides align.
-
Using your yarn and hook (or a yarn needle), slip stitch or whip stitch across the short edge to form the back of the bonnet.
-
Fasten off and weave in ends.
You now have a bonnet shape, open at the front and bottom!

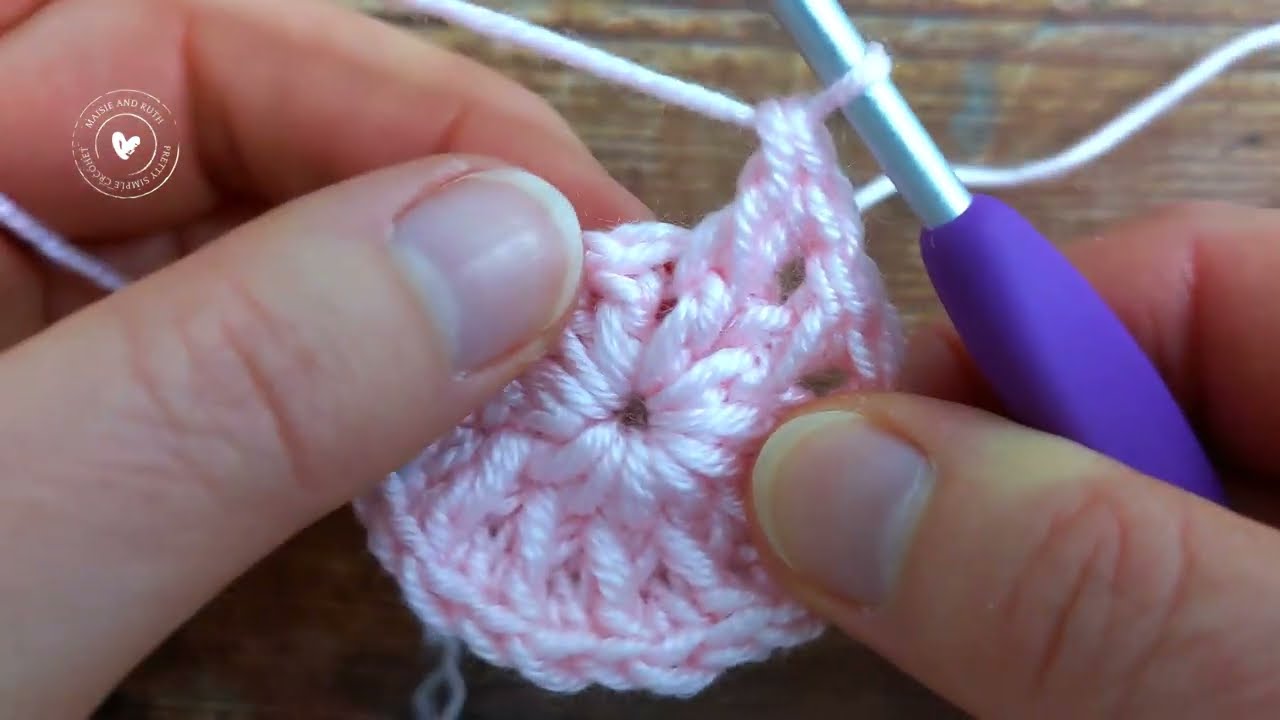
Step 3: Add Edging Around the Face
To give a neat finish around the baby’s face:
-
Join yarn to one bottom front corner of the bonnet.
-
Work 1 round of single crochet evenly around the front opening (top to bottom).
-
Sl st to join, fasten off, and weave in ends.
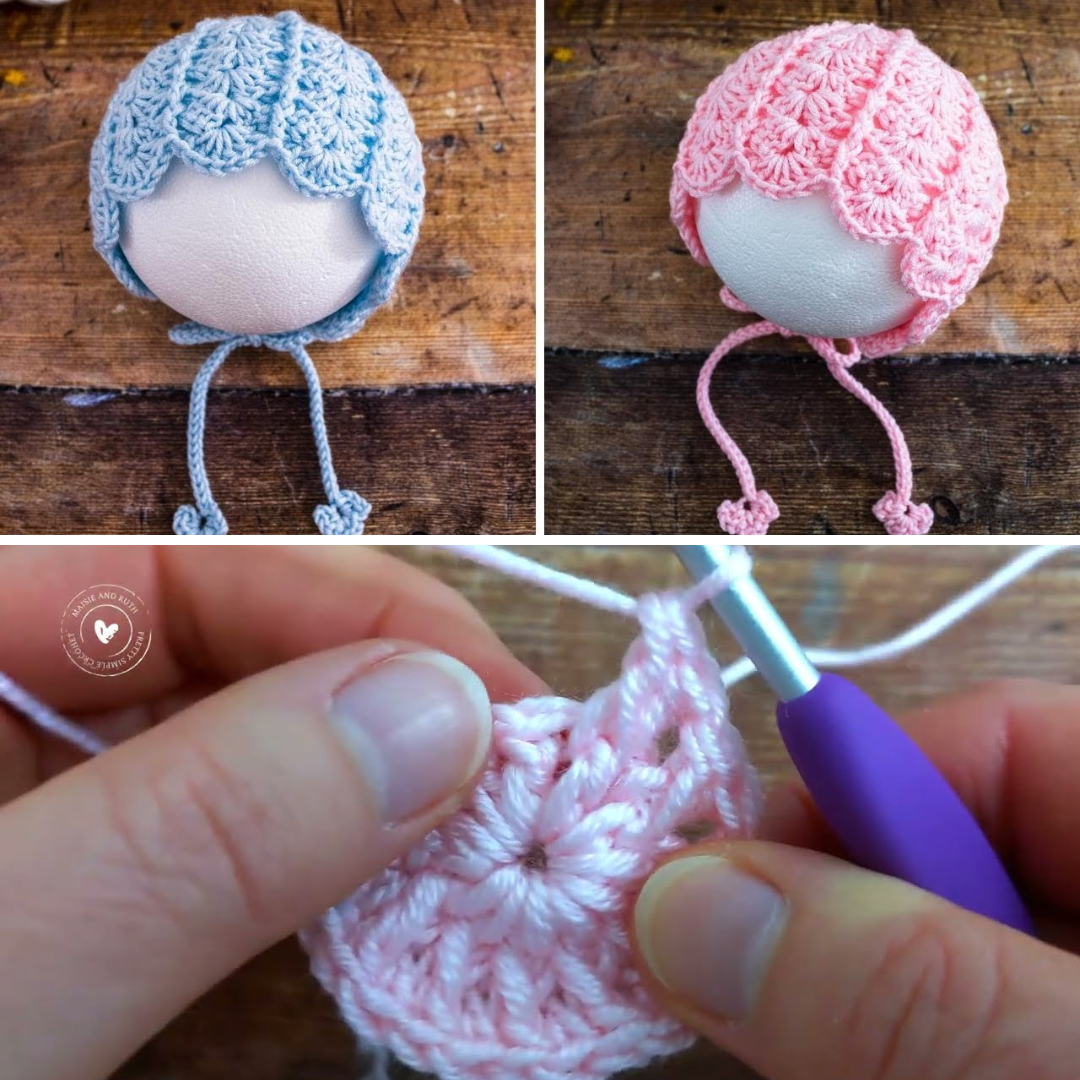
Optional: Add a scalloped or picot edging for a fancy touch.
Step 4: Add Chin Ties
Option 1: Crochet Chains
-
Join yarn to one bottom corner.
-
Chain 40–50 (depending on desired length), sl st back down the chain.
-
Fasten off.
-
Repeat on the other side.
Option 2: Use Ribbon
-
Cut two 10″ pieces of soft satin or cotton ribbon.
-
Sew securely to the inside corners of the bonnet.
-
Make sure they’re safely attached and not too long to avoid tangling.
Optional Additions
-
Shell or scallop edging: Adds a delicate, decorative finish.
-
Embroidered flower or bow: Add to the side for a boutique look.
-
Pom-pom or mini bear ears: For a playful twist!
Care Instructions
-
Machine washable yarn is best for baby items.
-
Wash on a gentle cycle or hand wash.
-
Lay flat to dry to preserve shape.
Pro Tips
-
Use natural fiber blends like cotton-acrylic for softness and breathability.
-
For photo props, play with pastel tones, ivory, or vintage rose colors.
-
Want to size up? Just start with a longer chain and add a few more rows.
Make it a Set!
Pair the bonnet with matching:
-
Crochet baby booties
-
Fur-trimmed mittens
-
A baby blanket or cardigan
Packaged together, it makes a beautiful, heartfelt gift set for a new arrival.
Final Thoughts
There’s something incredibly special about creating a handmade baby bonnet. It’s a simple project with timeless appeal—and it’s just as sweet to make as it is to give. This easy crochet baby bonnet combines comfort, softness, and a hint of vintage charm, making it perfect for your baby or someone you love.
Video Tutorial: