by
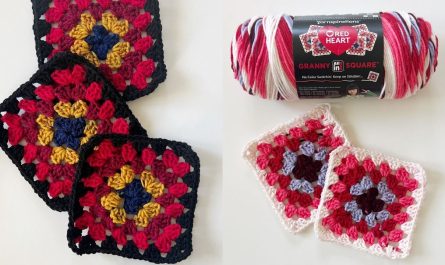
by Crochet is a timeless craft that continues to evolve, blending tradition with creativity. One of the most popular and versatile motifs in crochet is the granny square — a simple yet iconic building block that can be used to make everything from blankets to bags and garments. When you add a crochet flower to the center of a granny square, you get a beautiful fusion of texture and color that transforms a simple square into a work of art.
Whether you’re new to crochet or looking to add new motifs to your pattern library, learning how to crochet a flower granny square opens the door to endless possibilities.
What is a Flower Granny Square?
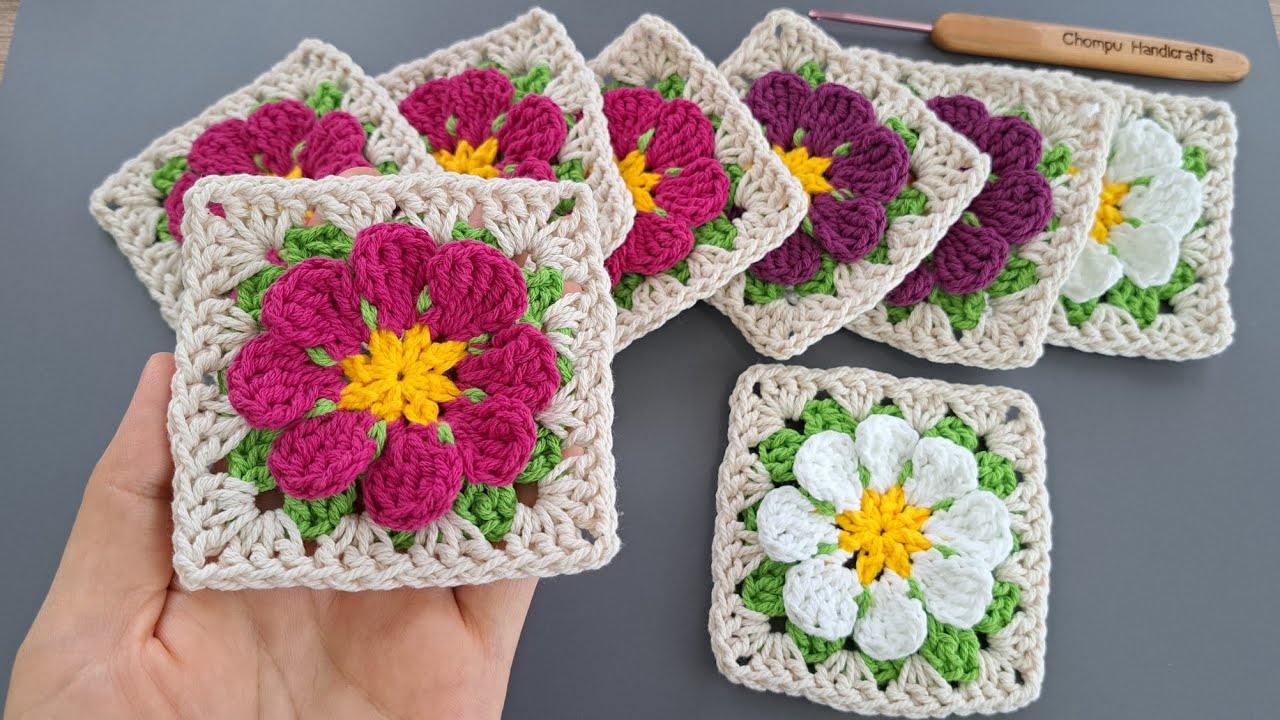
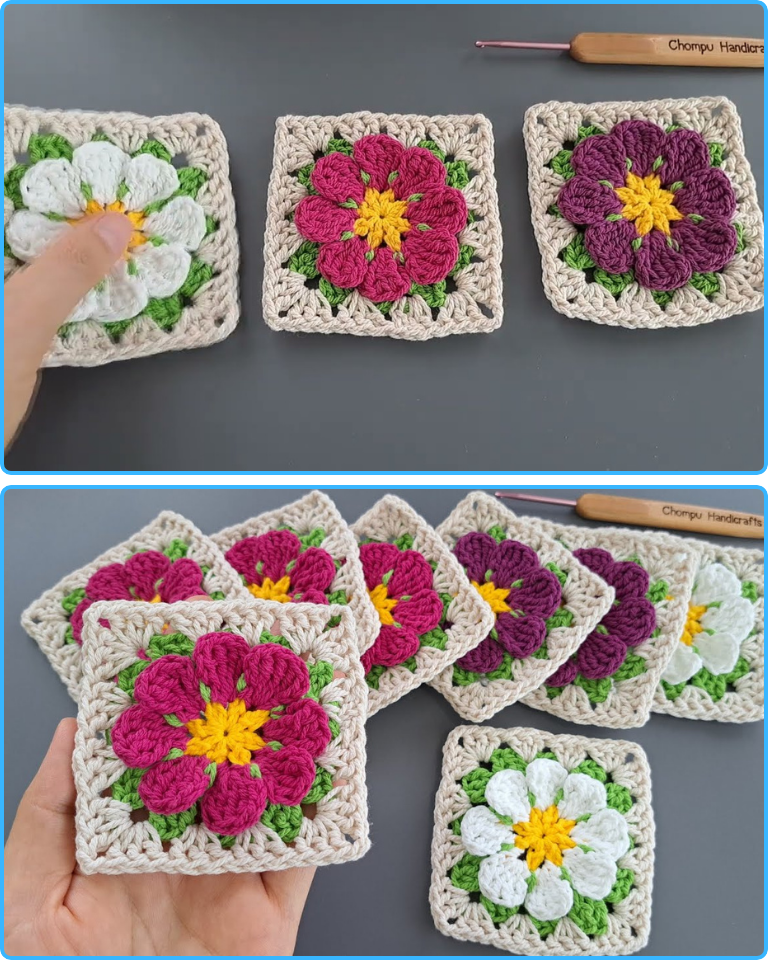
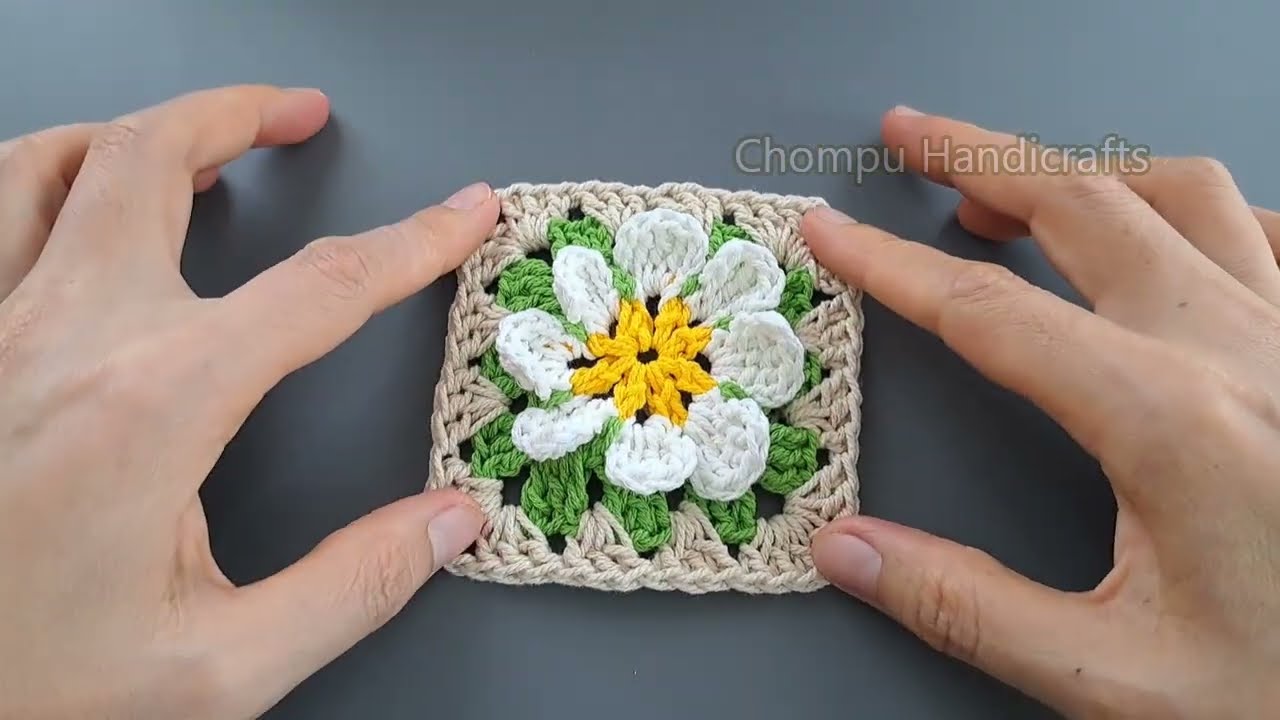
A flower granny square is a type of crochet motif where a flower is crocheted in the center, and the outer layers are shaped into a square. This gives the visual appeal of a blooming flower framed by a traditional square pattern — a perfect combination of organic and geometric beauty.
These squares are often used in:
-
Blankets and throws
-
Pillow covers
-
Tote bags and pouches
-
Sweaters and cardigans
-
Table runners and wall art
Materials You’ll Need
Before diving into the pattern, gather the following supplies:
Yarn:
-
Type: Worsted weight yarn (category 4) for a standard size.
-
Colors: At least two — one for the flower, and another for the background (square).
-
Fiber: Acrylic, cotton, or a blend (cotton offers great stitch definition; acrylic is easier to work with).
Hook:
-
Size 4.0mm (G/6) or as recommended on the yarn label.
Other Tools:
-
Yarn needle (for weaving in ends)
-
Scissors
-
Stitch marker (optional for beginners)
✨ Stitches You Should Know
This pattern uses beginner-to-intermediate stitches. You should be familiar with:
-
Slip Knot and Foundation Chain
-
Chain (ch)
-
Slip Stitch (sl st)
-
Single Crochet (sc)
-
Half Double Crochet (hdc)
-
Double Crochet (dc)
-
Treble Crochet (tr)
-
Cluster stitch (used for puffier flower centers)
Step-by-Step Pattern: Crochet Flower Granny Square
Below is a basic pattern to create a 3D flower granny square with layered petals.
Round 1: Make the Flower Center
-
Start with a magic ring, or chain 4 and join with a slip stitch to form a ring.
-
Ch 1, then work 12 single crochets (sc) into the ring.
-
Join to the first sc with a sl st. (12 stitches total)
TIP: Use a different color for the flower petals.
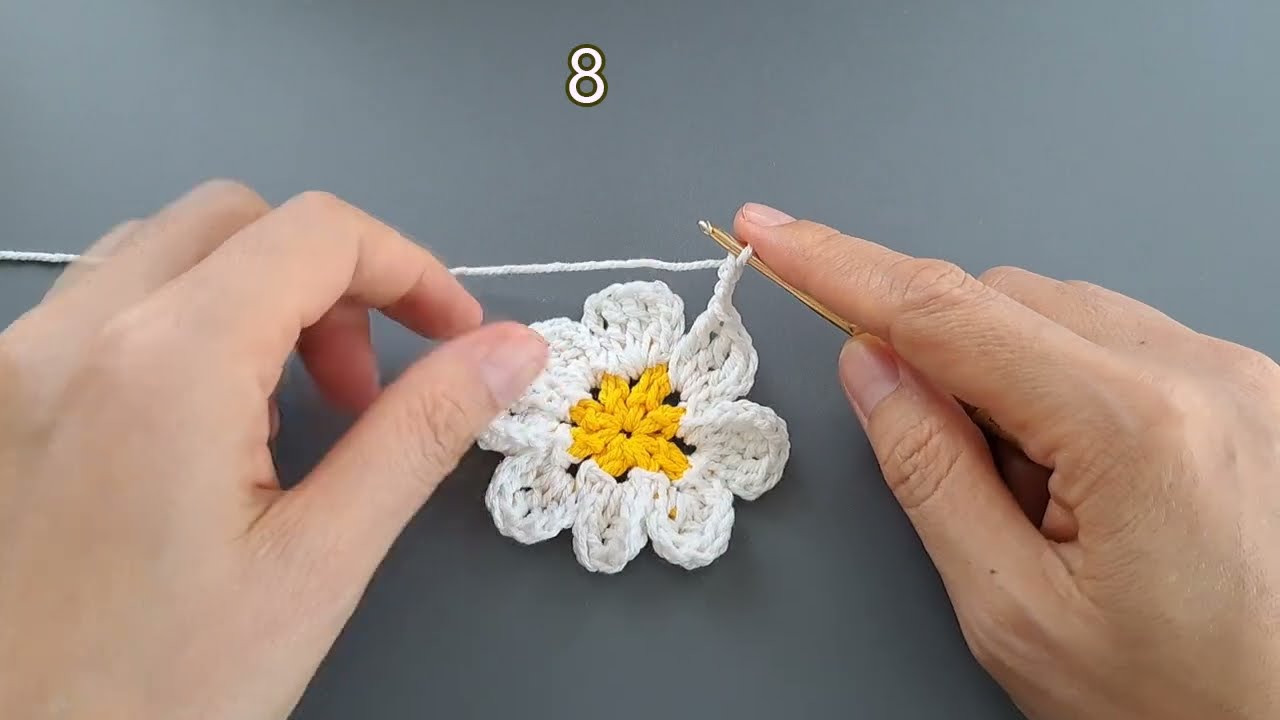
Round 2: Form the Flower Petals
-
Ch 2 (counts as part of your first petal).
-
In the same stitch, work (1 dc, 1 tr, 1 dc, ch 2).
-
Sl st into the next stitch.
-
Repeat this petal pattern: (Ch 2, 1 dc, 1 tr, 1 dc, ch 2, sl st in next st) around.
-
You’ll make 6 petals in total (or 12 if you work into each stitch).
You now have a complete flower in the round!
Round 3: Transition to the Square Shape
Switch to your background color (the one used for the square frame).
-
Insert hook behind a petal and sl st into the space between two petals.
-
Ch 3 (counts as a dc), 2 dc into the same space, ch 2, 3 dc into the same space — this forms a corner.
-
Move to the next space between petals, 3 dc.
-
Repeat the (3 dc, ch 2, 3 dc) in every third space to form the four corners, and 3 dc in the remaining two side spaces.
-
Join with a sl st to the top of the starting ch-3.
You now have a square with a flower centered inside!
Round 4 (Optional): Add One More Border
Continue with your square frame:
-
Ch 3, and work dc in each stitch around.
-
In each corner space, work (2 dc, ch 2, 2 dc).
-
Join with sl st.
Finishing Up
-
Fasten off the yarn and weave in all loose ends using your yarn needle.
-
Block your square to straighten edges if necessary (especially helpful for joining).
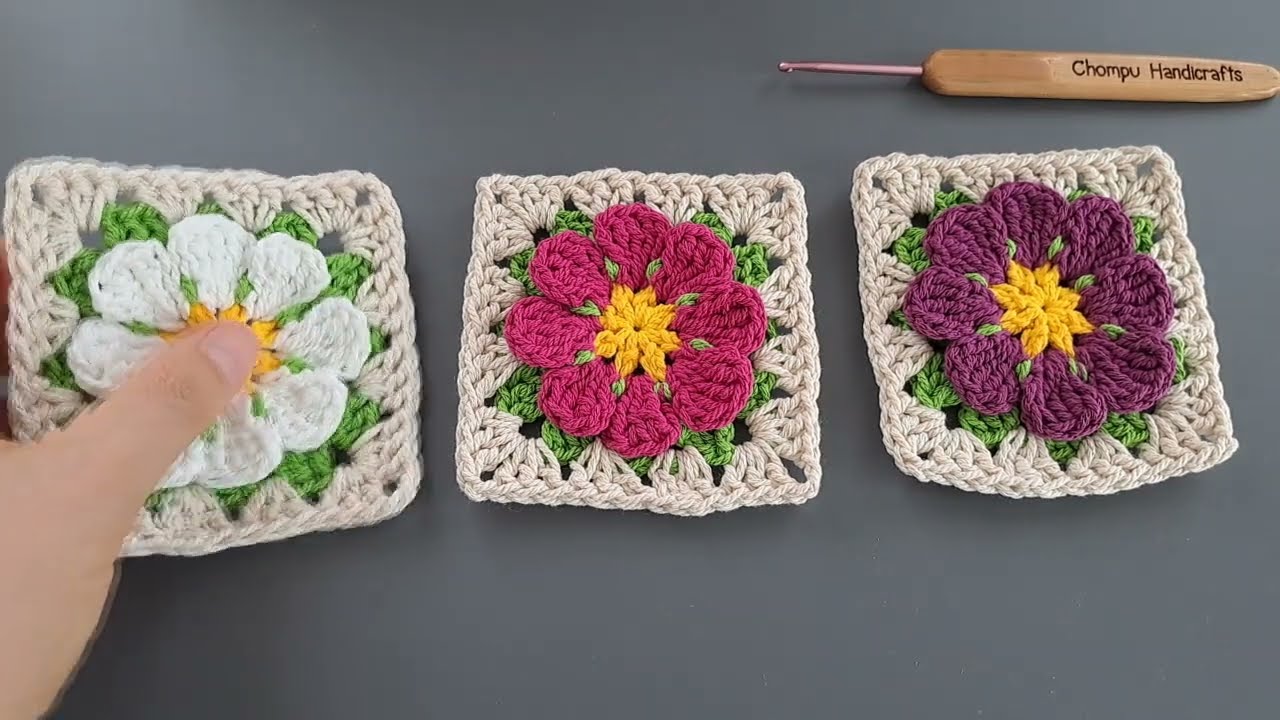
Customizations and Variations
1. Petal Styles
-
Use puff stitches or popcorn stitches for a chunkier 3D flower.
-
Layer a second set of petals behind the first for a fuller bloom.
2. Color Changes
-
Use gradient or ombré yarns for a multi-tone flower.
-
Alternate background colors for a patchwork quilt effect.
3. Square Sizing
-
Add more border rounds to increase square size.
-
Use thinner yarn and a smaller hook for smaller squares.
Joining Flower Granny Squares
Here are some popular methods for joining your granny squares:
1. Whip Stitch (Sewing)
-
Use a yarn needle and stitch squares together edge-to-edge.
-
Best for seamless joins.
2. Slip Stitch Join (Crochet)
-
Crochet squares together using slip stitches for a visible ridge.
3. Join-As-You-Go
-
Attach new squares while working the final round.
-
Saves time and creates a uniform join.
Creative Ideas Using Flower Granny Squares
Here are ways you can use your finished squares:
| Project | Notes |
|---|---|
| Blanket/Afghan | Combine multiple squares in a pattern. |
| Cushion Covers | 16 squares per side make a standard pillowcase. |
| Bags and Purses | Use squares for front/back panels. |
| Wall Hangings | Hang connected squares on a wooden dowel. |
| Baby Items | Use pastel shades for a soft, cozy baby gift. |
| Table Runners | Arrange them in a line and edge with lace. |
Tips for Beginners
-
Start with fewer squares and smaller projects like coasters.
-
Use stitch markers to keep track of corners.
-
Don’t worry if your first few squares aren’t perfect — blocking helps a lot!
-
Practice with scrap yarn until you’re confident in the pattern.
Conclusion
The flower granny square is more than just a pretty motif — it’s a celebration of color, creativity, and tradition. With a few simple stitches and your imagination, you can turn a ball of yarn into a square bursting with floral charm. From heirloom blankets to trendy accessories, the possibilities are endless.
By learning to crochet this beautiful motif, you’re not just making a square — you’re building the foundation for countless creative projects to come.
Video tutorial: