 by
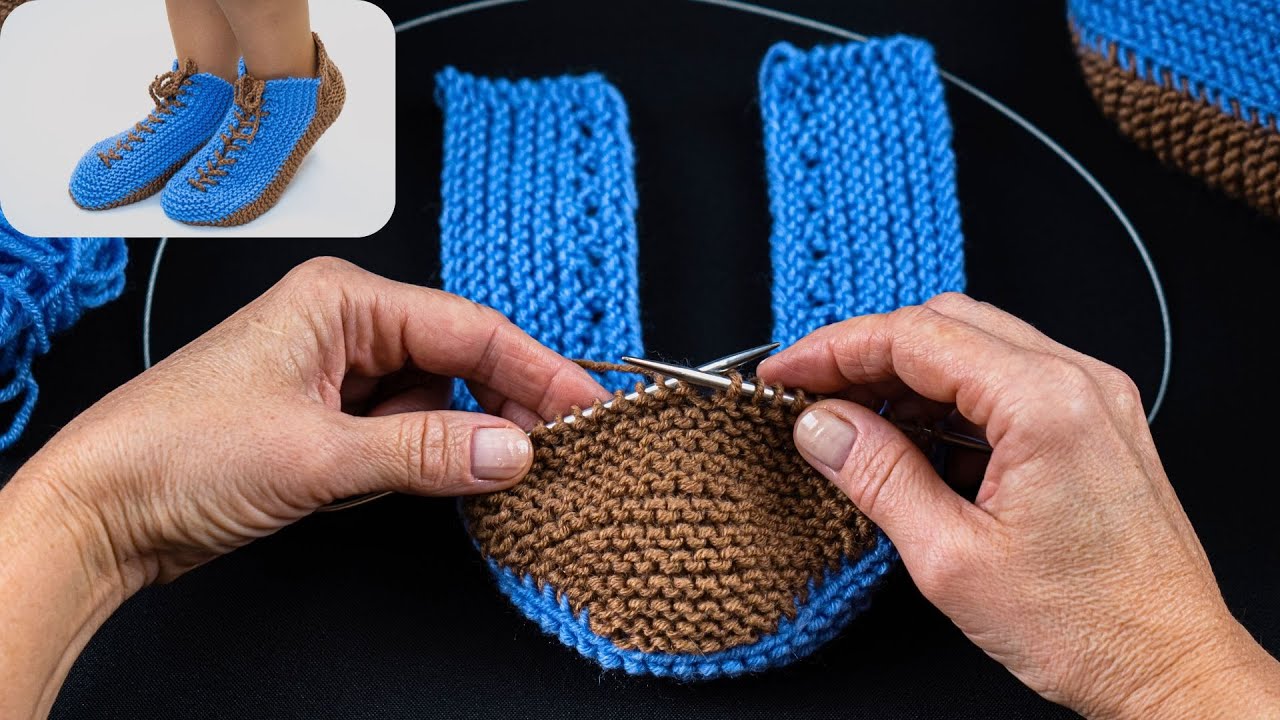
by Here is a clear, detailed, and beginner-friendly tutorial for making very simple knitted slippers. This pattern is worked flat on two needles, uses basic stitches only, and is perfect even if you are new to knitting 

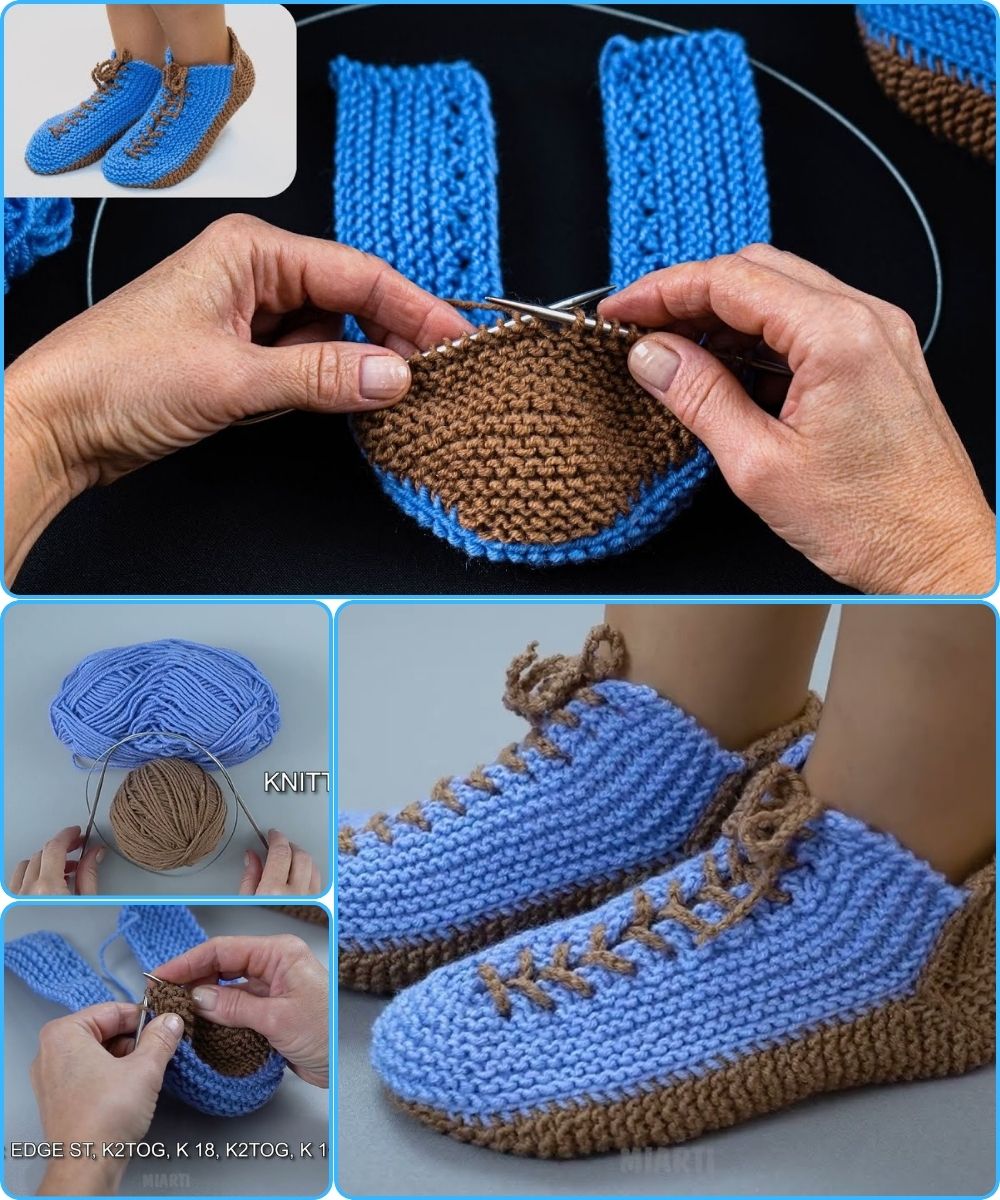
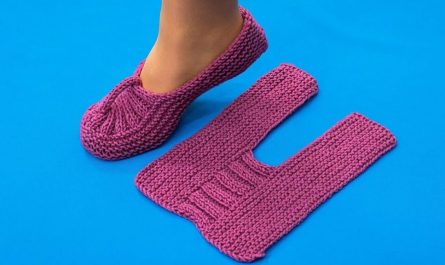
How to Make Very Simple Knitted Slippers
A Detailed Step-by-Step Tutorial
Skill Level
Beginner
Finished Size
Adult medium (easy to adjust for any foot size)
Materials Needed
-
Yarn: Medium-weight yarn (Category 4 / worsted weight)
 Choose soft, warm yarn; wool or acrylic blends work well
 -
Knitting needles: Two straight needles, size US 7–8 (4.5–5 mm)
-
Yarn needle (for sewing seams)
-
Scissors
Basic Knitting Skills Used
-
Cast on
-
Knit stitch (k)
-
Purl stitch (p)
-
Knit two together (k2tog – simple decrease)
-
Bind off
-
Sewing seams

Knitting Abbreviations
-
k – knit
-
p – purl
-
k2tog – knit two stitches together
-
st(s) – stitch(es)
Stitch Pattern
Garter Stitch (knit every row) Does not curl Easy to count Perfect for slippers
Step-by-Step Instructions
Step 1: Cast On
Cast on 36 stitches.
Tip: For wider feet, cast on 40 stitches. For smaller feet, cast on 32 stitches.
Step 2: Knit the Sole
-
Knit every row (garter stitch)
-
Continue until the piece measures about 9 inches (23 cm) or the length of your foot from heel to toe
This flat rectangle will form the sole of the slipper.
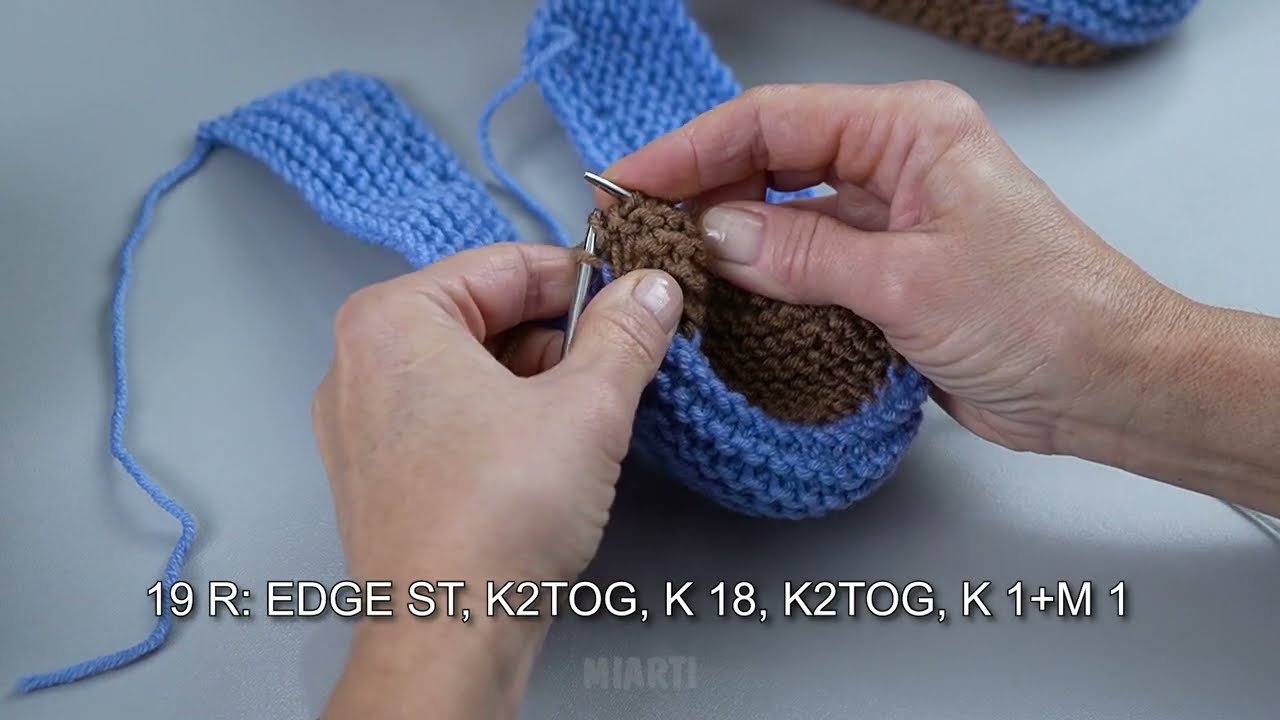
Step 3: Shape the Toe
To shape the front of the slipper:
-
Knit 2 stitches together at the beginning of the row
-
Knit until 2 stitches remain, then knit 2 together
-
Knit the next row normally (no decreases)
Repeat these steps until 20 stitches remain.
Step 4: Knit the Top of the Foot
-
Knit all rows (garter stitch) for 2–2.5 inches (5–6 cm)
This section covers the top of your foot.
Step 5: Shape the Heel
-
Knit across 10 stitches, then turn
-
Knit back across these 10 stitches only
-
Continue knitting back and forth on these stitches for 2 inches (5 cm)
This creates the heel flap.
Step 6: Bind Off
Bind off all stitches loosely.
Cut yarn, leaving a 10–12 inch tail for sewing.
Step 7: Assemble the Slipper
Using a yarn needle:
-
Fold the piece in half
-
Sew the toe seam
-
Sew the heel seam
-
Turn the slipper right side out
Repeat all steps to make the second slipper.
Optional Finishing Touches
-
Pick up stitches around the opening and knit K1, P1 ribbing for a snug cuff
-
Add non-slip fabric dots to the sole
-
Sew on a button, pom-pom, or small bow
Adjusting the Size
-
Smaller feet: Cast on fewer stitches and knit a shorter sole
-
Larger feet: Cast on more stitches and knit a longer sole
Always match the sole length to the foot length for best fit.
Beginner Tips
-
Use light-colored yarn so you can see stitches clearly
-
Keep tension even but relaxed
-
Try the slipper on as you knit
-
Don’t worry about small mistakes—slippers are forgiving!
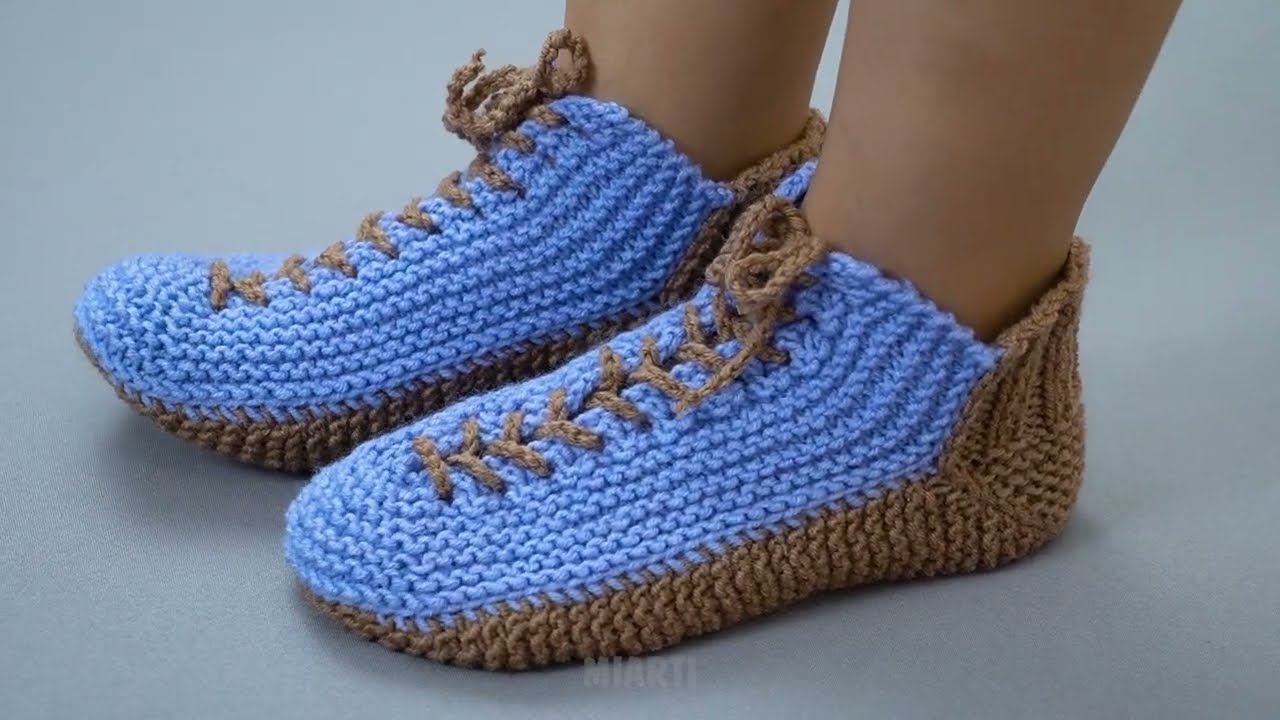
 Congratulations! You’ve made a pair of very simple, cozy knitted slippers using basic stitches and two needles.
If you’d like, I can:
-
Create a one-page printable pattern
-
Adapt this for kids or babies
-
Show a no-sew version
-
Add pictures or diagrams
Watch video: