by
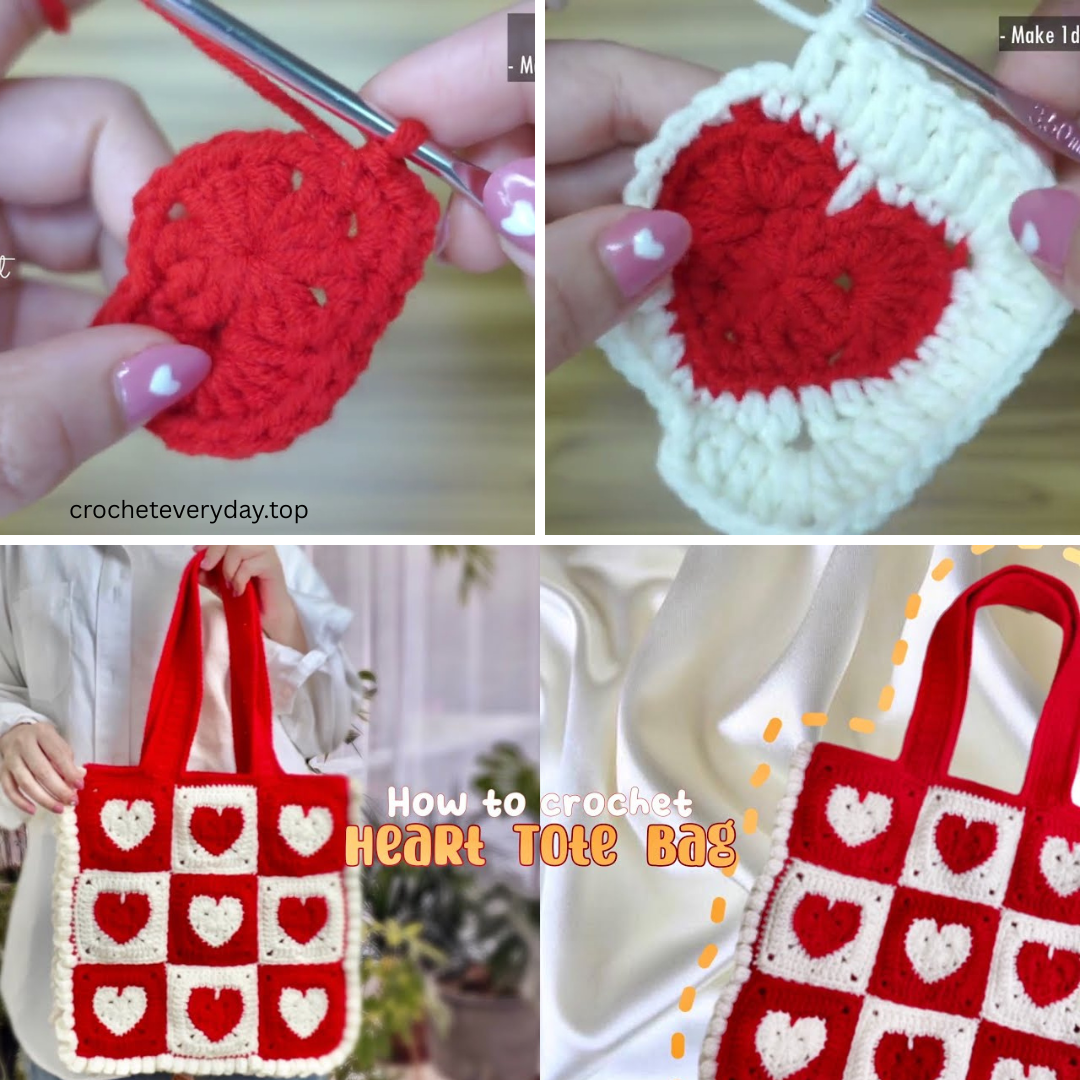
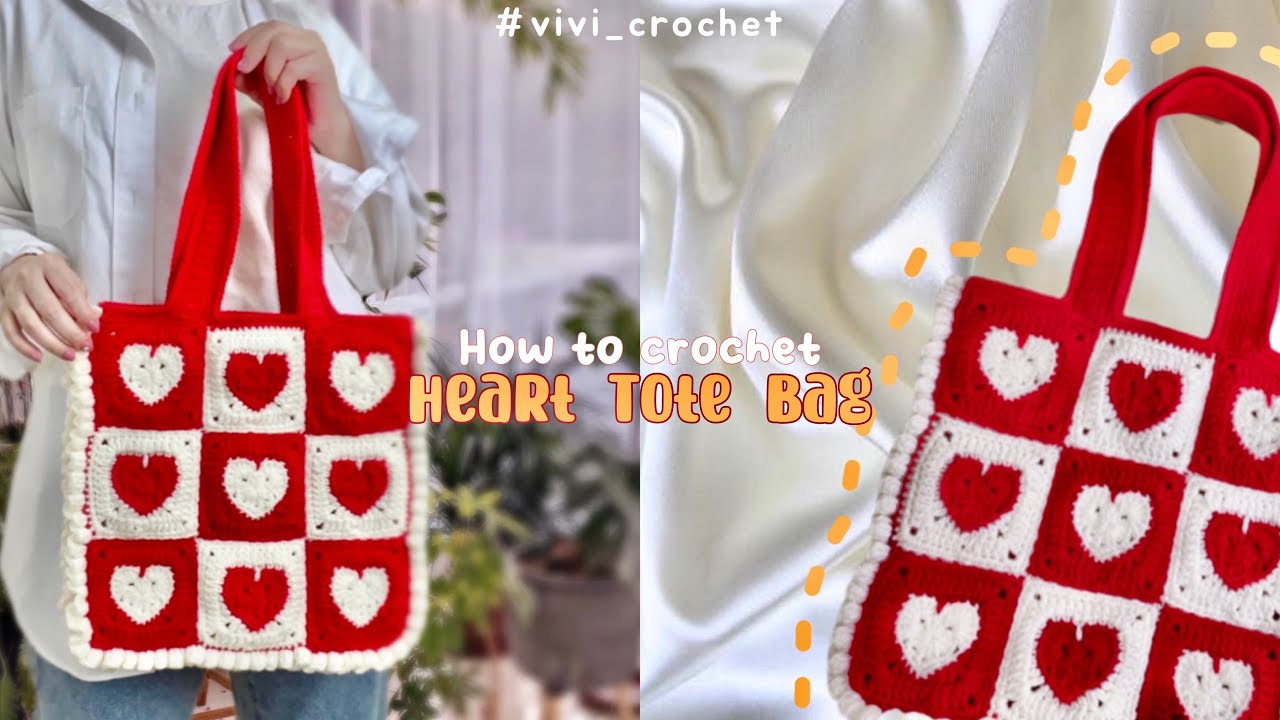
by Granny square projects have long been a favorite among crocheters of all levels. Their versatility, charm, and nostalgic appeal never go out of style. Add a heart motif to the center, and you’ve got a romantic, eye-catching piece perfect for expressing your style or gifting to someone special. In this detailed guide, you’ll learn how to crochet a Heart Granny Squares Tote Bag from scratch, including how to make the squares, assemble them into a bag, and finish with handles and optional lining.
Whether you’re a beginner or just looking to tackle a new crochet bag design, this project will be as enjoyable to make as it is to carry.
Materials You’ll Need
To start your heart granny square tote bag project, make sure you have the following materials on hand:
✦ Yarn
-
Type: Worsted weight (Category 4) yarn works best
-
Fiber: Cotton or cotton-acrylic blend (durable and structured)
-
Colors:
-
Color A (Heart) – Red, pink, or any accent color
-
Color B (Background) – White, cream, or neutral
-
Color C (Join and Border) – Optional contrast or matching tone
-
✦ Tools
-
Crochet Hook: 4.0mm to 5.0mm (check yarn label)
-
Tapestry Needle: For sewing and weaving in ends
-
Scissors
-
Stitch Markers (optional)
-
Fabric & Lining Materials (optional for inner lining)
-
Handles: You can crochet straps, buy leather handles, or use wooden/plastic rings
♥️ Skill Level
-
Beginner to Intermediate
-
Must be familiar with:
-
Chain (ch)
-
Single crochet (sc)
-
Double crochet (dc)
-
Slip stitch (sl st)
-
Magic ring (optional)
-
Working in rounds
-

Overview of the Project
-
Crochet multiple heart granny squares
-
Block the squares for evenness
-
Join squares into panels (front, back, sides, bottom)
-
Assemble the panels into a tote shape
-
Add handles and optional lining
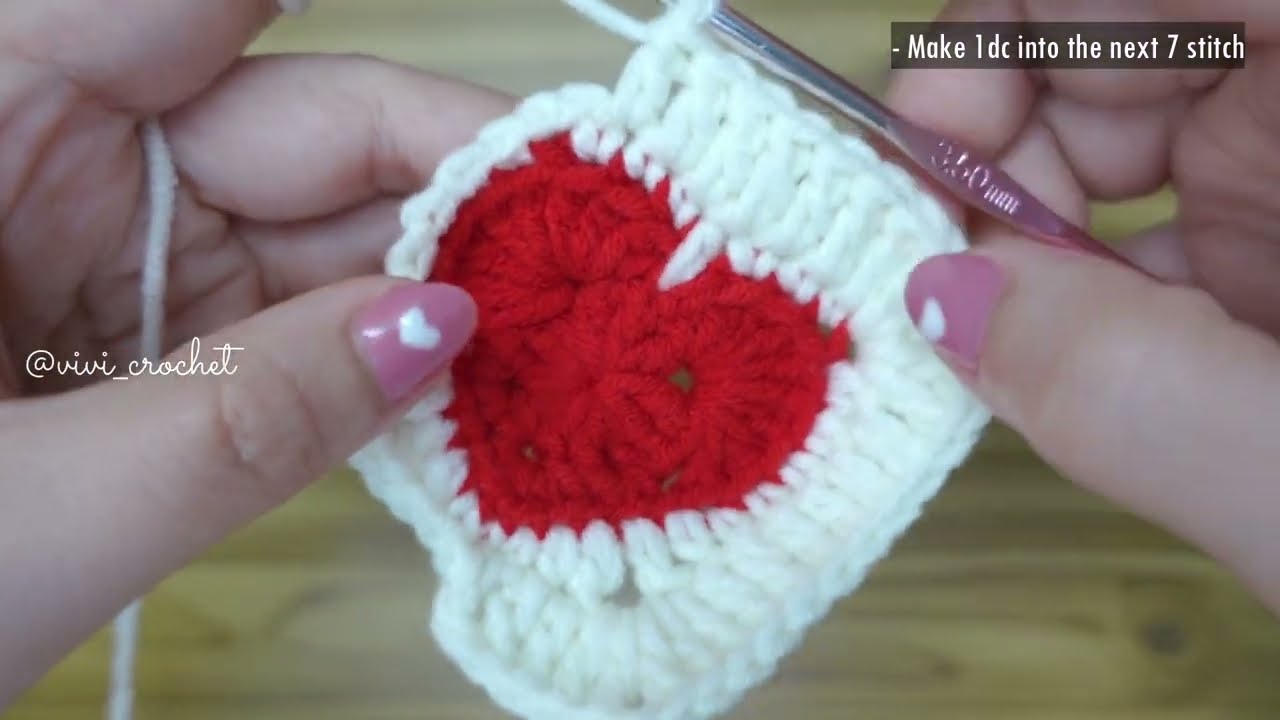
❤️ Part 1: Crocheting the Heart Granny Square
Here’s how to make a single square. You’ll need about 13–20 squares depending on the desired bag size (e.g. 3×3 squares for small, 4×5 for large).
✦ Round 1: Make the Heart Center
Using Color A (heart color):
-
Start with a magic ring (or ch 4 and join with sl st to form a ring).
-
Ch 3 (counts as dc), then work 2 dc, 3 hdc, 1 dc, 3 hdc, 2 dc, ch 3, and sl st into the center ring.
-
Fasten off. You should now have a heart shape.
✦ Round 2: Create the Square Around the Heart
Switch to Color B (background color):
-
Join yarn at the top-center of the heart with a sl st.
-
Ch 3, dc in same stitch. Begin working dc around the heart:
-
Place 2 dc in each stitch, evenly distributed around the heart’s outer edge.
-
In the dip at the top of the heart, place (sc, ch 1, sc).
-
At the point of the heart, place (2 dc, ch 2, 2 dc) to form the square’s bottom corner.
-
-
Adjust tension so the shape becomes more square-like.
-
End with sl st to beginning ch-3.
-
Fasten off and weave in ends.
✦ Optional Round 3–4: Expand the Square
Continue in granny square style:
-
Join Color C (or continue with Color B).
-
Work (3 dc, ch 1) clusters around, with (3 dc, ch 2, 3 dc) in corners.
-
Continue for one or two more rounds to increase square size.
Tip: Block the squares with steam or a damp cloth to help them lay flat and uniform.
Part 2: Assembling the Bag Panels
✦ Decide on Layout
Popular layouts include:
-
3×3 square layout (9 squares) – Small tote
-
4×4 (16 squares) – Medium tote
-
Front & back panels – Each made from 4–9 squares
-
Side/bottom panels – Either 1-row of squares or solid single crochet strips
✦ Join Squares Together
You can use either method:
1. Slip Stitch Join (Visible Seam)
-
Place squares right sides facing out
-
Sl st through both loops of adjoining squares
-
Creates a textured, raised join
2. Whip Stitch (Invisible Seam)
-
Place squares right sides together
-
Sew through back loops only for a clean seam
Repeat until all squares are joined into panels.
Part 3: Assemble the Tote
✦ Step-by-Step Assembly
-
Join Side Panels to Front/Back: Align and sew the edges together using whip stitch or sc.
-
Add Bottom Panel: You can crochet a solid rectangle base (e.g., sc rows) or use another row of granny squares.
-
Reinforce Seams: Crochet a round of sc around the top edge of the bag to stabilize the opening.
Part 4: Add Straps or Handles
You have several options:
✦ Crochet Handles:
-
Ch 60–80 (based on desired length)
-
Row 1–3: Sc across for 2–3 rows to thicken
-
Attach ends securely to inside edge of the tote
✦ Use Store-Bought Handles:
-
Leather, wooden, or bamboo handles
-
Sew or crochet loops for attaching
Optional: Add a Lining
A lining gives structure and prevents stretching.
✦ Simple Lining Steps:
-
Cut fabric to match bag dimensions (front, back, sides, and bottom)
-
Sew pieces together into a bag shape
-
Insert into crocheted tote
-
Hand-sew around the top edge using matching thread
Add inner pockets or zippers for extra utility!
Care Instructions
-
Hand wash only
-
Lay flat to dry
-
Store in a dry place to maintain shape
-
Spot clean gently with damp cloth
Customization Ideas
-
Use variegated yarn for rainbow hearts
-
Add fringe, tassels, or pom-poms
-
Include a button or drawstring closure
-
Mix solid and heart granny squares for visual contrast
Perfect For…
-
Valentine’s Day gifts
-
Handmade market stalls
-
Custom commissions
-
Everyday eco-friendly carry bags
♥️ Final Thoughts
The Heart Granny Squares Tote Bag is a joyful blend of classic crochet charm and modern flair. It’s a beautiful way to combine your love of color, creativity, and functional fashion into one eye-catching project. With some patience and a touch of love, you’ll end up with a bag that’s as practical as it is precious.
Whether you wear it as an everyday tote or gift it to a loved one, this bag will surely carry hearts—literally and figuratively.
Video Tutorial :