by
by Crocheting is a timeless craft that offers a wide range of possibilities—from cozy sweaters and delicate doilies to small accessories like jewelry and hairpins. If you’re looking for a creative way to elevate your style or create personalized gifts, crocheted hairpins are a charming and practical option. These dainty, handmade accessories not only showcase your crafting skills but also add a unique flair to your wardrobe.
In this comprehensive guide, we’ll take you step-by-step through the process of crocheting beautiful hairpins. Whether you’re a beginner or a seasoned crocheter, you’ll find useful tips, patterns, and inspiration to create one-of-a-kind hair accessories.
Why Crochet Hairpins?
Before diving into the tutorial, let’s explore why crocheted hairpins are worth making:
-
Customization: Choose your own colors, patterns, and embellishments.
-
Eco-Friendly: Use natural yarns and avoid mass-produced plastic accessories.
-
Budget-Friendly: A little yarn goes a long way—perfect for scrap yarn projects.
-
Gift-Worthy: Make unique, handmade gifts for friends and family.
-
Stylish and Versatile: Add a vintage, boho, or minimalist flair to any look.
Materials You’ll Need
Basic Supplies
-
Yarn: Lightweight yarn like cotton, bamboo, or lace weight. Choose colors that match your personal style.
-
Crochet Hook: Typically 2.0 mm to 3.5 mm depending on the yarn.
-
Hairpins/Bobby Pins/Clips: Metal pins or barrettes that can hold the crochet embellishment.
-
Tapestry Needle: For weaving in ends.
-
Scissors: Sharp for clean cuts.
-
Glue Gun or Needle and Thread: To attach crochet pieces to pins securely.
-
Optional Embellishments: Beads, pearls, buttons, or small fabric flowers.
Basic Crochet Stitches You’ll Use
If you’re new to crochet, familiarize yourself with these basic stitches:
-
Slip Knot and Chain (ch)
-
Slip Stitch (sl st)
-
Single Crochet (sc)
-
Half Double Crochet (hdc)
-
Double Crochet (dc)
-
Magic Ring (also called Magic Circle)
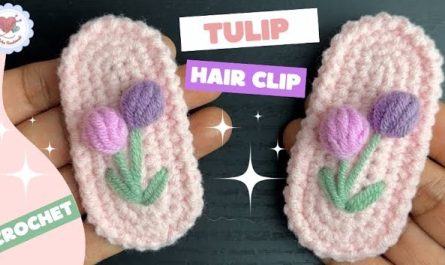
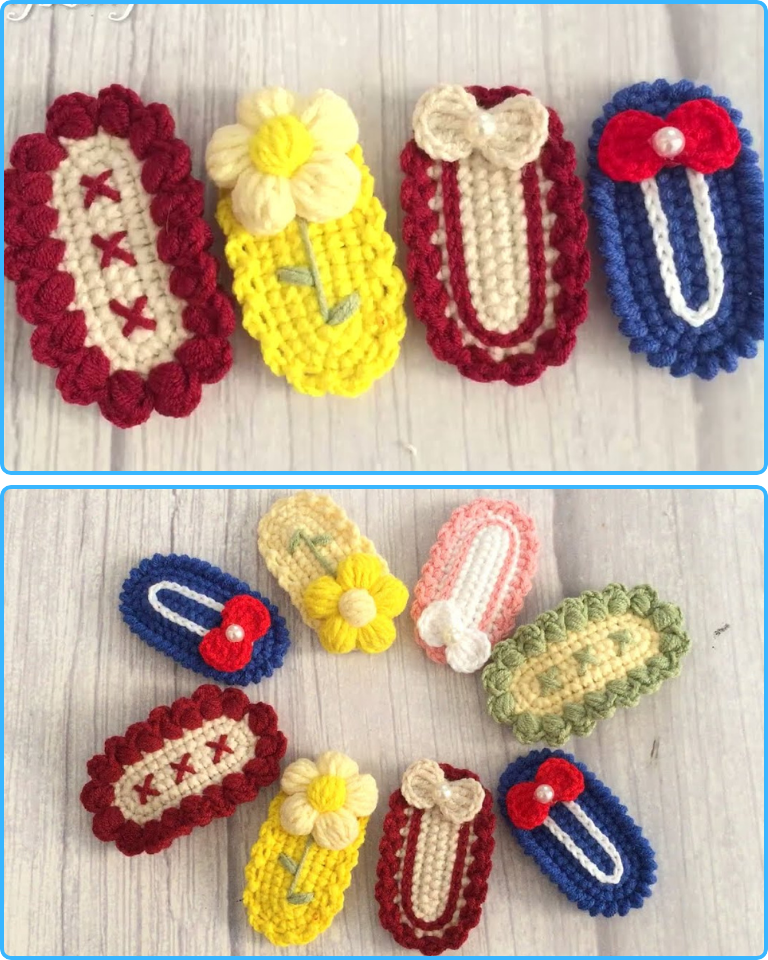
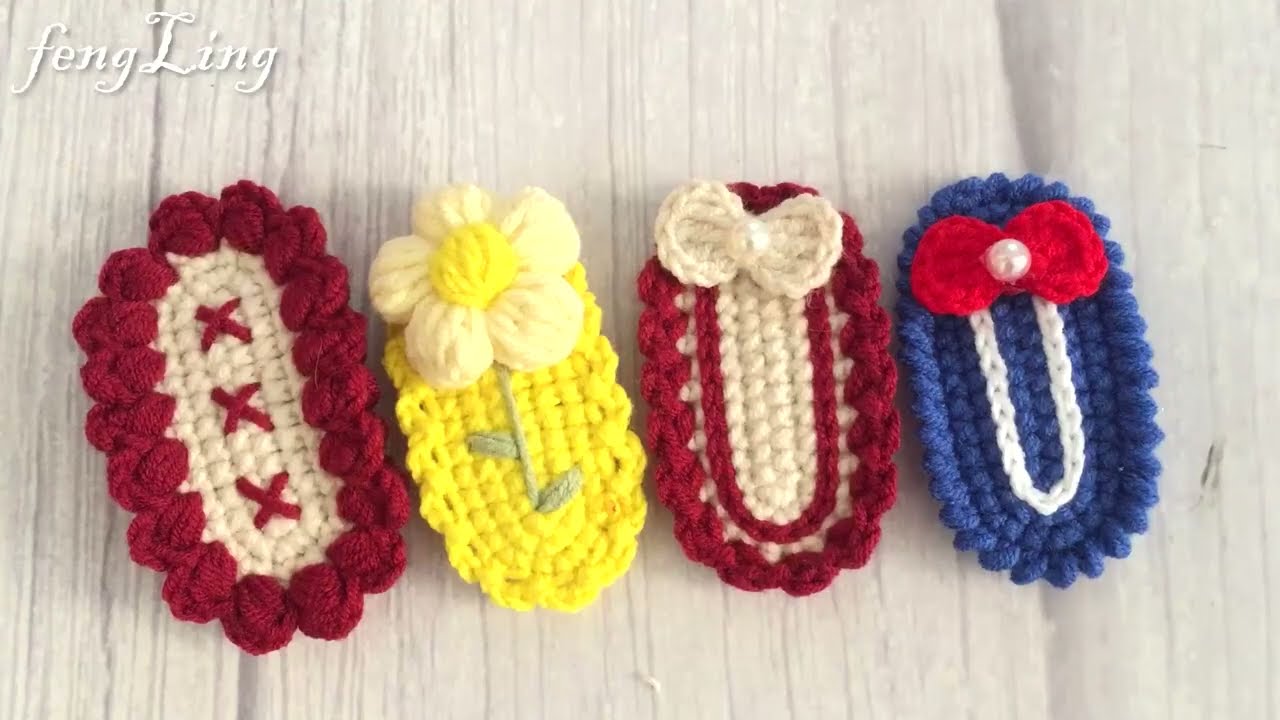
Step-by-Step Guide: Crochet Flower Hairpin
Pattern 1: Simple Crochet Flower
Step 1: Make a Magic Ring
-
Create a loop with your yarn.
-
Insert hook into the loop, yarn over, pull through, and chain 1 to secure.
-
This will be the center of your flower.
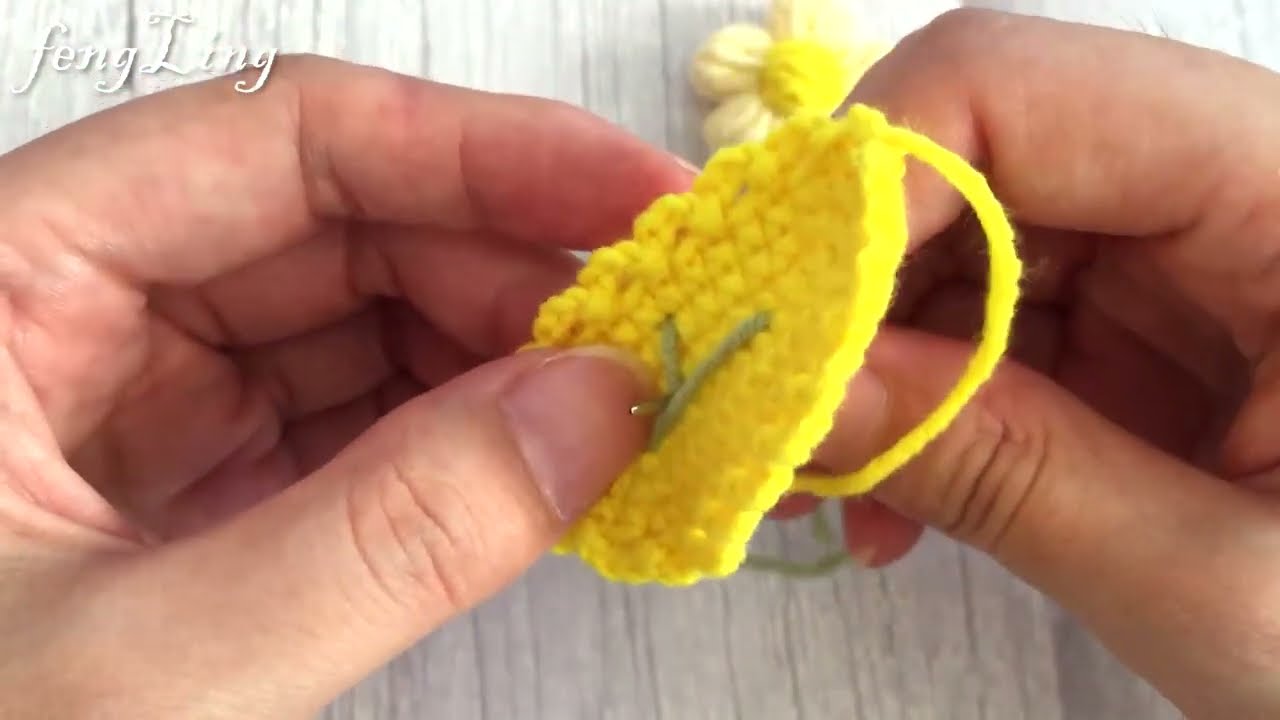
Step 2: Crochet Petals
-
Round 1: Chain 1, then work 6 single crochet stitches into the ring.
-
Pull the tail to close the ring, and join with a slip stitch to the first sc.
-
Round 2 (Petals):
-
Chain 2, work 2 double crochets into the next stitch, chain 2, slip stitch into the same stitch.
-
Repeat this for each of the 6 stitches around to make 6 petals.
-
-
Finish off and weave in ends.
Step 3: Attach to Hairpin
-
Use a glue gun or needle and thread to sew the flower onto the flat side of the bobby pin or barrette.
-
Let glue dry thoroughly before use.
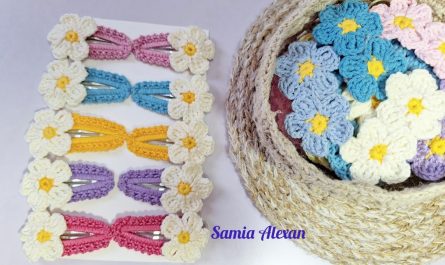
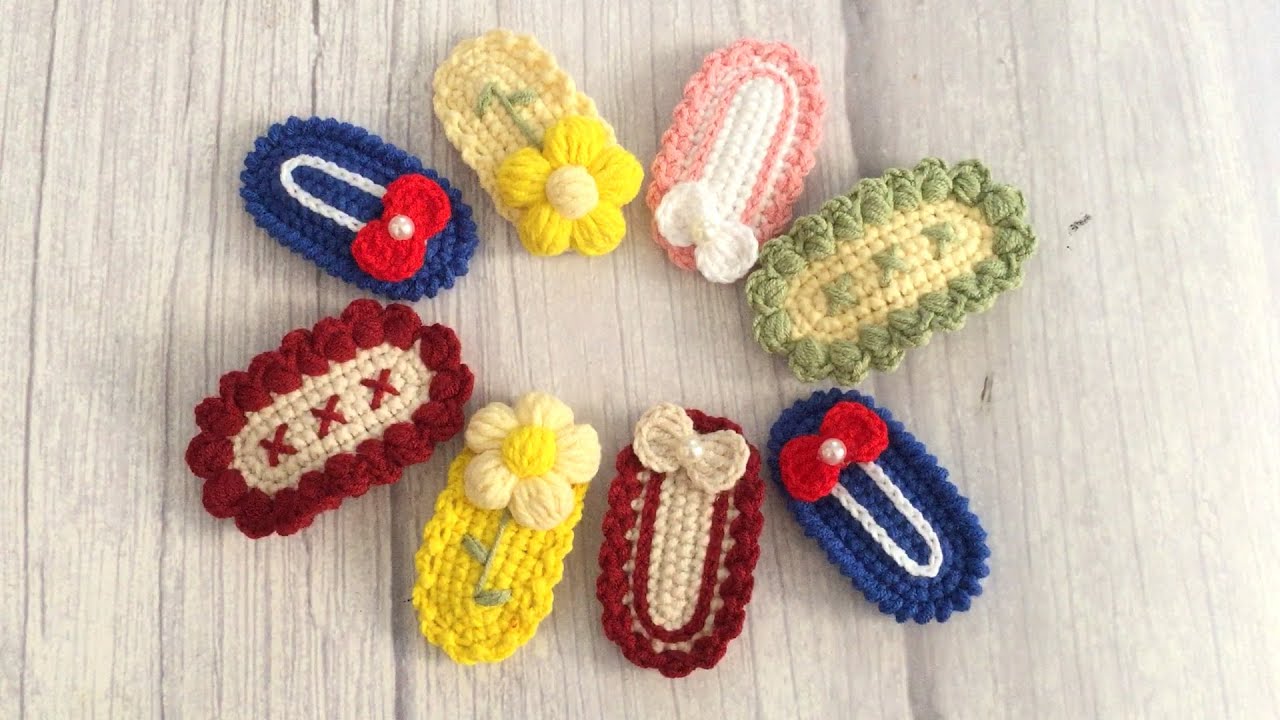
Alternative Designs
Pattern 2: Mini Rosette
-
Round 1: Chain 13.
-
Round 2: Starting in the 3rd chain from hook, dc 3 in each chain across.
-
This will cause the piece to curl.
-
Roll it into a rosette shape and sew the base.
-
Attach it to the pin with glue or thread.
Pattern 3: Spiral Motif
-
Chain 20.
-
Work 2 single crochet into each chain across.
-
The piece will spiral naturally.
-
Shape into a circle and secure with a few stitches or hot glue.
-
Affix it to your hairpin.
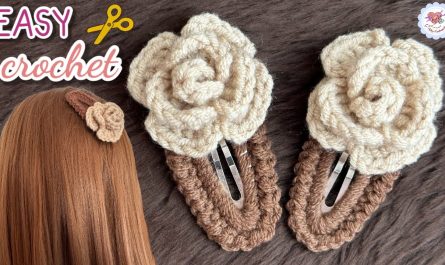
Tips for Making Stunning Crochet Hairpins
-
Use contrasting thread or metallic yarn for a touch of glam.
-
Block your motifs to shape them perfectly before attaching.
-
Mix and match motifs—like pairing a flower with a leaf or two.
-
Add beads or small pearls in the center for added elegance.
-
Secure firmly to the hairpin to avoid slipping or fraying.
Styling Ideas
Here are a few ways to use your handmade crochet hairpins:
-
Boho Chic: Pair floral pins with loose waves or braids.
-
Vintage Glam: Use neutral or pastel colors and pair with a retro dress.
-
Minimalist Style: Try geometric shapes like circles or triangles in solid colors.
-
Children’s Accessories: Use bright colors and cute shapes like butterflies or stars.
Caring for Your Crochet Hairpins
-
Avoid water exposure if glued—opt for sewing instead for washable pieces.
-
Store flat to preserve the shape.
-
Spot clean only unless you can remove the crochet motif from the pin.
-
Use fabric stiffener for durability if desired.
Advanced Ideas
Once you master the basics, try these:
-
Lace Motifs: Use thinner thread and steel hooks for a delicate look.
-
Layered Flowers: Combine two or three flower motifs of different sizes.
-
Tiny Amigurumi Shapes: Hearts, animals, or bows.
-
Seasonal Designs: Snowflakes for winter, leaves for autumn, etc.
Conclusion
Crocheting hairpins is a fun, accessible, and rewarding craft that combines functionality with beauty. With just a little yarn and creativity, you can turn everyday hair accessories into personalized fashion statements. Whether you keep them for yourself or give them as thoughtful handmade gifts, crocheted hairpins are a charming addition to any collection.
So grab your hook, pick your favorite pattern, and start stitching—your next beautiful hairpin is only a few loops away!
Video tutorial: