by
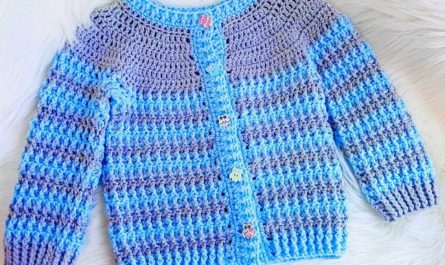
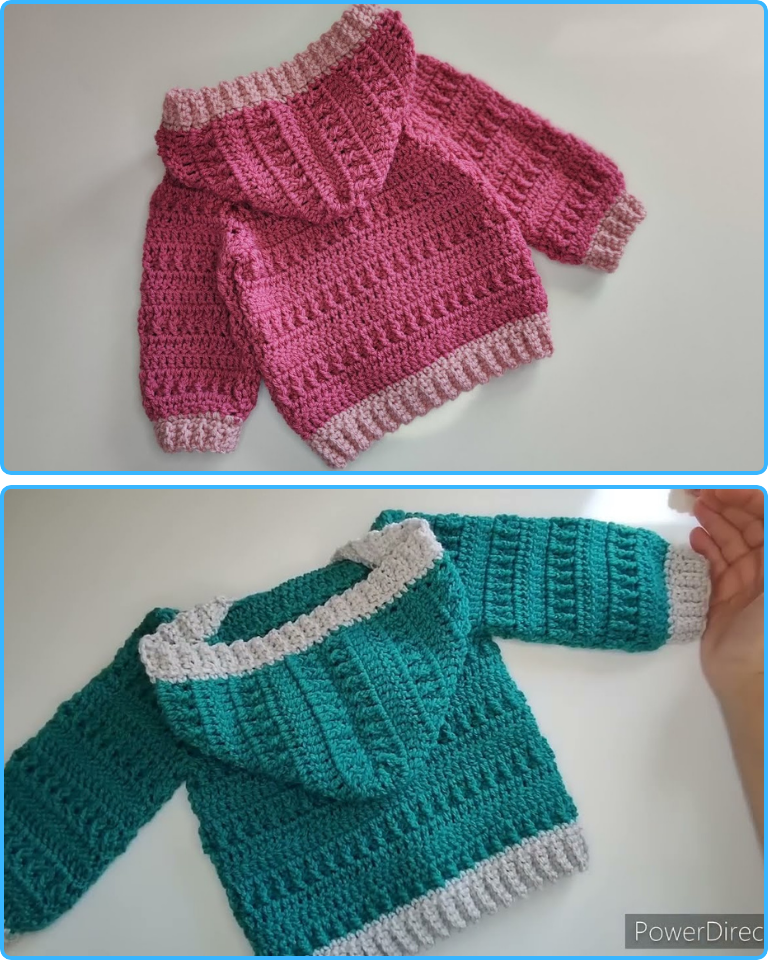
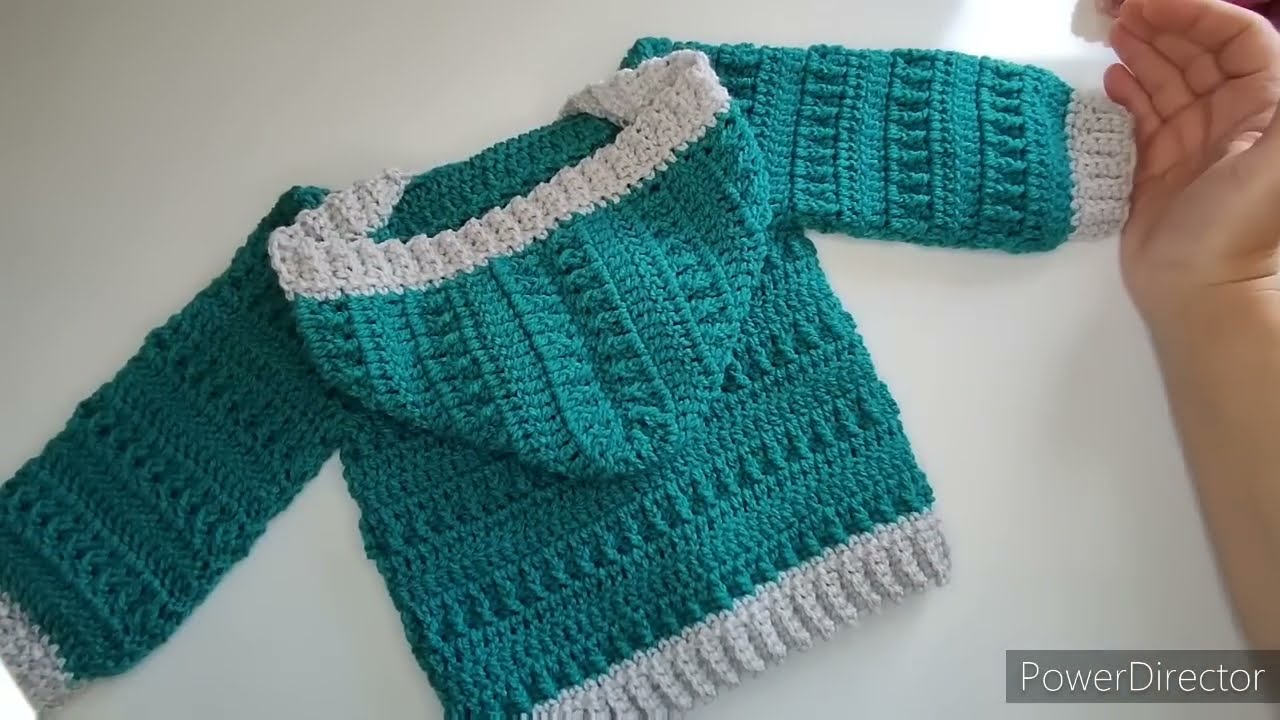
by Crocheting a baby hoodie is a heartwarming and practical project that makes for a perfect handmade gift or addition to your little one’s wardrobe. Unlike store-bought baby clothes, a crocheted hoodie can be customized in color, texture, size, and detailing—making it truly one of a kind.
This comprehensive guide will take you through everything you need to know to crochet a cozy, adorable baby hoodie, even if you’ve never tackled a garment project before. Whether you prefer to follow a pattern or want to improvise with your own touches, this tutorial has got you covered.
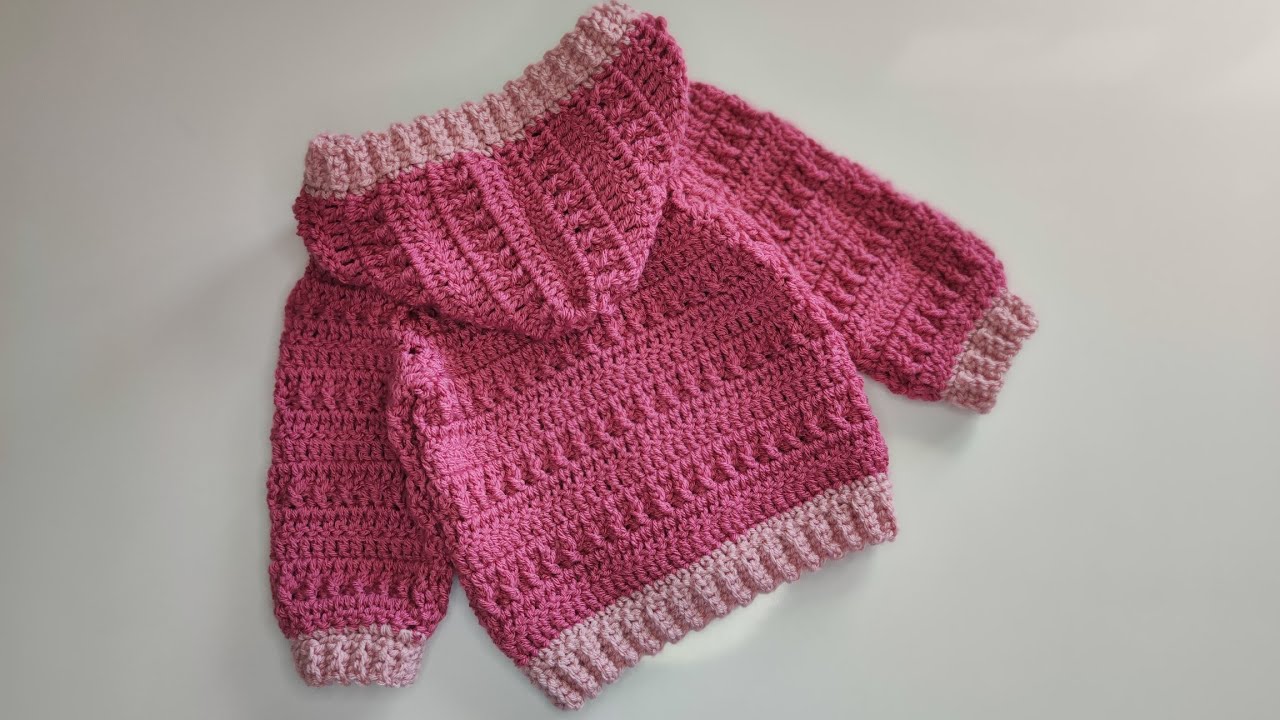
Table of Contents
-
Materials and Tools Needed
-
Choosing Yarn and Size
-
Understanding Construction Styles
-
Essential Stitches and Techniques
-
Step-by-Step Pattern (for 6–12 Months Size)
-
Adding a Hood
-
Optional Additions: Pockets, Buttons, Ears, and More
-
Finishing Touches and Care Instructions
-
Tips for Customization
-
Conclusion
1. Materials and Tools Needed
To make a baby hoodie, you’ll need the following:
Yarn:
-
Worsted weight yarn (medium #4)
Baby-friendly yarns like:-
Bernat Softee Baby Cotton
-
Lion Brand Baby Soft
-
Paintbox Yarns Cotton Aran
-
Red Heart Soft Baby Steps
-
You’ll need approximately:
-
300–400 yards for size 6–12 months
Hook:
-
5.0 mm (H-8) crochet hook
(Check your yarn label for a recommended hook size.)
Notions:
-
Yarn needle
-
Scissors
-
Stitch markers
-
Measuring tape
-
Buttons (if desired, for the closure)
-
Optional: Zipper (for more secure closure)
2. Choosing Yarn and Size
Crochet garments for babies should prioritize softness and ease of washing. Look for:
-
Hypoallergenic
-
Machine-washable yarn
-
Breathable fiber (cotton, cotton blends, or soft acrylics)
Size Chart (Standard Guidelines):
| Age | Chest Circumference | Hoodie Length | Sleeve Length |
|---|---|---|---|
| 0–3 months | 16″ | 10″ | 6″ |
| 6–12 months | 18″ | 12″ | 8″ |
| 12–18 months | 20″ | 13″ | 9″ |
This guide will focus on a 6–12 month hoodie. Adjust accordingly by increasing the stitch count or using larger hooks for bigger sizes.
3. Understanding Construction Styles
There are several ways to construct a baby hoodie:
-
Top-down (raglan-style) – Seamless, worked from the neckline down
-
Bottom-up – Worked in parts and sewn together
-
Side-to-side – Worked across the body width and folded
-
Granny square or motif-based – More decorative and modular
We’ll be using a top-down raglan-style construction for a seamless and beginner-friendly approach.
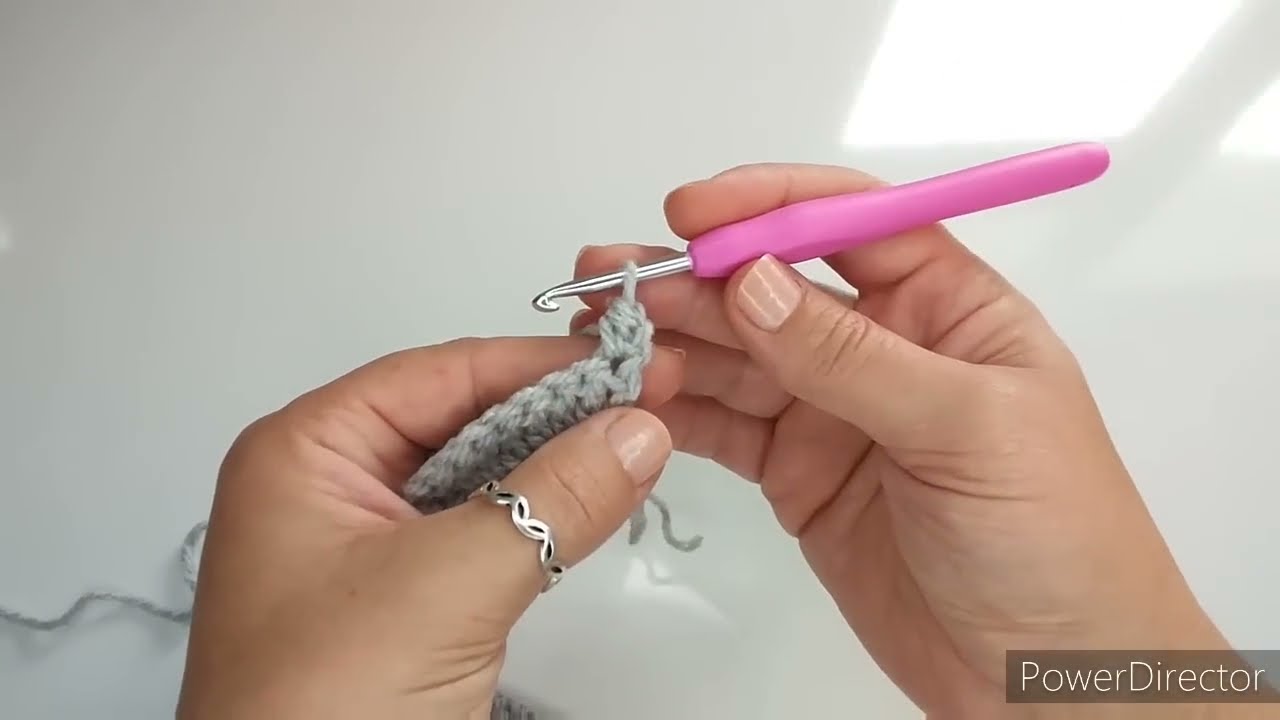
4. Essential Stitches and Techniques
You should be comfortable with the following:
-
Chain (ch)
-
Slip Stitch (sl st)
-
Single Crochet (sc)
-
Half Double Crochet (hdc)
-
Double Crochet (dc)
-
Increasing and Decreasing
-
Working in rounds and rows
5. Step-by-Step Baby Hoodie Pattern (6–12 Months)
Let’s get started!
Step 1: Yoke (Top of Hoodie)
Using your 5.0 mm hook and main yarn:
Row 1:
Ch 41.
Sc in 2nd ch from hook and across. (40 sts)
Turn.
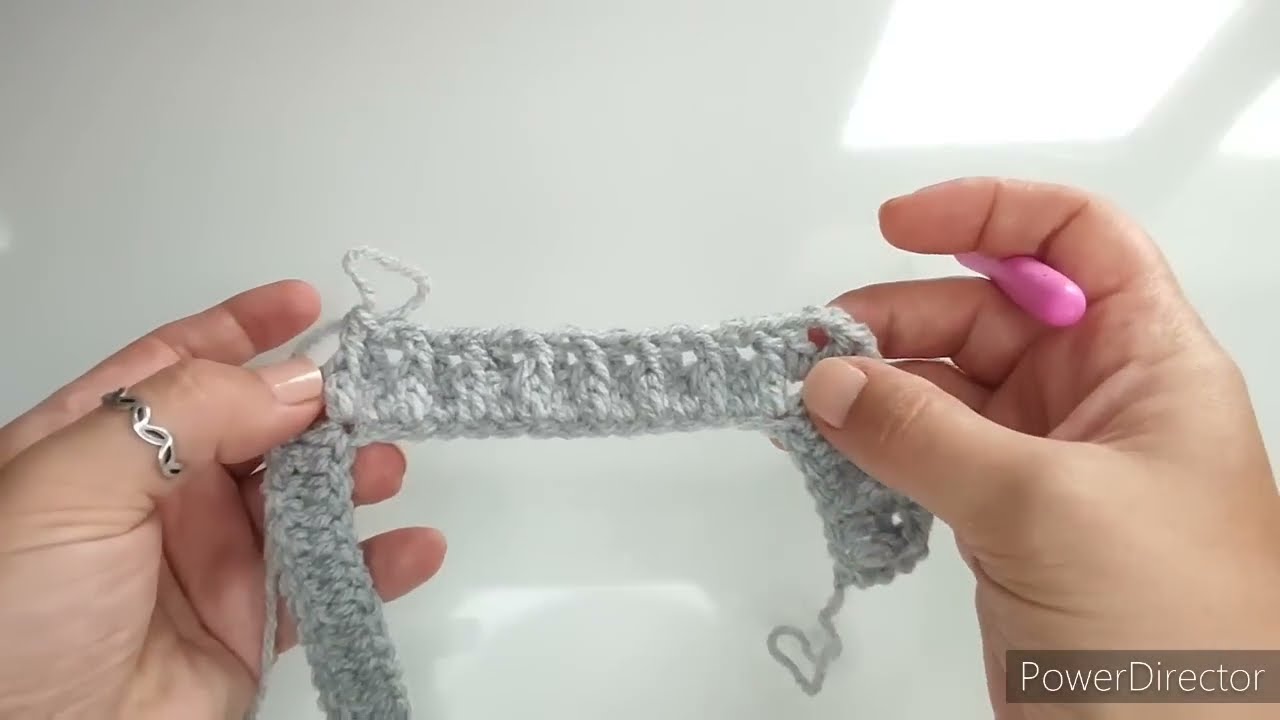
Row 2 (Establish Raglan Lines):
Ch 2 (counts as dc), dc in next 5 sts, dc, ch 1, dc in next st (raglan increase), dc in next 6 sts, dc, ch 1, dc in next st, dc in next 10 sts, dc, ch 1, dc in next st, dc in next 6 sts, dc, ch 1, dc in next st, dc in last 6 sts. (You now have 4 raglan ch-1 spaces.)
Row 3–10:
Ch 2, dc in each st and (dc, ch 1, dc) in each ch-1 space from the previous row. This expands your yoke. End after Row 10 or until it comfortably fits shoulder width (~9.5″ across).
Step 2: Separate Sleeves
Row 11:
-
Work to the first ch-1 space, then skip stitches between the first and second raglan increases (sleeve), ch 4, and continue dc across body only.
-
Repeat on the opposite side to separate second sleeve.
Now you’re working the body only.
Step 3: Body of the Hoodie
Rows 12–22 (or until desired length):
Ch 2, dc in each st across. Turn.
For a longer body, continue to Row 24 or more.
Optional: Add a ribbed bottom using single crochet back loop only (sc blo) rows.
Step 4: Sleeves (Work in rounds)
Attach yarn to underarm area.
Round 1:
Ch 2, dc evenly around the armhole opening (usually 24–30 sts). Join.
Rounds 2–10:
Dc around. Optional: Decrease 2 sts every few rounds for tapered sleeves.
Round 11:
Finish with 2 rounds of sc or sc blo for a cuffed look.
Repeat on the second sleeve.
6. Adding the Hood
Attach yarn to the back neckline.
Row 1:
Ch 2, dc evenly along the neckline (approximately 40–45 sts). Turn.
Rows 2–14:
Continue dc rows, turning at each end. Increase 1 stitch on both ends every 2 rows to widen slightly.
After Row 14 (or desired height), fold the top in half and sl st or sc across to close the top of the hood.
Optional: Add a drawstring edge by working a row of sc around the hood opening and weaving in a chain string.
7. Optional Additions
Buttons:
-
Add buttonholes to the front edge by chaining and skipping stitches.
-
Sew on wooden or plastic buttons (ensure they’re baby-safe).
Zipper:
-
Hand-sew or machine-stitch a short zipper to the front opening.
Animal Ears:
To add bear, cat, or bunny ears:
Make 2:
-
Magic ring, 6 sc.
-
Increase to 12, then 18 sts.
-
Fold and sew to hood top corners.
Pockets:
Create 2 small square patches using sc or hdc and sew to front of the hoodie.
8. Finishing Touches & Care Instructions
-
Weave in all yarn tails securely.
-
Block your finished hoodie using steam or gentle pinning (especially if using cotton yarn).
-
Add your label or tag if gifting!
Washing:
-
Machine wash cold or hand wash.
-
Lay flat to dry.
9. Tips for Customization
-
Color Blocking: Use different colors for sleeves, hood, or body.
-
Striped Yarn: Self-striping yarn adds interest with no color changes.
-
Textures: Try alternating rows of hdc and dc for a unique fabric.
-
Themed Embellishments: Add appliqués like stars, hearts, or animals.
10. Conclusion
Crocheting a baby hoodie may seem like a big project, but with this step-by-step guide, it’s entirely achievable—even for a confident beginner. The top-down raglan design makes it simple, seamless, and highly customizable. Plus, it’s an incredibly thoughtful, cozy gift that showcases your care and creativity.
Once you’ve mastered this basic version, you can venture into more complex textures, novelty yarns, or fun character hoods (think bunny ears, dinosaur spikes, or even unicorn horns!).
Video tutorial: