by
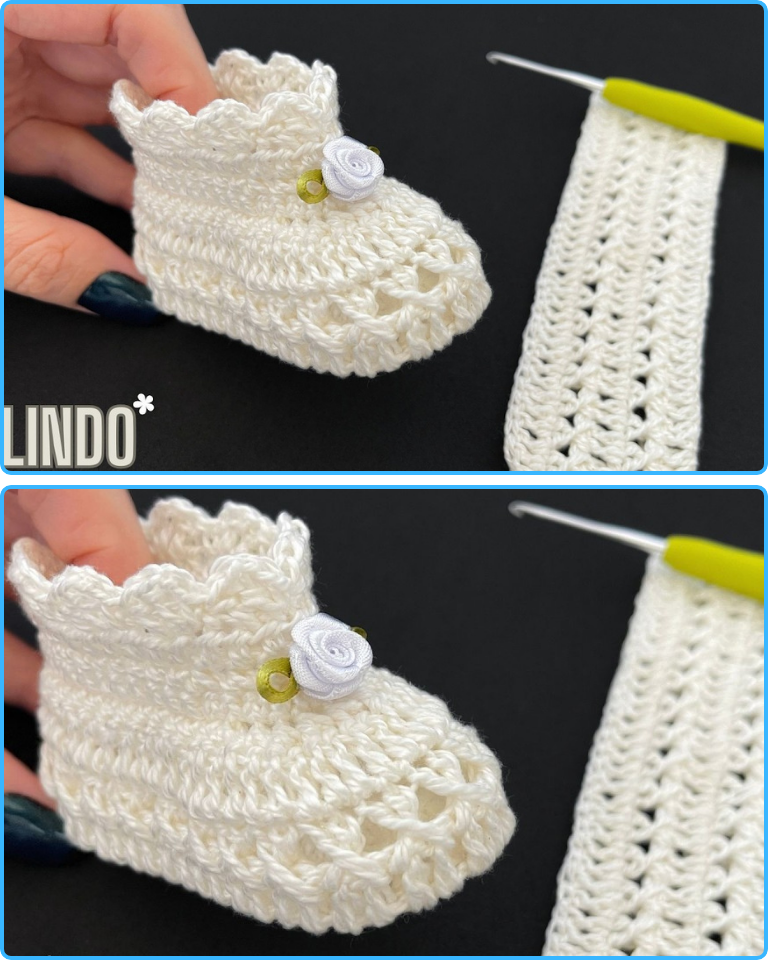
by Hello, fellow makers! Are you looking for a sweet, simple, and wonderfully cozy project to create for a baby in your life? I’m excited to share this detailed pattern for the Cross-Stitch Baby Booties, a quick and easy crochet shoe that’s perfect for keeping tiny toes warm. This pattern is designed for beginners and uses only a few basic stitches, making it a fantastic project for a baby shower gift, a first birthday present, or just to practice your skills.
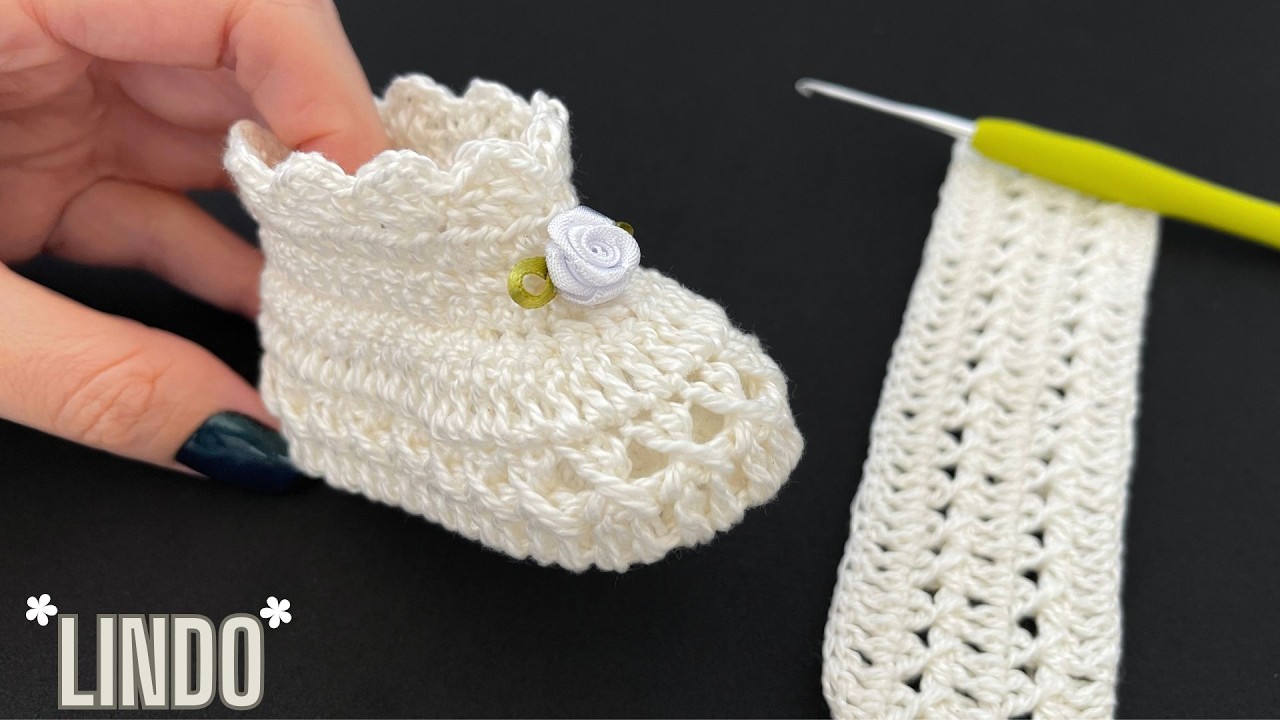
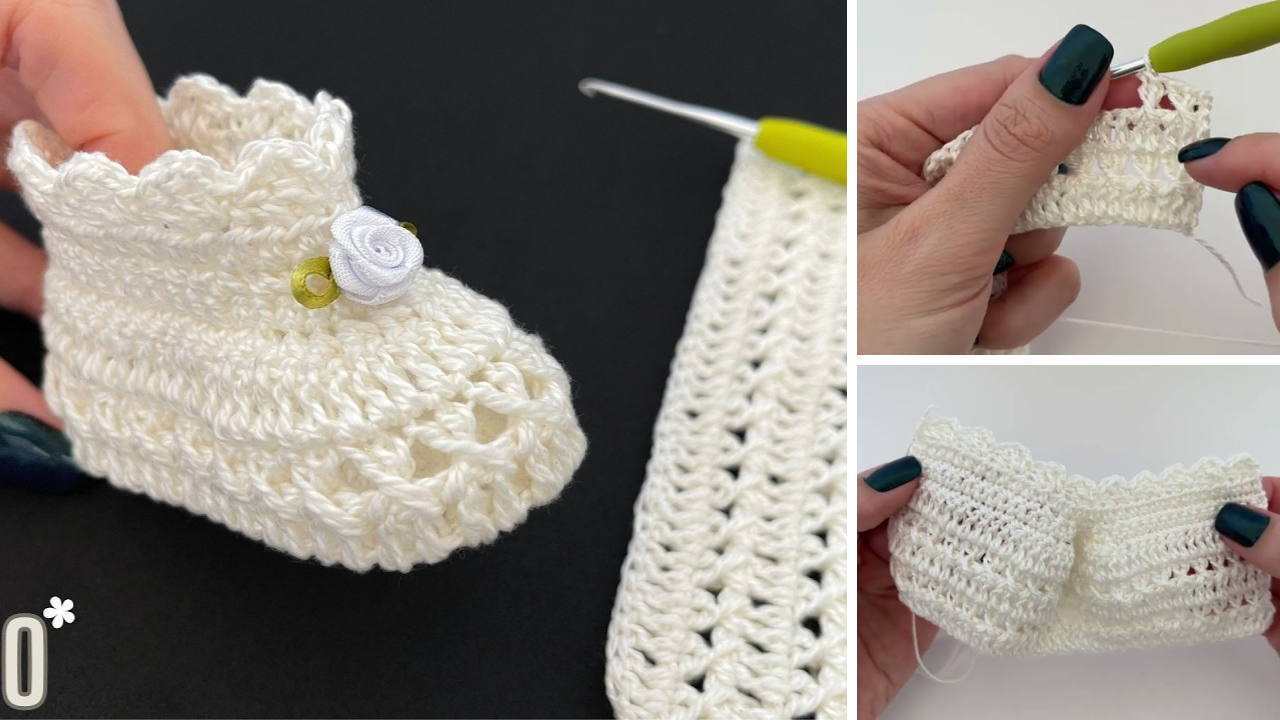
The design is unique because it’s worked as a flat piece and then seamed at the end, which creates a classic bootie shape. The main stitch, a clever crossed double crochet, gives the fabric a beautiful texture that looks intricate but is surprisingly simple to master. We’ll start with a simple chain, work a few rows, shape the toe with decreases, and then finish it all off with a decorative top edge. Let’s grab our hooks and yarn and get ready to create some cozy booties!
Why You’ll Love Crocheting These Booties:
- Quick to Make: The simple construction means you can whip up a pair in an afternoon.
- Unique Texture: The crossed double crochet stitch gives the booties a beautiful, professional look.
- Beginner-Friendly: The pattern uses only basic stitches and a few simple decreases.
- Customizable: Easily change colors, yarn, and add decorations like a flower or ribbon to personalize each pair.
What You’ll Need:
- Yarn: Any light worsted / DK (Category 3) yarn.
- Crochet Hook: A size appropriate for your yarn.
- Yarn Needle (Tapestry Needle): For weaving in ends and seaming the shoe.
- Scissors:
- Ribbon or Decorative Flower (optional): To create a tie for the top of the bootie.
Essential Crochet Abbreviations:
- ch: chain
- sl st: slip stitch
- sc: single crochet
- dc: double crochet
- hdc: half-double crochet
- st(s): stitch(es)
- dec: decrease (working two stitches together)
- Crossed dc: A special stitch where you skip a stitch, make a dc in the next, then go back and dc in the skipped stitch.
- FO: fasten off
The Pattern: The Cross-Stitch Baby Booties (0-3 months)
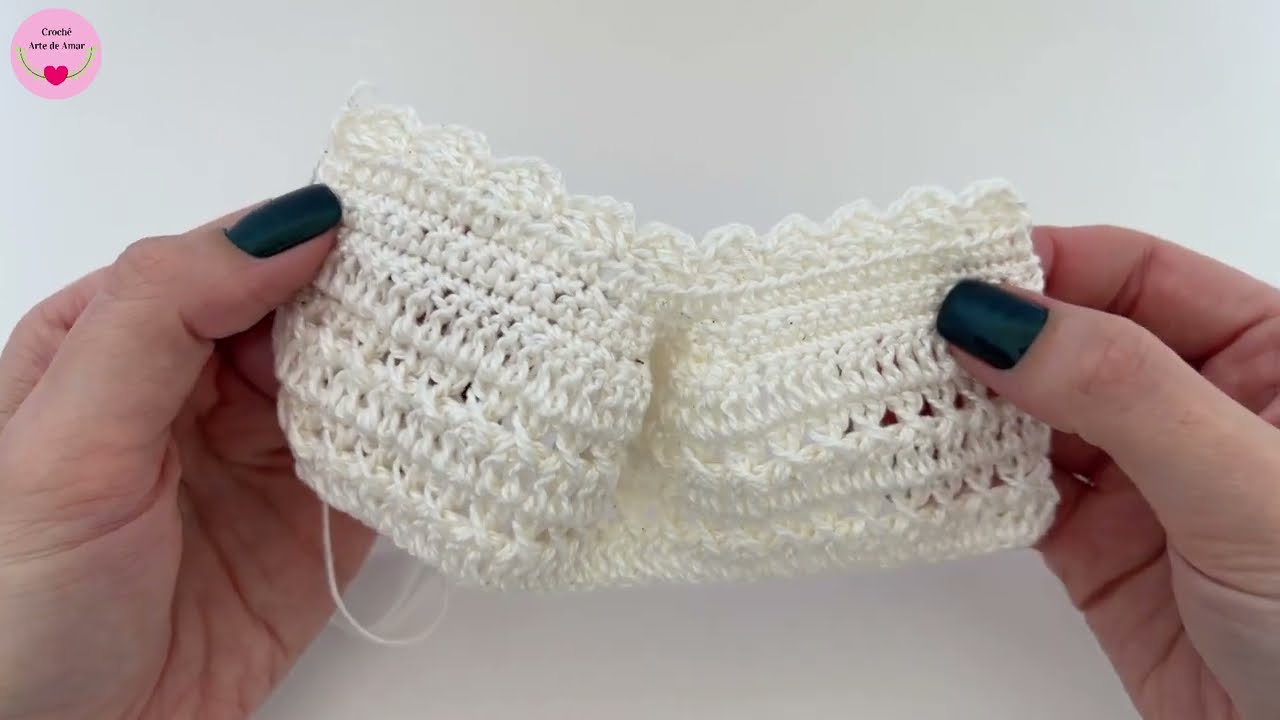
This pattern is worked as a flat piece and then seamed to create the bootie.
Part 1: The Body
- Starting Chain:
Ch 48. (This is for a 9cm foot length. Adjust as needed for different sizes by multiplying the foot length by two). - Row 1:
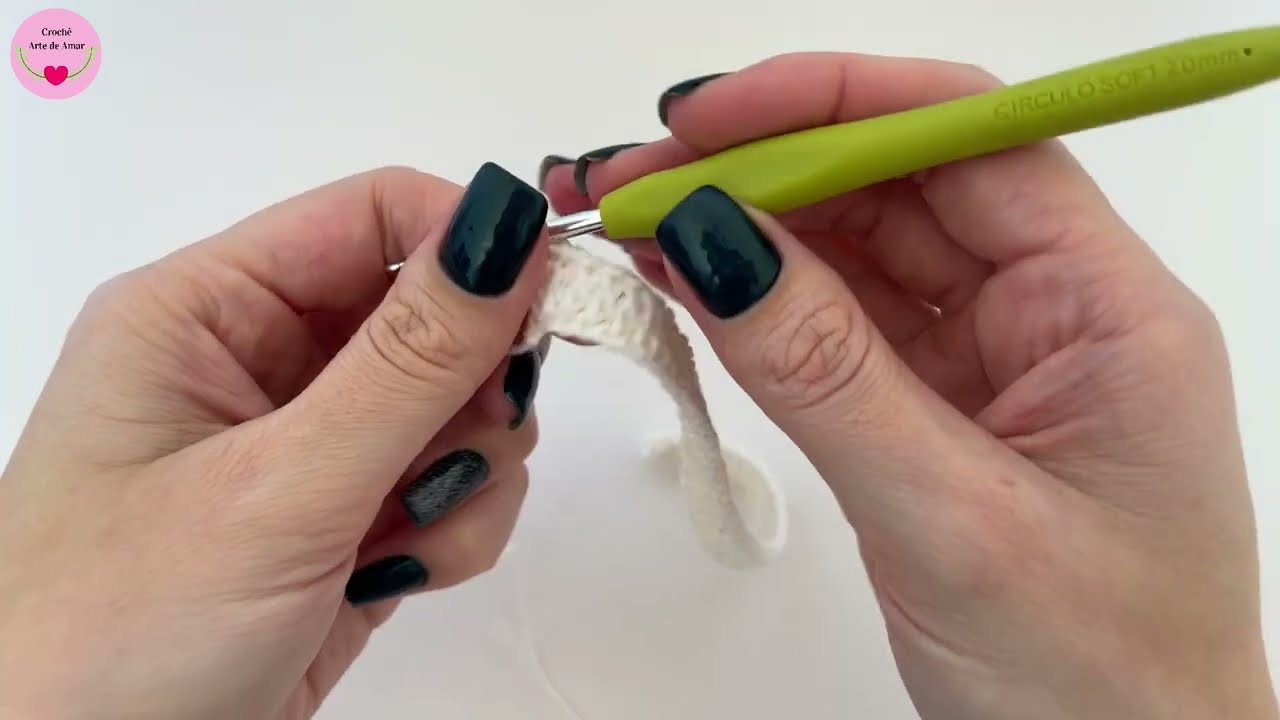
Dcin the 4thchfrom the hook.Dcin eachchacross. - Row 2 (Crossed dc):
Ch 2, turn. Sk the nextst,dcin the nextst, then go back anddcin the skippedst. Repeat this pattern across the row. End the row with a regulardcin the lastst. - Row 3:
Ch 2, turn.Dcin eachstacross. - Repeat Rows 2 and 3 until the piece measures approximately 5 cm in height.
Part 2: Shaping the Shoe
- First Reduction Row:
Ch 1, turn.Scin each of the first 15 sts. Make 8 decreases (sc dec) in the middle section.Scin each of the last 15 sts. - Second Reduction Row:
Ch 1, turn.Scin eachstacross. - Third Reduction Row:
Ch 1, turn.Scin each of the first 13 sts. Make 6 decreases (sc dec) in the middle section.Scin each of the last 13 sts.
Part 3: The Top Edge
- Row 1:
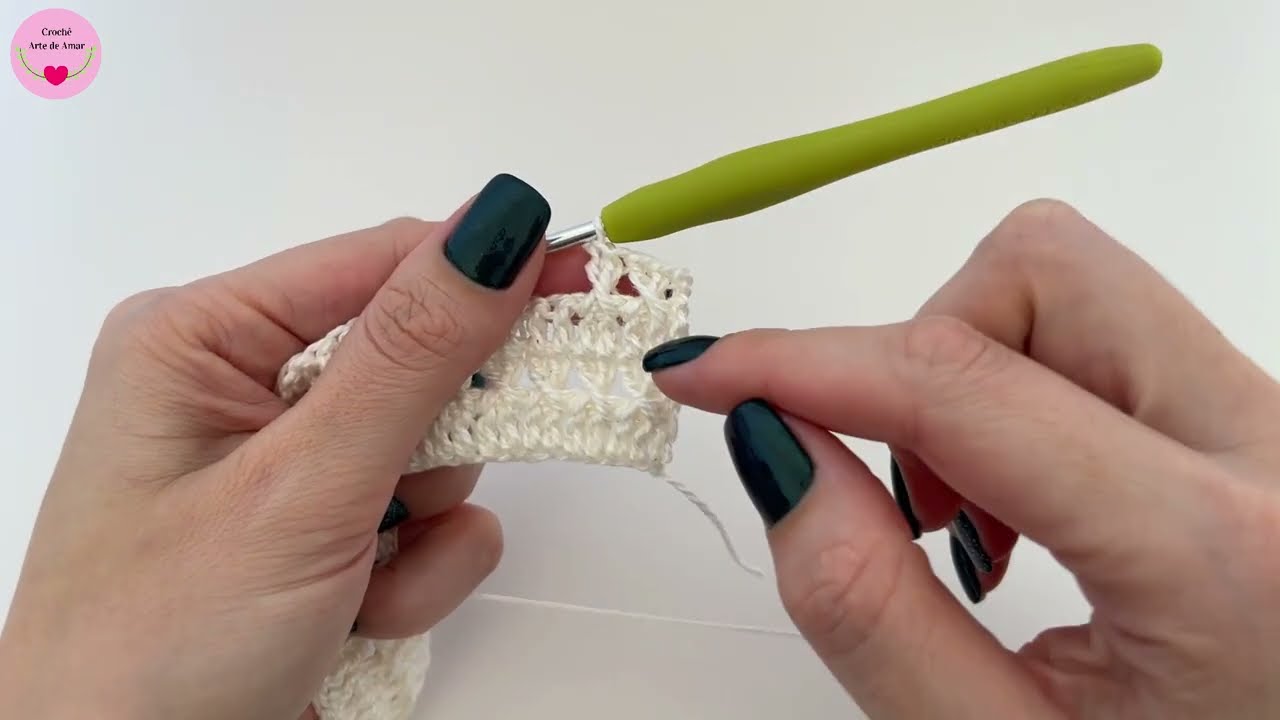
Ch 2, turn.Hdcin eachstacross. - Row 2 (Decorative Edge):
Ch 3, turn.2 dcin the firstst. Sk 1st,scin the nextst.- Repeat this pattern across the row:
Ch 2,2 dcin the samestwhere you just made asc. Sk 1st,scin the nextst.
Part 4: Assembly
- FO, leaving a long tail for sewing.
- Fold the piece in half with the wrong side facing out.
- Use your yarn needle and the long tail to sew the edges together, starting from the heel and working towards the toe.
- To create the heel, pull the thread tight about 1 cm from the end of the seam to gather and round the corner.
- Continue sewing until about 2 cm from the end of the seam, then create a zigzag stitch to gather and close the end of the toe.
- Secure the yarn and weave in the end.
- Turn the bootie right side out.
- Decorate: Weave a ribbon through the stitches at the top or sew on a crochet flower to help the shoe stay on the baby’s foot.
Congratulations, you’ve created a beautiful and unique pair of Cross-Stitch Baby Booties! Happy hooking!
Video tutorial: