by
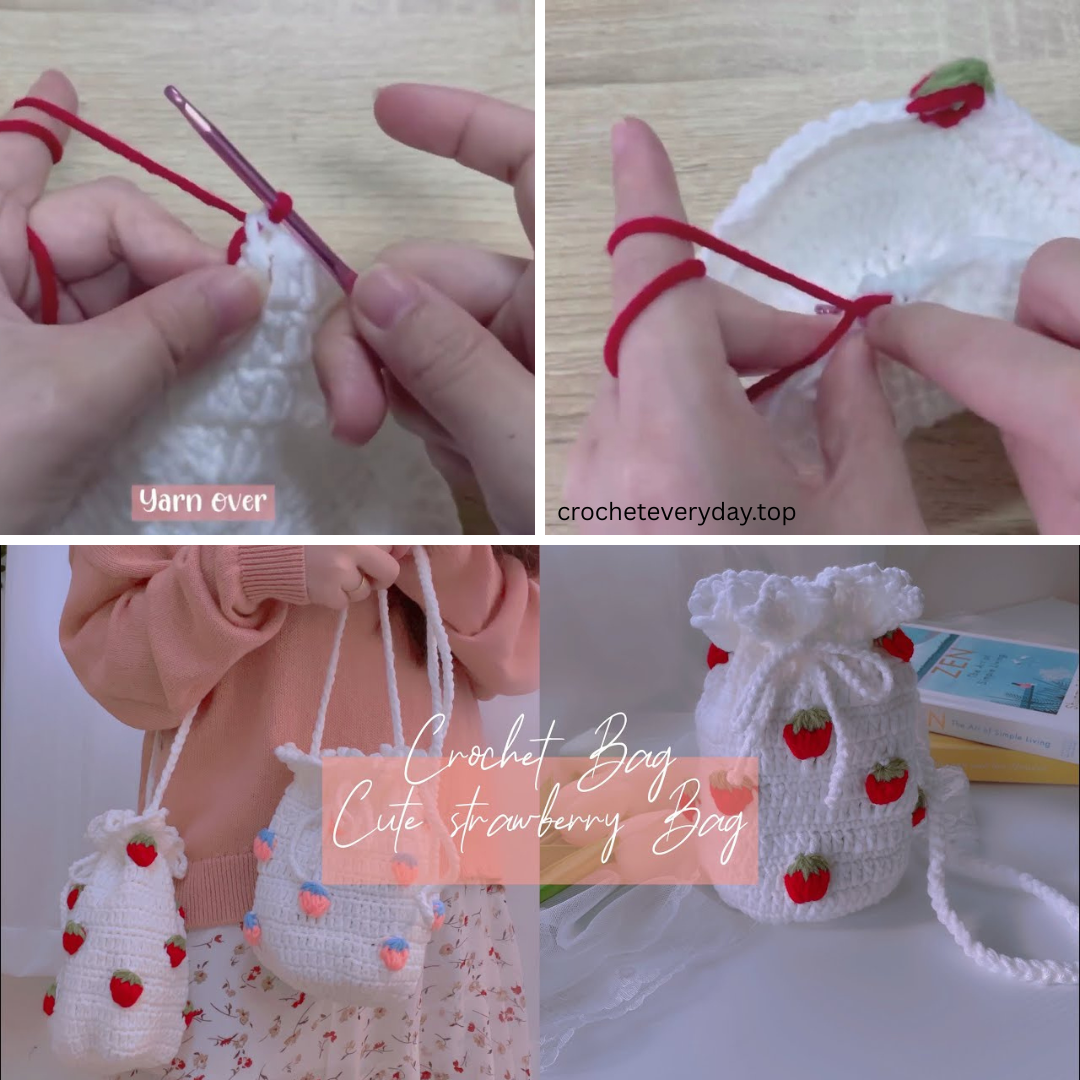
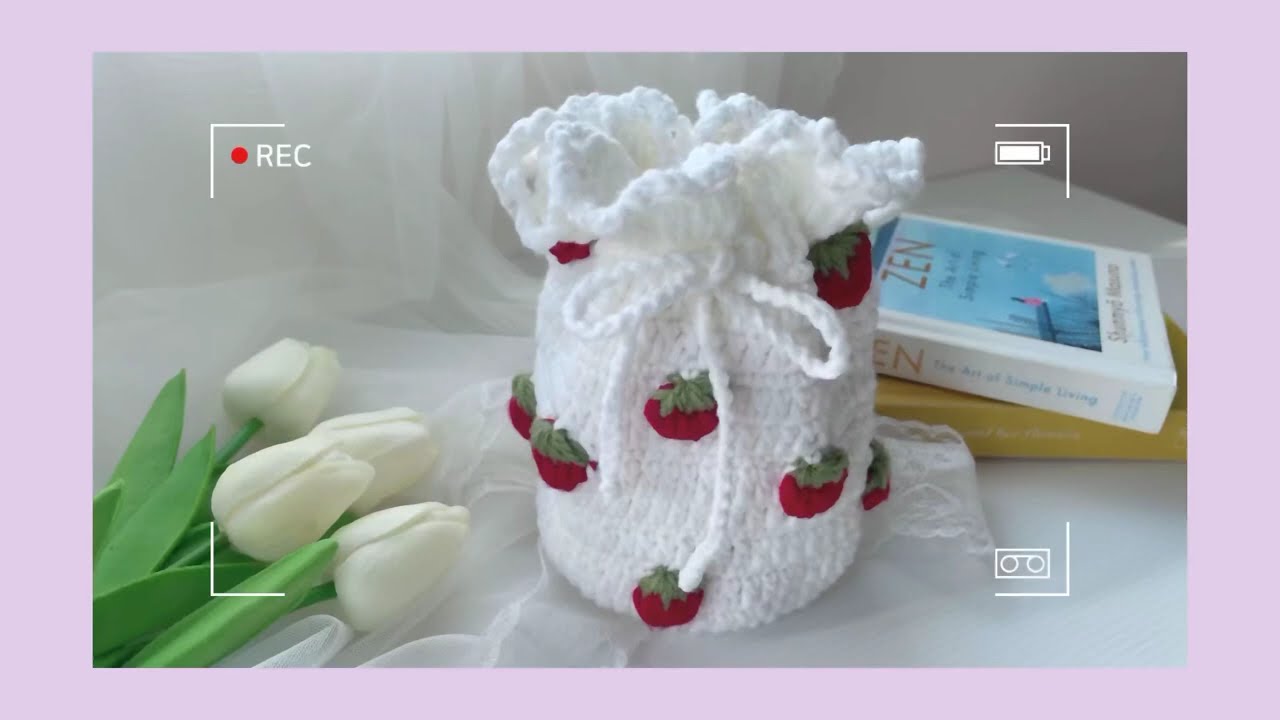
by If you’re craving a fun, functional, and fabulously fruity project, why not try crocheting your very own Cute Strawberry Pouch Bag? Whether you’re a beginner looking for a bite-sized challenge or a seasoned crocheter seeking a whimsical new idea, this pouch is the perfect way to add some berry-inspired charm to your collection.
This tutorial will walk you through everything you need to make a small strawberry-shaped pouch with a zippered top — ideal for holding coins, lip balm, earbuds, or other small treasures.
Materials You’ll Need
Before we dive into the stitches, gather these supplies:
Yarn:
-
Red or pink – for the strawberry body
-
Green – for the leafy top
-
White or yellow – for the seed details (optional)
Recommended yarn: Cotton or acrylic, worsted weight (category 4)
Tools:
-
Crochet hook: 3.5mm–4mm (E–G hook)
-
Tapestry needle – for sewing parts together and weaving in ends
-
Stitch marker – to mark your rounds
-
Scissors
-
Zipper (4–6 inches) – red or green works best
-
Fabric lining (optional) – for a neat interior finish
-
Hot glue or sewing needle & thread – for attaching the zipper
Abbreviations (US Terminology)
-
ch – chain
-
sc – single crochet
-
sl st – slip stitch
-
inc – increase (2 sc in one stitch)
-
dec – decrease (sc 2 stitches together)
-
st(s) – stitch(es)
-
rnd – round
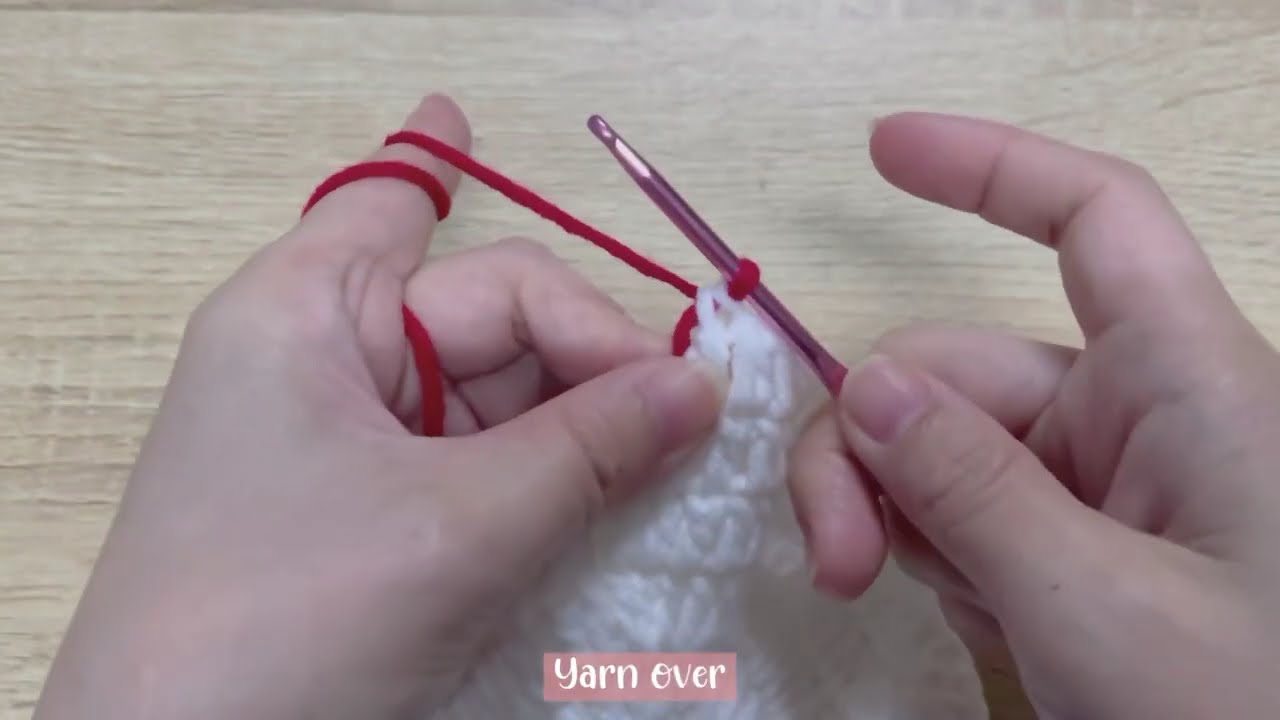
Part 1: Crocheting the Strawberry Body
We’ll crochet the body in the round, working from the base upward.
Strawberry Base (Red Yarn):
Rnd 1: Make a magic ring, 6 sc into the ring (6)
Rnd 2: inc in each st around (12)
Rnd 3: (sc 1, inc) x6 (18)
Rnd 4: (sc 2, inc) x6 (24)
Rnd 5: (sc 3, inc) x6 (30)
Rnd 6-15: sc in each st around (30)
Adjust length by adding or subtracting rounds depending on how tall you want the pouch.
Fasten off and weave in ends.

Part 2: Leafy Top (Green Yarn)
We’ll create a circular leafy “cap” that fits around the zipper opening.
Rnd 1: Magic ring, 6 sc into ring (6)
Rnd 2: inc in each st (12)
Rnd 3: (sc 1, inc) x6 (18)
Rnd 4: (sc 2, inc) x6 (24)
Now create leaf spikes:
[Leaf Pattern – repeat around the circle]:
-
ch 4
-
sl st into 2nd ch from hook, sc, hdc
-
sl st into next st on the base round
Repeat around until you have 6–8 leaves. Fasten off.
✨Optional: Embroider Strawberry Seeds
Using yellow or white yarn and a tapestry needle, embroider small “V” shapes randomly across the red pouch body to mimic strawberry seeds. Space them out evenly and securely weave in ends.
Part 3: Attach the Zipper
-
Open the zipper and pin it to the inside edge of the pouch’s top opening.
-
You can sew the zipper with a needle and thread or glue it with fabric/hot glue for a no-sew version.
-
Attach the green leafy cap to the top edge, covering where the zipper meets the pouch body. Sew or glue in place.
Pro Tip: Add a lining before attaching the zipper by cutting a small piece of fabric the same shape as your pouch. Sew it inside to give the pouch more structure and a professional finish.
Customize Your Strawberry Pouch
Once the base pattern is done, you can personalize it with:
-
A wrist strap or keyring
-
Safety eyes and a smile to turn it into a character pouch
-
Glitter or beads for a sparkly effect
-
Larger size to make a clutch bag or small purse
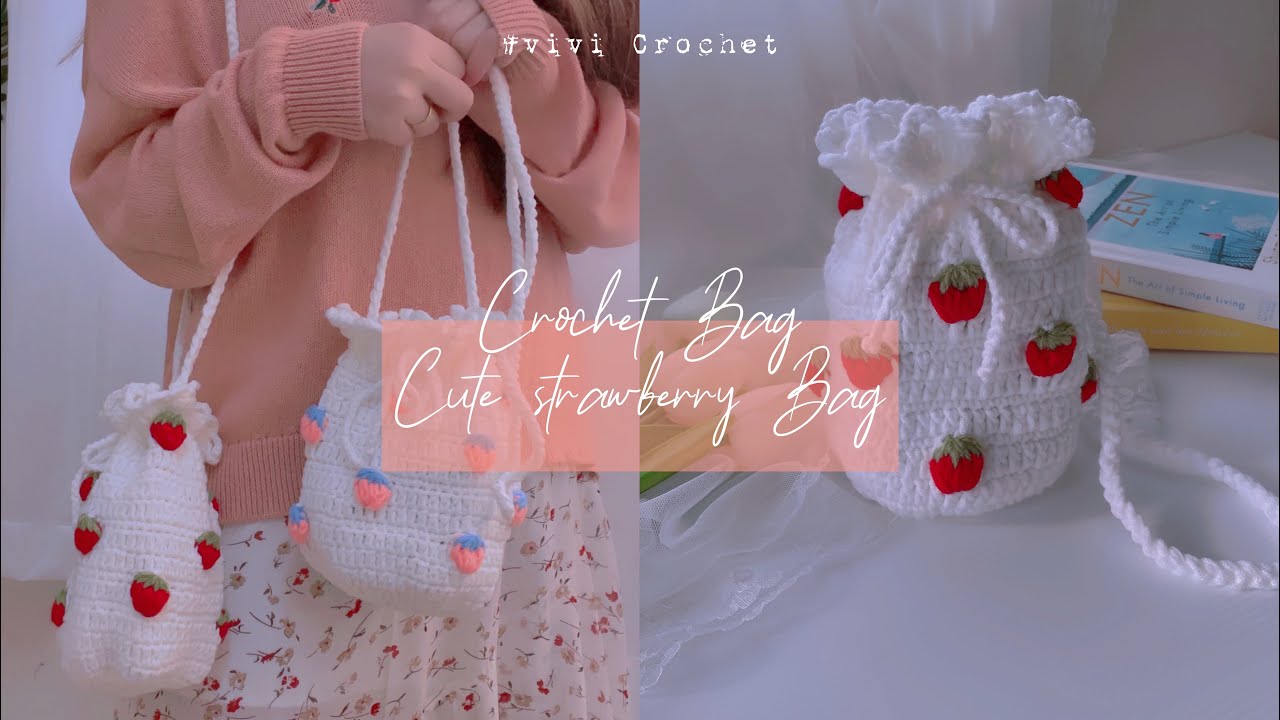
You’re Done!
Congratulations — you’ve just crocheted a Cute Strawberry Pouch Bag! It’s a sweet and satisfying project that’s both practical and adorable. This pouch makes a lovely handmade gift, craft fair item, or just a delightful addition to your own accessory stash.
Video Tutorial :