by
by Tote bags are a staple accessory—stylish, practical, and perfect for everyday use. Now imagine carrying a tote bag you made with your own two hands! If you’re new to crocheting or looking for a simple and satisfying project, this Super Easy Crochet Tote Bag tutorial is just for you.
This pattern is designed for absolute beginners but is also a relaxing and fast project for more experienced crocheters. Using basic stitches and minimal shaping, you’ll create a sturdy, reusable tote bag that’s both functional and fashionable.
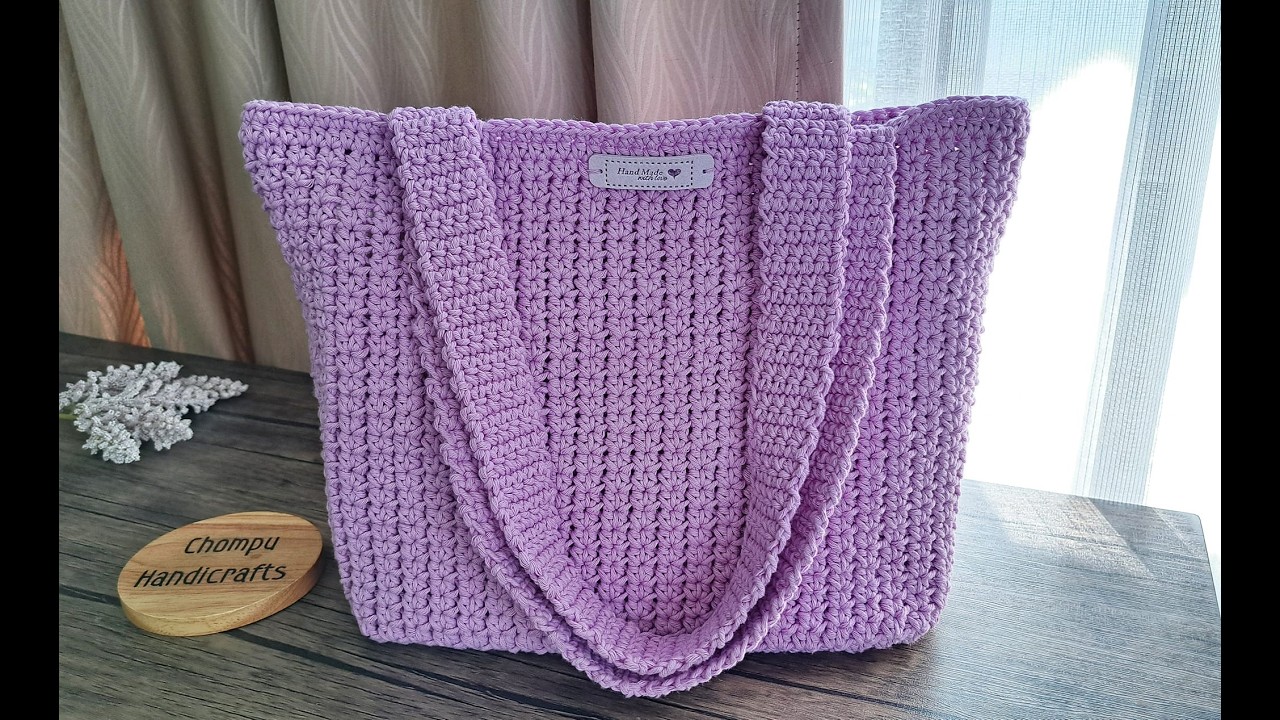
Table of Contents
-
Introduction
-
Why Crochet a Tote Bag?
-
Materials & Tools
-
Yarn & Color Recommendations
-
Crochet Stitches You Need to Know
-
Finished Bag Dimensions
-
Step-by-Step Instructions
-
Step 1: Crochet the Base Rectangle
-
Step 2: Build the Sides in the Round
-
Step 3: Create the Handles
-
Optional Step: Add a Pocket or Lining
-
-
Customization Tips
-
How to Style and Use Your Bag
-
Final Thoughts
☀️ 1. Introduction
A tote bag is one of the easiest and most versatile crochet projects you can take on. It’s perfect for grocery shopping, carrying books, storing yarn, or accessorizing your outfit. This pattern uses just single crochet (sc) and half double crochet (hdc)—two of the easiest stitches—and no complex shaping, making it ideal for beginners.
2. Why Crochet a Tote Bag?
-
Eco-friendly alternative to plastic bags
-
Great stash-busting project
-
Functional and giftable
-
Teaches you useful crochet skills (working in the round, increasing, adding handles)
Plus, it’s a fast project with a satisfying payoff—you’ll be carrying your own handmade tote in no time!
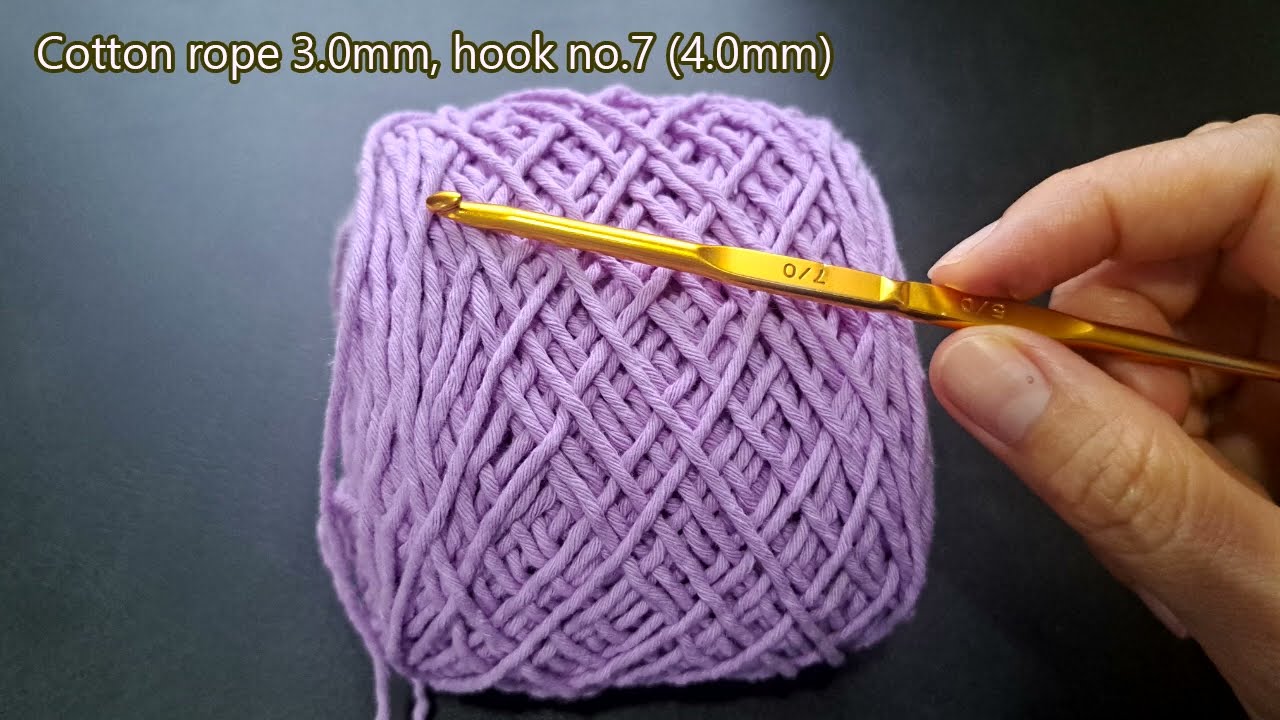
3. Materials & Tools
Here’s what you’ll need:
Yarn:
-
Worsted weight yarn (Category 4)
-
Approx. 400–500 yards depending on the size of the bag
-
Choose sturdy cotton yarn for durability
Tools:
-
Crochet hook: 5.0 mm (H-8) or size recommended on yarn label
-
Scissors
-
Tapestry needle (for weaving in ends)
-
Measuring tape
Optional:
-
Fabric lining (if you want a polished, finished interior)
-
Stitch markers (helpful for keeping track of rounds)
4. Yarn & Color Recommendations
Best Yarn Types:
-
100% cotton yarn (e.g., Lily Sugar’n Cream or Lion Brand 24/7 Cotton)
-
Cotton blends or recycled yarns for eco-conscious projects
Color Ideas:
-
Solid: White, black, navy, olive
-
Stripes: Mix 2-3 colors in equal sections
-
Ombre or gradient yarns for a fun fade
-
Seasonal tones: Pastels for spring, rust tones for fall
✏️ 5. Crochet Stitches You Need to Know
Don’t worry if you’re new! Here are the only stitches you need:
-
Chain (ch)
-
Single Crochet (sc)
-
Half Double Crochet (hdc)
-
Slip Stitch (sl st)
If you can make a chain and a single crochet, you can make this bag.
6. Finished Bag Dimensions (Adjustable)
-
Width: 14 inches
-
Height: 13 inches
-
Straps: 20–24 inches each
You can adjust the width and height simply by adding or subtracting stitches and rows.
7. Step-by-Step Instructions
Let’s get started!
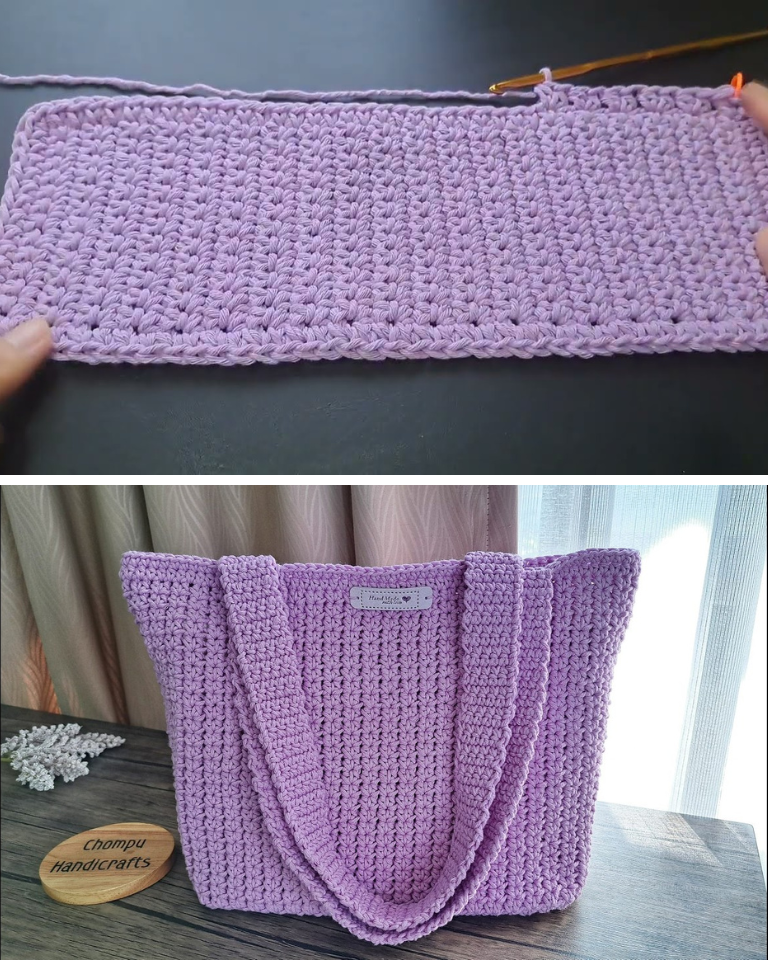
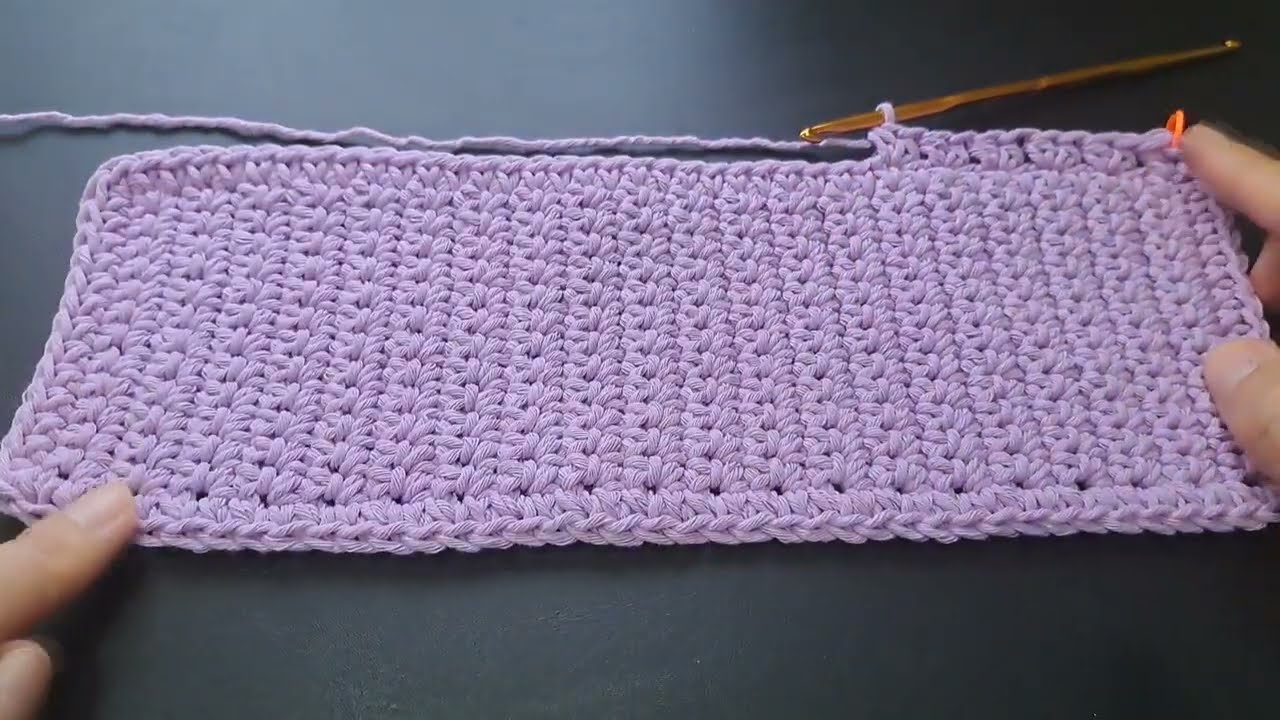
Step 1: Crochet the Base Rectangle
We start with a flat rectangle to form the bottom of the bag.
Pattern:
-
Ch 41 (or desired width).
-
Row 1: Sc in second ch from hook and across. (40 sc)
-
Row 2–10: Ch 1, turn, sc in each st across.
This makes a rectangular base ~14 inches wide and ~3 inches deep. You can adjust this to make the bag larger or smaller.
Step 2: Build the Sides in the Round
Now we’ll work around the rectangle to build the walls of the tote.
Pattern:
-
Ch 1, sc evenly around all four sides of the rectangle.
-
Place 2 sc in each corner to help it curve naturally.
-
Join with sl st to the first sc.
-
-
Start working in continuous rounds:
-
Rounds 1–30: Hdc in each stitch around (no increases).
-
Use a stitch marker to track the first stitch of each round.
-
Tip: You can vary the stitch type (all sc or alternating rows) to create texture.
Stop when the bag reaches your desired height (usually 13–15 inches tall).
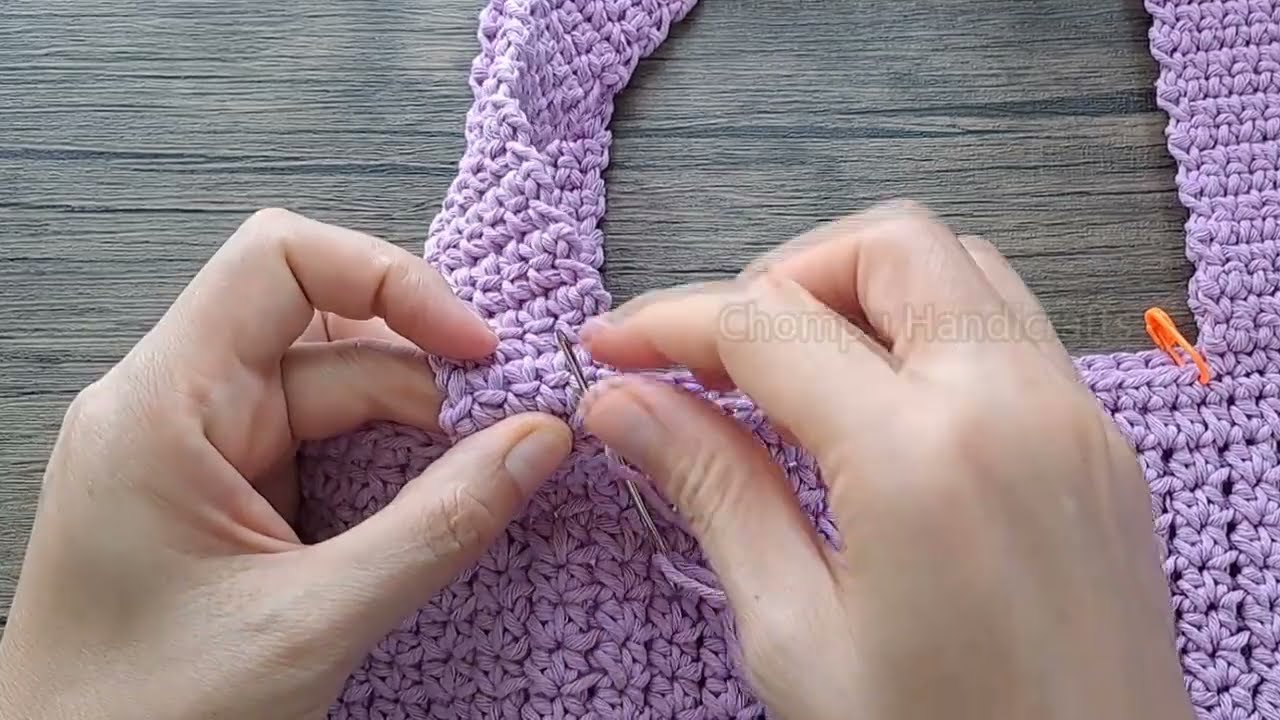
Step 3: Create the Handles
We’ll crochet two simple straps directly into the top edge of the bag.
Pattern:
-
Lay the bag flat. Count the total stitches around the top (e.g., 100).
-
Mark 10 stitches on each side where the handles should go, spaced evenly.
For each handle:
Repeat for the second handle. Ensure both are the same length and evenly spaced.
Optional Step: Add a Pocket or Lining
-
To add a pocket, crochet a small rectangle (e.g., 20×15 stitches) and sew it onto the inside or outside of the bag.
-
To add a fabric lining, cut a rectangle matching the bag’s dimensions, sew the sides, and stitch it to the inside top edge with a needle and thread.
8. Customization Tips
-
Add stripes: Change yarn colors every few rows.
-
Add texture: Use puff stitch or bobble stitch every 5th round.
-
Use variegated yarn: For a marbled or rainbow effect.
-
Create a drawstring closure: Weave a chain through holes at the top.
-
Add a button or magnetic snap for security.
9. How to Style and Use Your Bag
This Super Easy Crochet Tote Bag is as practical as it is beautiful. Use it for:
-
Shopping or groceries
-
Library books
-
Farmer’s markets
-
Beach trips
-
Everyday errands
-
Gifting (stuff with yarn, snacks, or books!)
Pair it with a casual outfit, denim jacket, and sandals for a relaxed, handmade look.
10. Final Thoughts
This Super Easy Crochet Tote Bag proves that simple can be beautiful. With just a few basic stitches and some patience, you’ll end up with a bag that’s:
-
Eco-friendly
-
Stylish
-
Handmade with love
-
Totally customizable
Whether it’s your first crochet project or your fiftieth, this bag is sure to become a favorite. So grab your yarn, put on your favorite music or podcast, and let’s get hooking!
Video tutorial: